Get Started
Commitment Orchestrator can be found in the Harness dashboard under Cloud Costs module. Commitment Orchestrator can be easily setup from the dashboard itself by following these steps:
From the dashboard, click on the Commitment Orchestrator option. Then click on "Manage Accounts" -> "+Add Orchestration".
- Step 1: Select Master Account
- Step 2: Configuration
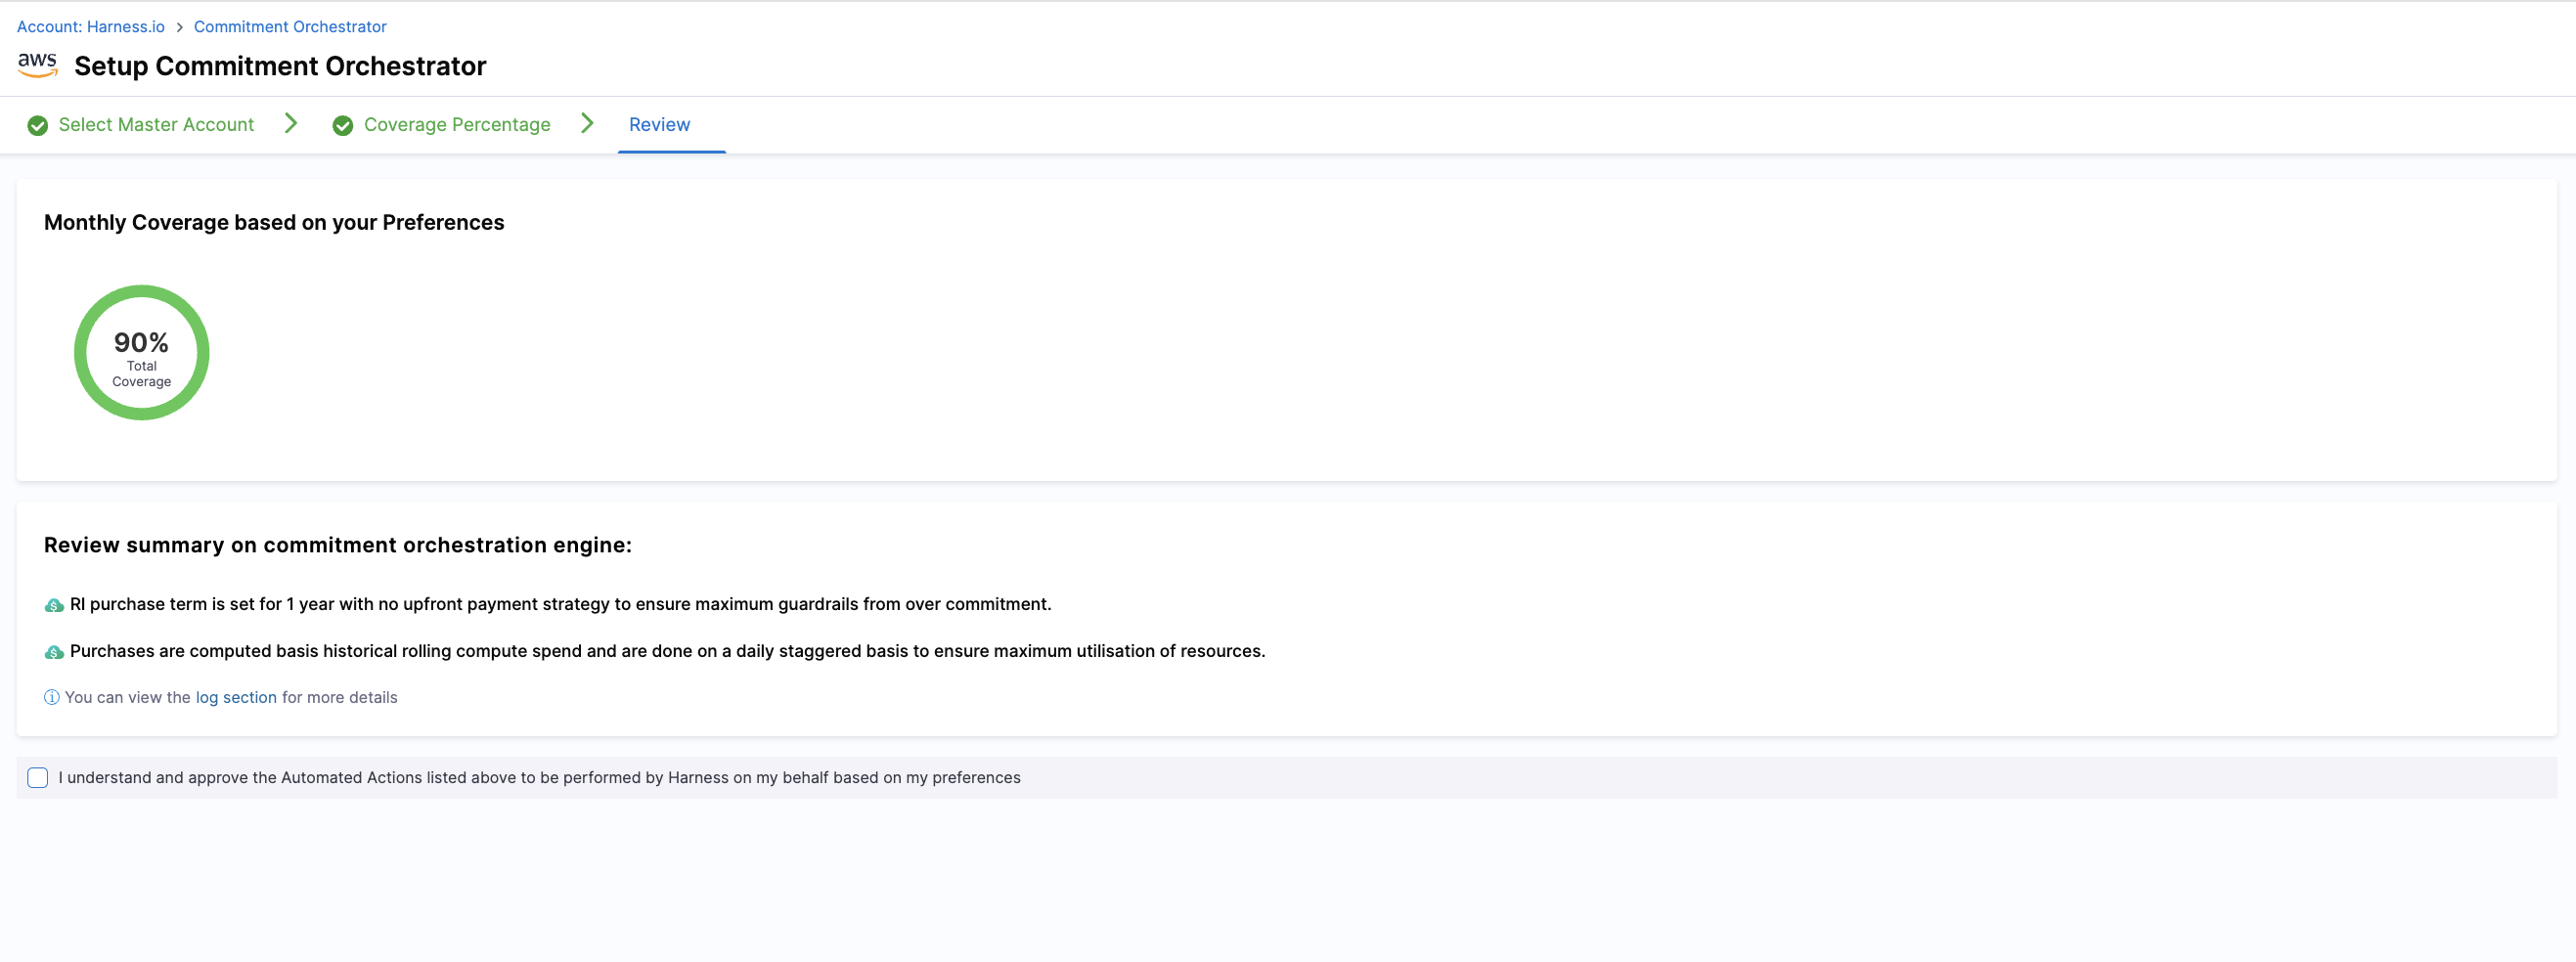
- Step 3: Review & Complete
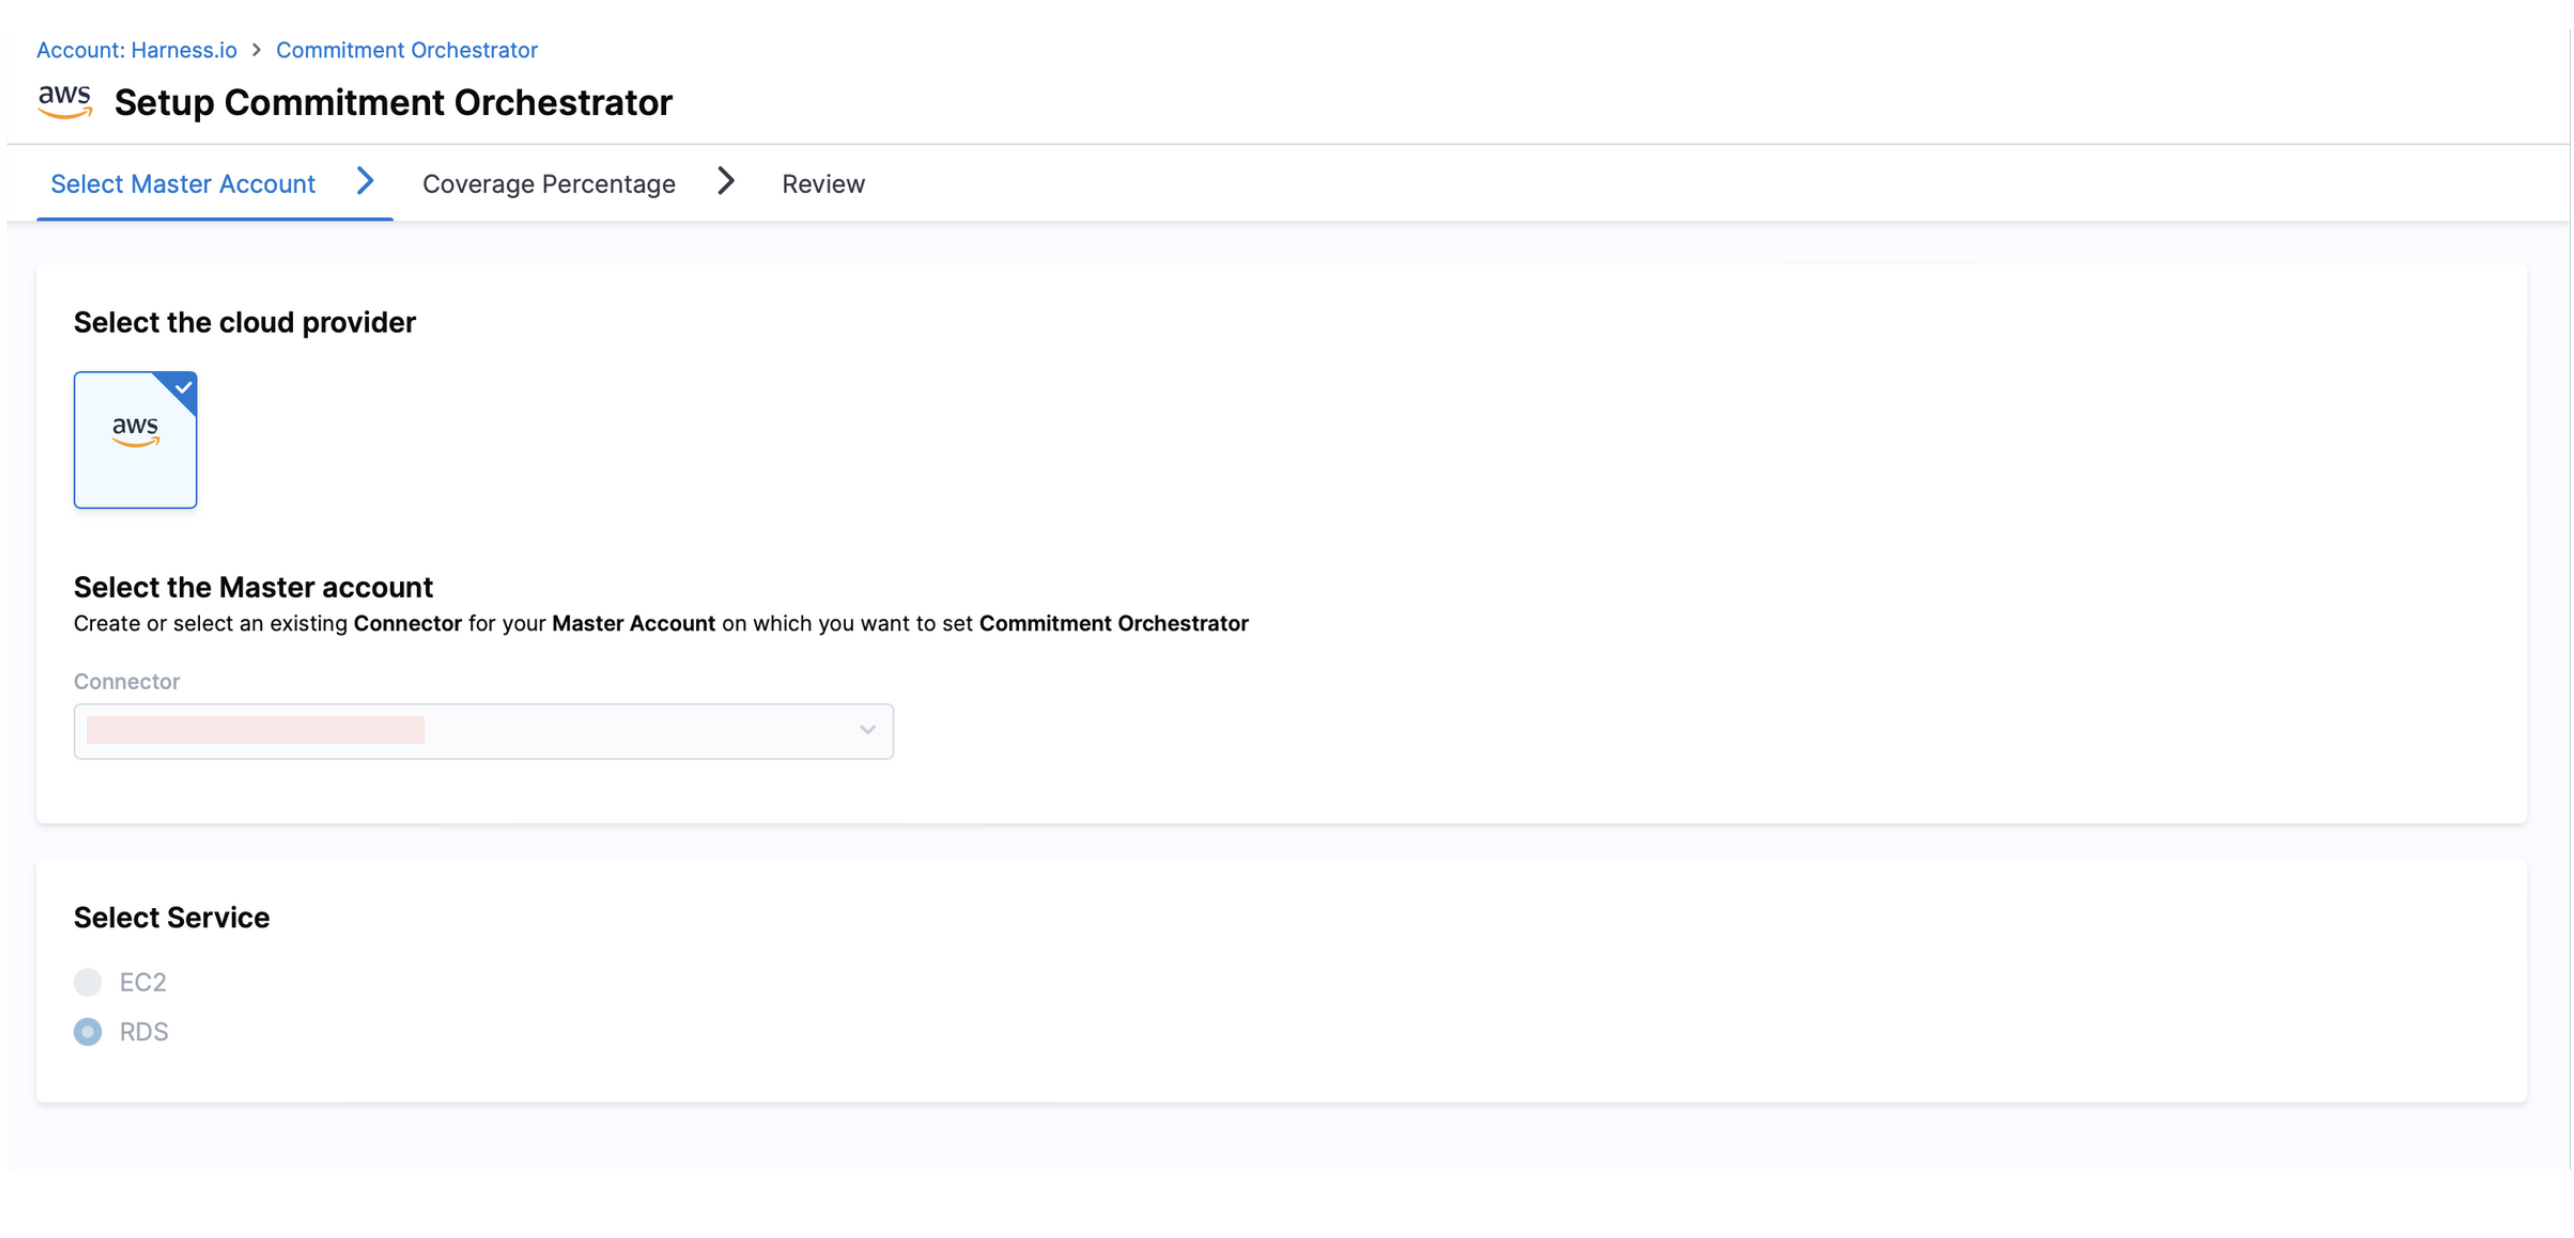
You need to select the master account with the right permissions to be added via connector on which you want to enable orchestration.
You can either select an existing connector for your master account or create one. Please note, even if "Commitment Orchestrator" is enabled in Connector Set Up for any other Account except for Master, it will not be visible in the connector list in Commitment Orchestrator Setup since Commitment Orchestrator requires Master Account connector.
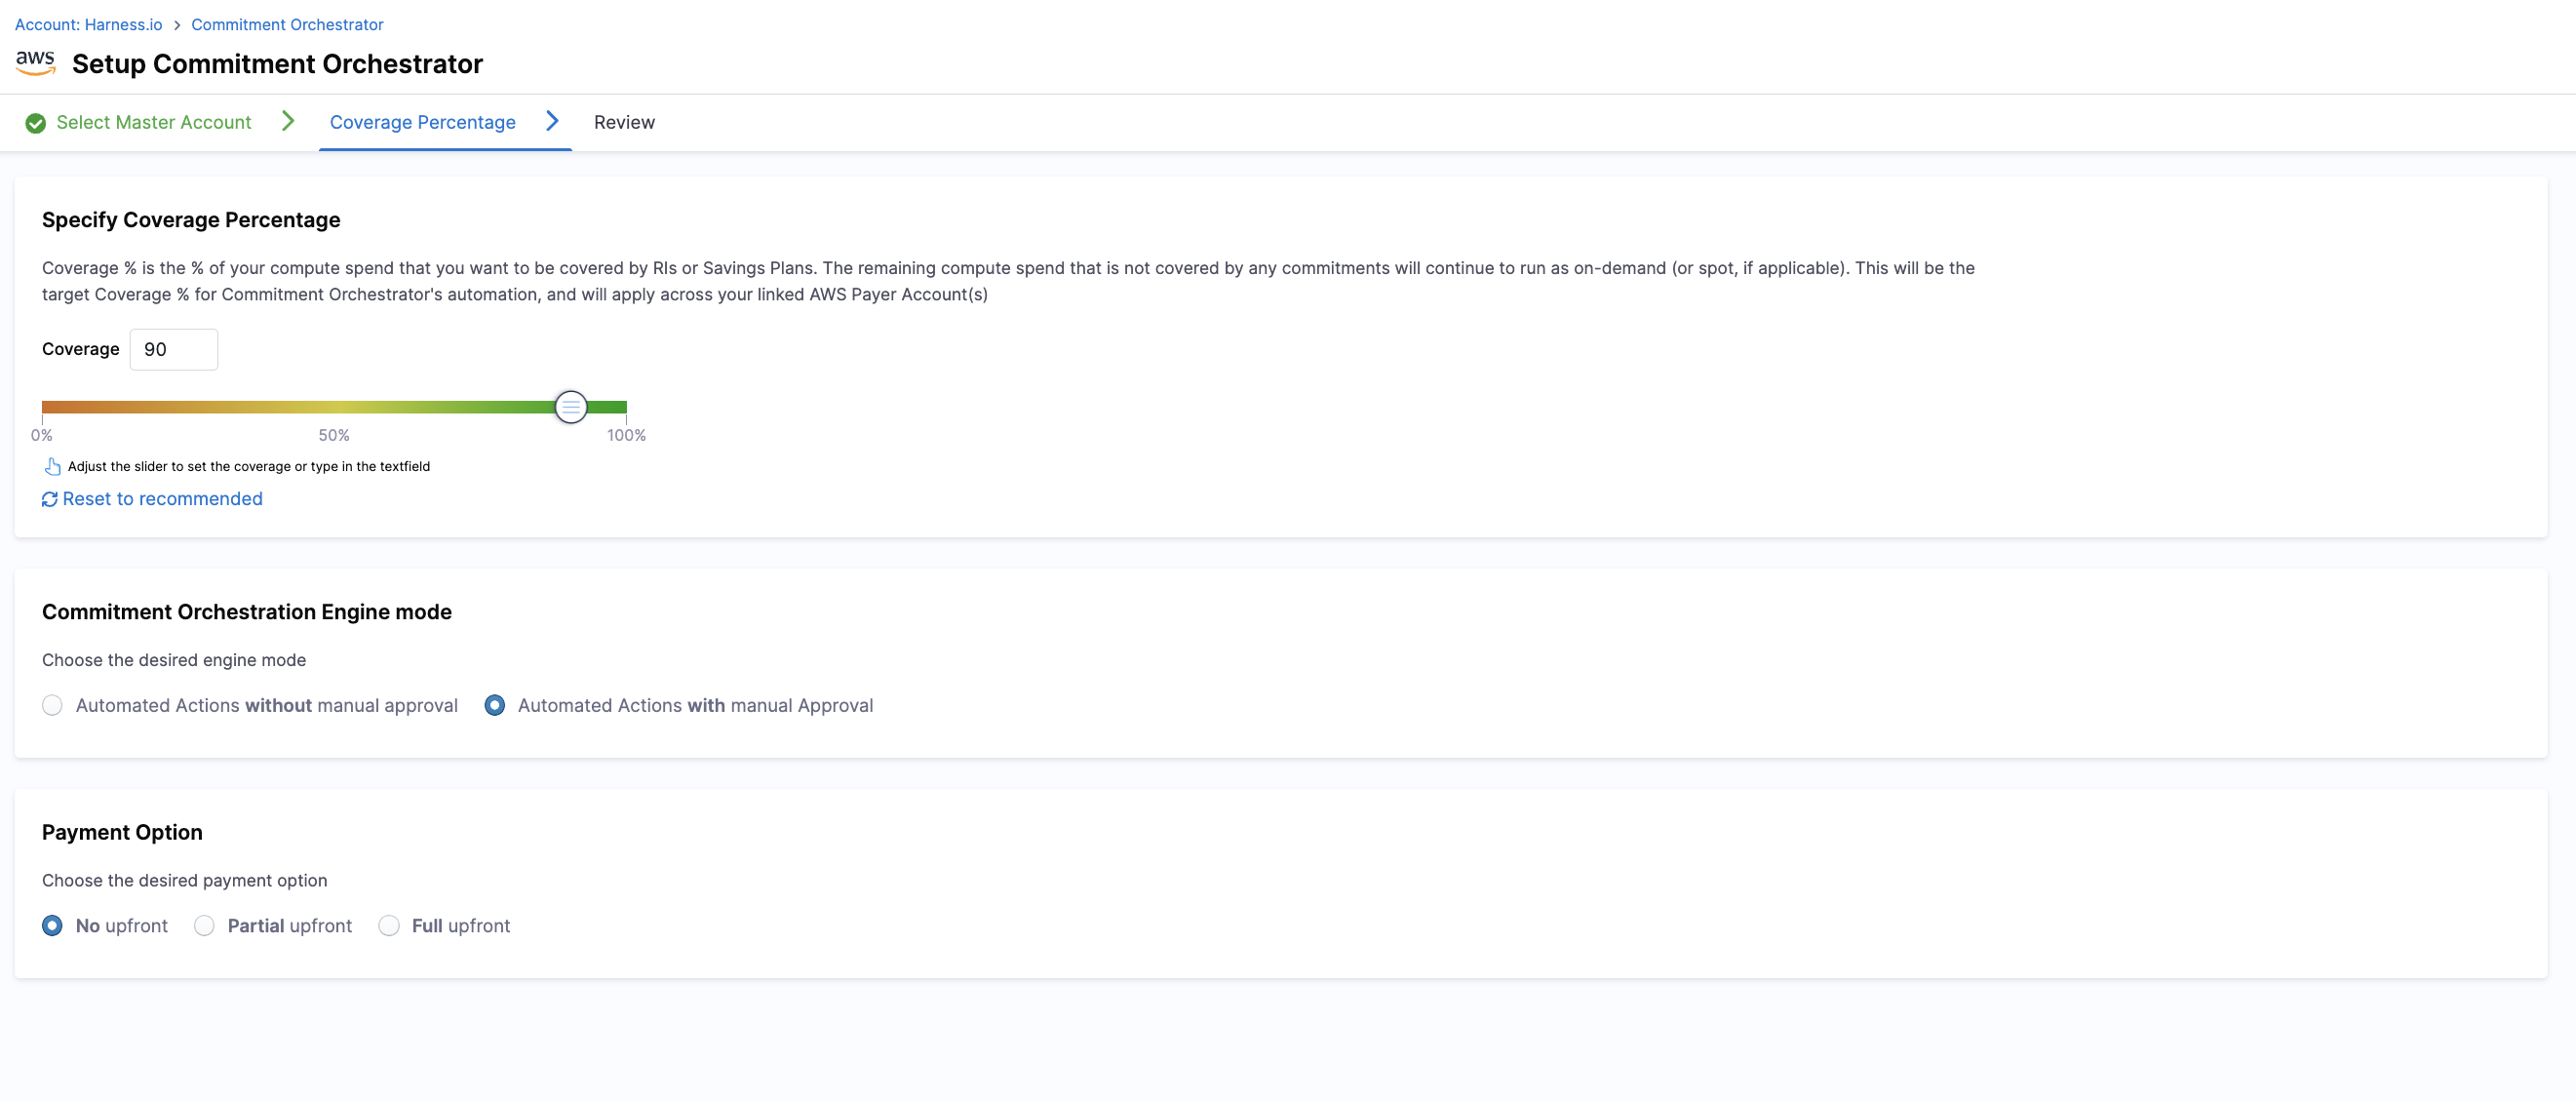
Coverage Percentage, Commitment Orchestration Engine Mode and Payment Option
Coverage Percentage: Coverage Percentage is the Percentage of your compute spend that you want to be covered by RIs or Savings Plans. The remaining compute spend that is not covered by any commitments will continue to run as on-demand (or spot, if applicable). This will be the target Coverage % for Commitment Orchestrator's automation, and will apply across your linked AWS Payer Account(s)
Commitment Orchestration Engine Mode: Select your preferred engine mode for commitment orchestration:
- Automated Actions without Manual Approval: System will automatically execute recommended commitment purchases without requiring approval.
- Automated Actions with Manual Approval: System will generate recommendations that require manual approval before execution.
Payment Option
Select your preferred payment structure for commitments:
- No Upfront: Pay the entire commitment amount in monthly installments.
- Partial Upfront: Pay a portion of the commitment upfront and the remainder in monthly installments.
- Full Upfront: Pay the entire commitment amount upfront for maximum discount.
Commitment Orchestrator Dashboard
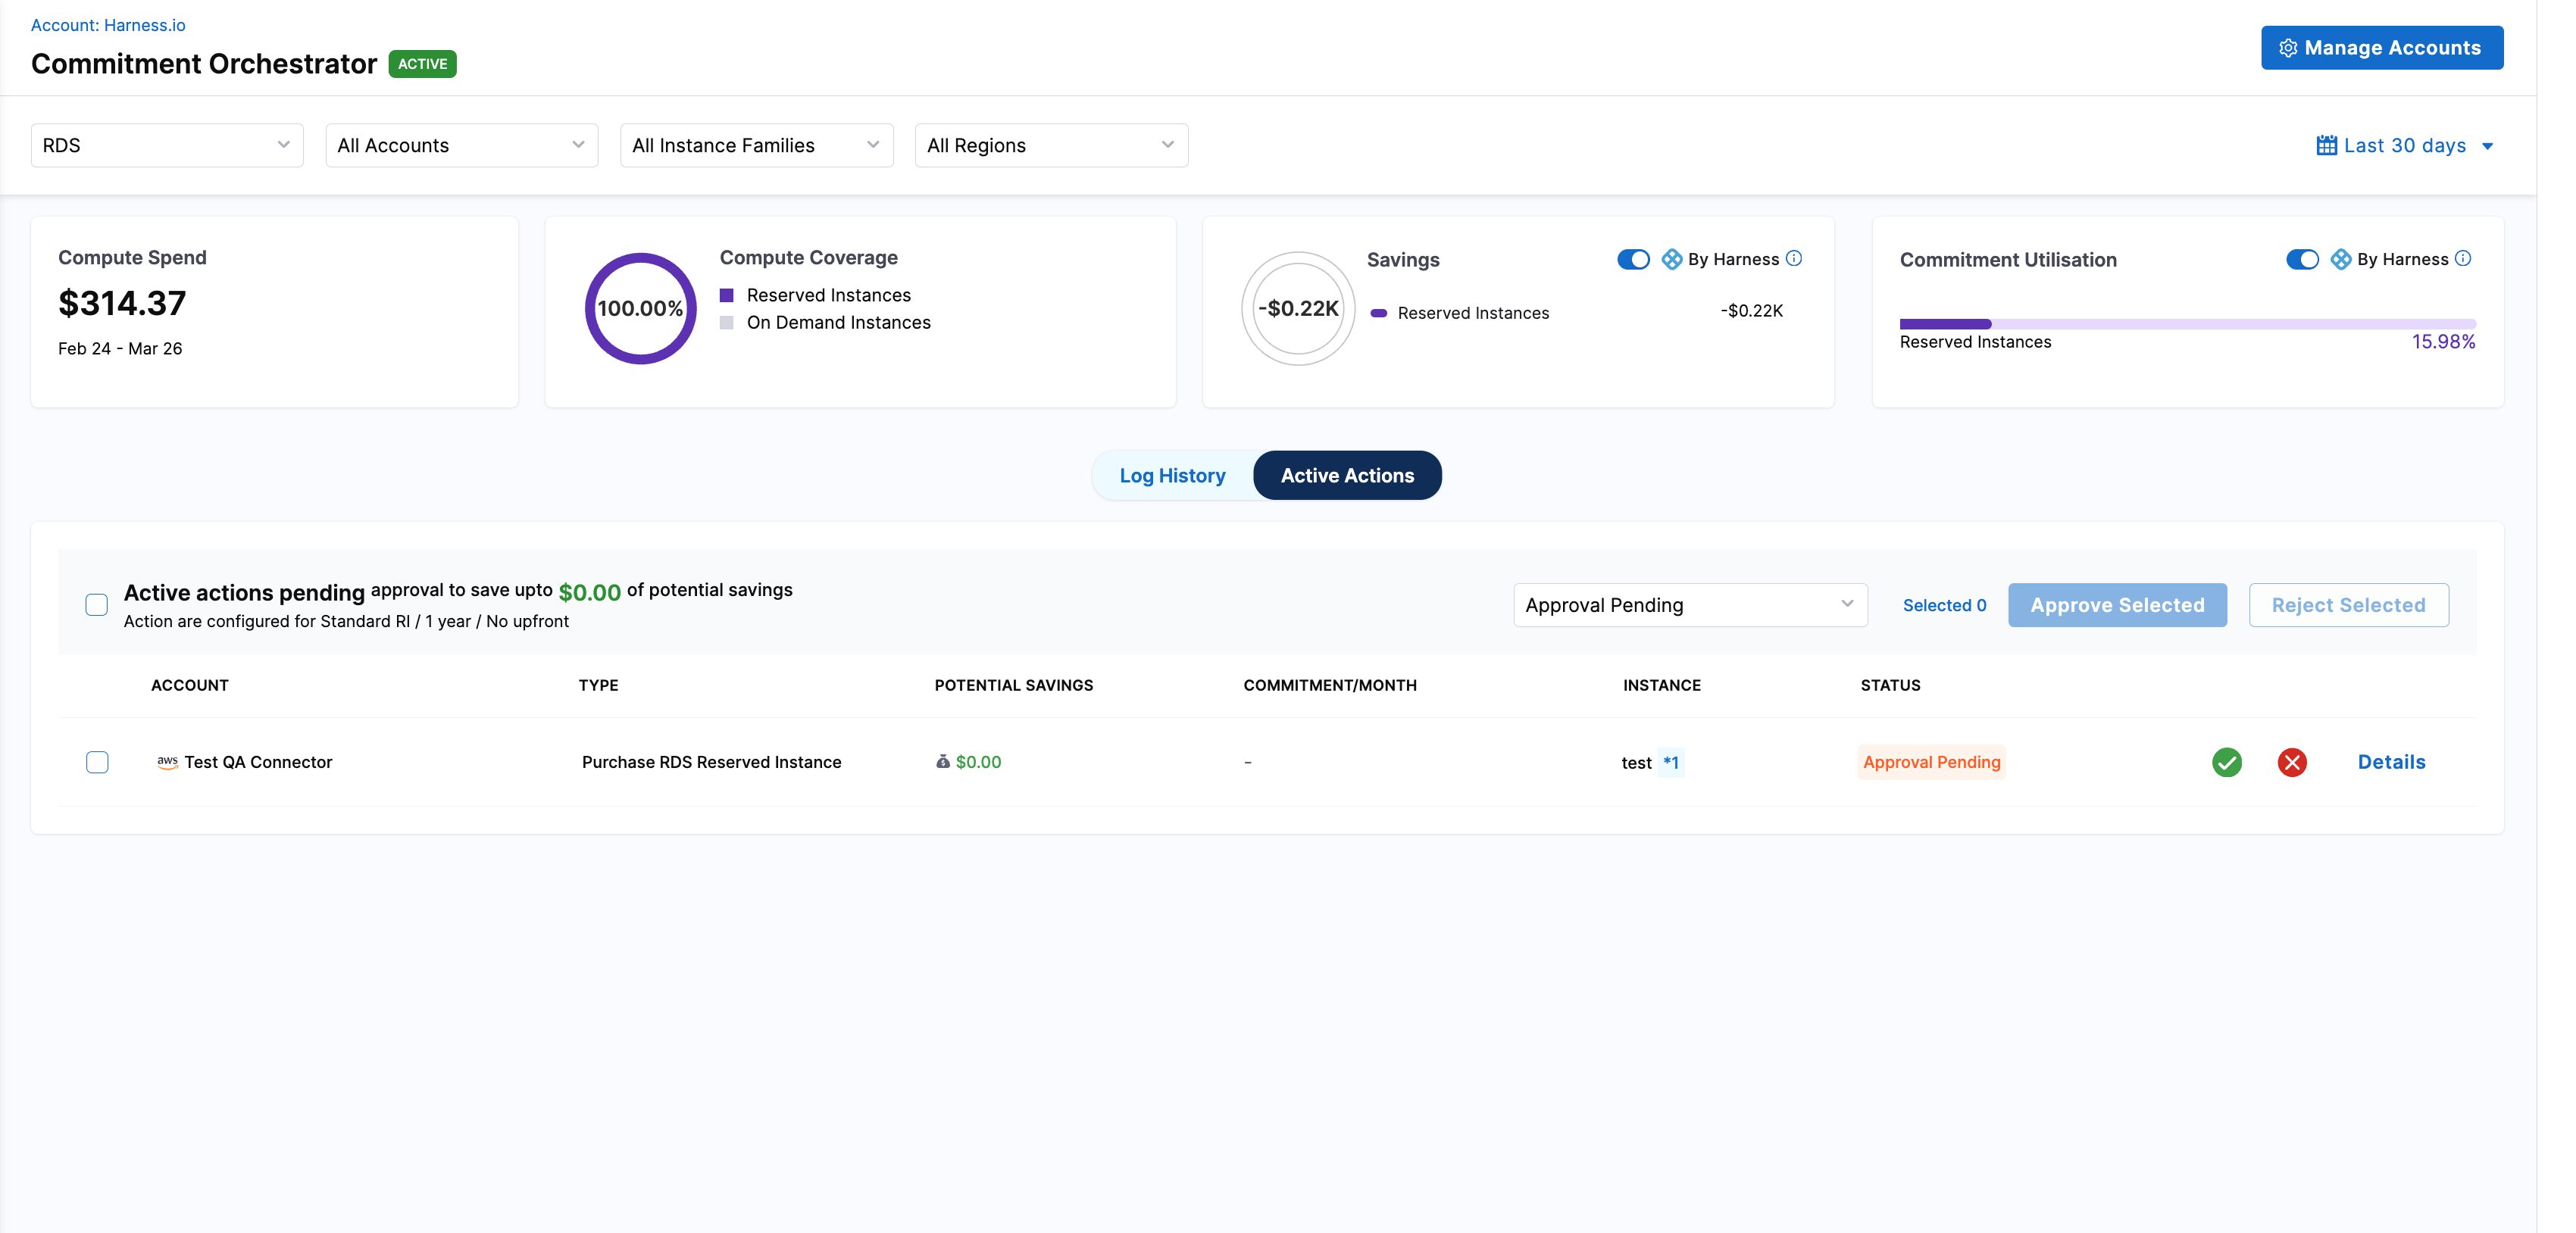
Post set-up, you can view your dashboard with all the information required. You can manipulate the information shown according to the filters such as Accounts, Instance Families and Regions and see all the information related to:
-
Compute Spend: Total amount spent on RDS compute resources across your selected accounts, instance families, and regions. This includes both On-Demand and Reserved Instance costs, providing a comprehensive view of your RDS expenditure over the selected time period.
-
Compute Coverage: Percentage of your RDS compute usage that is covered by Reserved Instances or Savings Plans.
-
Savings: Total cost savings achieved through Reserved Instances as compared to On-Demand rates. This shows the actual dollar amount saved by using commitment orchestration and helps quantify the ROI of your optimization efforts.
-
Commitment Utilisation: Percentage of your purchased Reserved Instances that are actively being used.
Log History
The Log History section provides a comprehensive audit trail of all Commitment Orchestrator activities, including date, connector name, type (RI Event and SP Event), description of the purchase.
Active Actions
The Active Actions feature enables users to review and manage recommendations generated by the Commitment Orchestrator. You can view all recommendations categorized by day and type, then approve or reject them individually, in subsets, or all at once across different master accounts and regions.
Supported Actions:
The Commitment Orchestrator supports six action states currently:
- APPROVED: You can approve the recommendation, allowing the action to proceed.
- REJECTED: You can choose to reject the recommendation, preventing the action from taking place.
- APPROVAL_PENDING: The action is pending approval by the user. This is the default state for all recommendations and any pending actions will expire in 24 hours.
- EXPIRED: The recommended action has expired.
- ERROR: The approval process encounters an error.
- COMPLETED: The approved recommendation has been successfully completed.
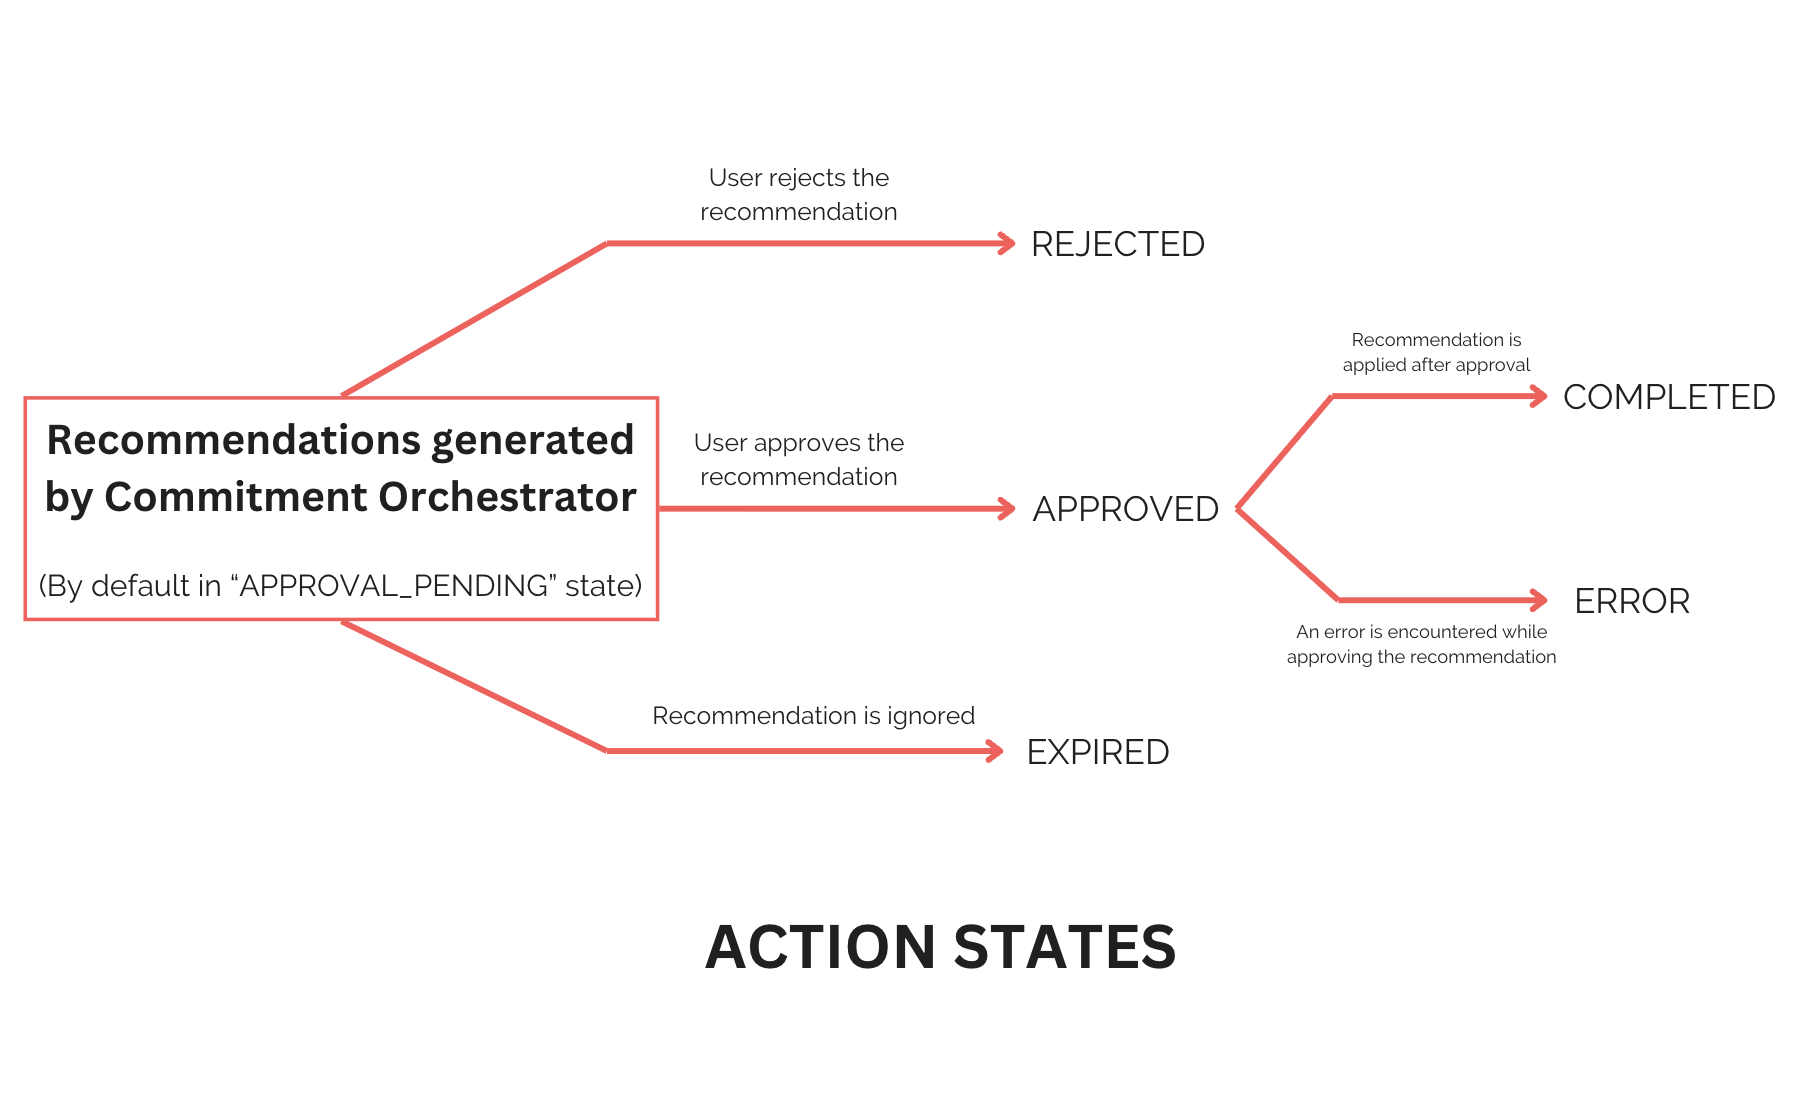
You can change and select the mode (either automatic approval or manual approval) during the setup flow.
