Okta
Okta acts as a SAML identity provider (IdP) for Harness, so your users authenticate with their existing Okta credentials. This page walks you through creating an Okta app integration, exchanging the SAML metadata with Harness, and enabling group-based authorization so Okta group members map automatically to Harness user groups.
When a user attempts to log in to Harness, Harness redirects them to Okta for authentication. After successful authentication, Okta sends a signed SAML assertion containing user attributes back to Harness, which validates it and grants access. Optionally, Okta includes group membership information in the SAML assertion through group attribute statements, so Harness assigns users to corresponding Harness user groups for role-based access control (RBAC).
What you will learn in this topic
By the end of this topic, you will be able to:
- Create a SAML app integration in Okta for Harness.
- Configure Harness to use Okta as a SAML SSO provider.
- Enable and test SSO Okta login.
- Set up SAML authorization using Okta.
- Use Just-in-Time (JIT) provisioning to automatically create users on first login.
Before you begin
Before you configure Okta as the SAML identity provider for Harness, ensure you have the following:
- Harness account access: A Harness account with Account Admin permissions.
- Okta account access: An Okta account with admin access.
- Provisioned Okta users: Users already provisioned in Okta, with the same email addresses they use in Harness.
Set up your workspace
Prepare both applications before you configure SAML so you can copy values between them without losing your place. Use two browser windows or tabs for this process: open Okta in one tab and Harness in the other.
In your Harness tab, add a SAML provider.
If you use Harness Self-Managed Enterprise Edition, your instance must be accessed through an HTTPS load balancer, otherwise SAML authentication fails over HTTP.
- Users are not created as part of the SAML SSO integration. Okta user accounts must exist before you exchange information between your Okta account and Harness.
- Users are invited to Harness using their email addresses. After they log into Harness, their email addresses are registered as Harness users. Go to SAML SSO with Harness for more information on user registration.
Step 1: Set up user accounts in Okta and Harness
To set up SAML support in your Okta Harness app, ensure that the app has corresponding users in Harness:
- In Harness, add the users you want to set up for SAML SSO by inviting them to Harness using the same email addresses that they use in your SAML provider.
- In Okta, assign them to your SAML provider app.
- The only user property that must match between a Harness user and its corresponding SAML provider user account is its email address.
- Sometimes users have mixed case email addresses in Okta. In these situations, Harness converts the email address to lowercase when adding them to Harness.
Step 2: Create app integration in Okta
Create the SAML app integration in Okta to establish the trust between Okta and Harness.
-
Sign in to your Okta administrator account, and select Applications.
-
Click Create App Integration.
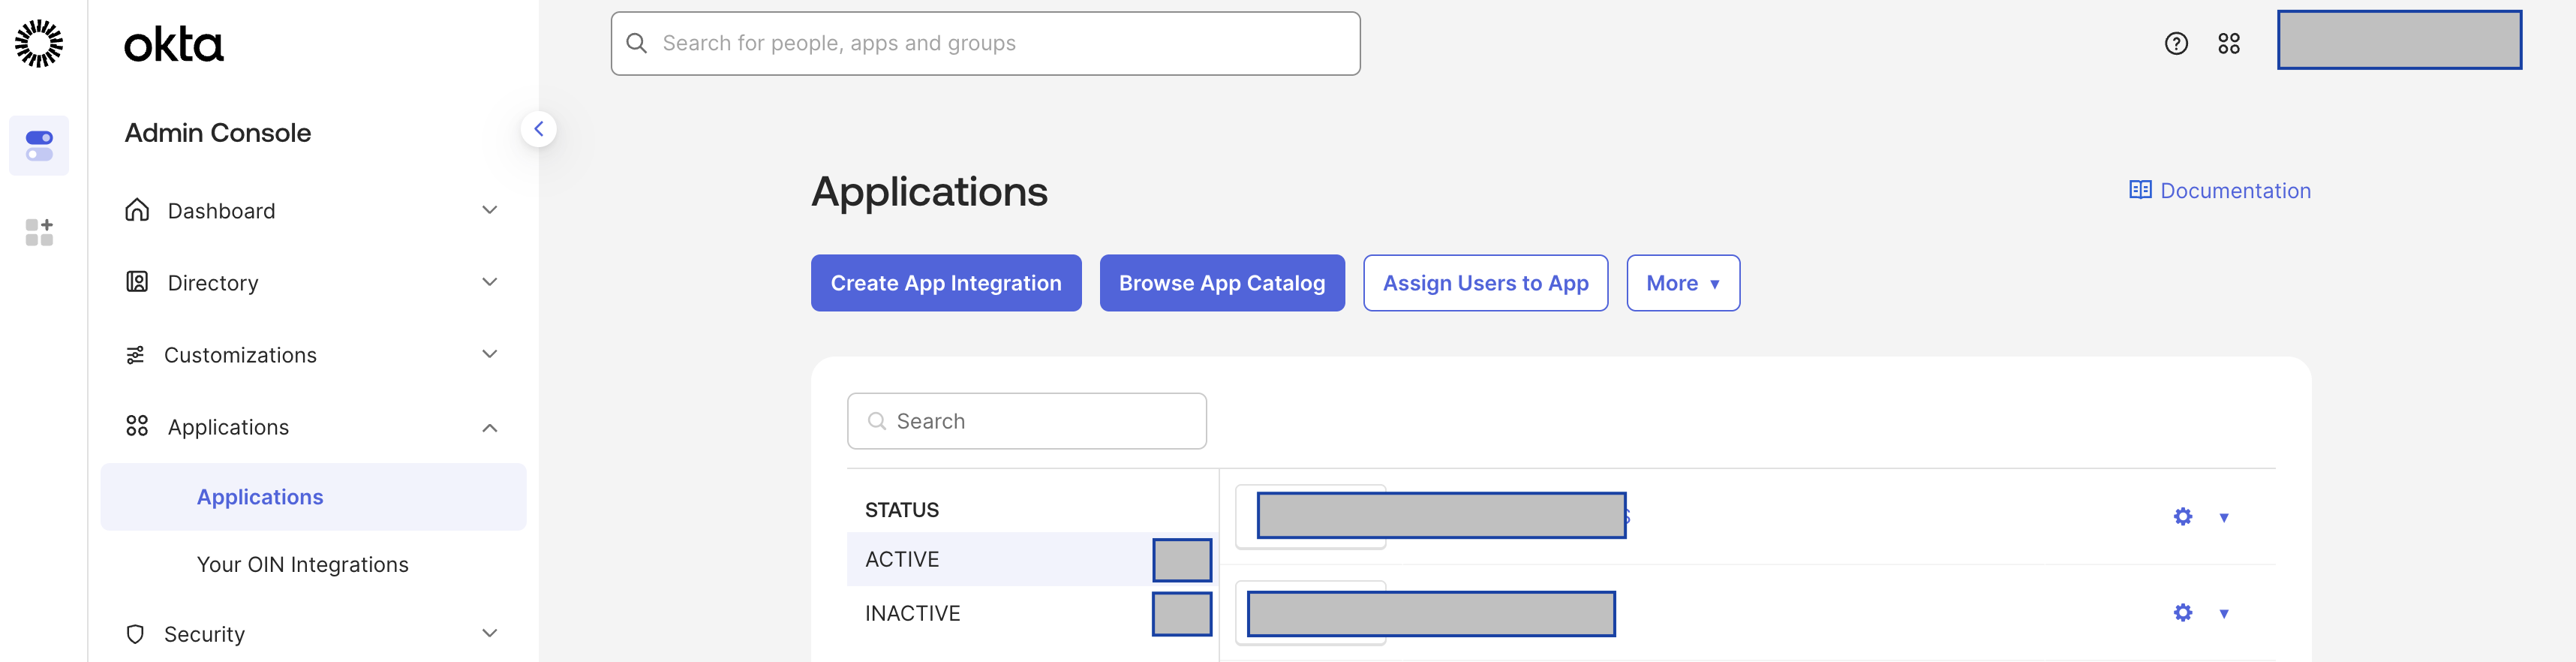
The Create a new app integration dialog opens.
-
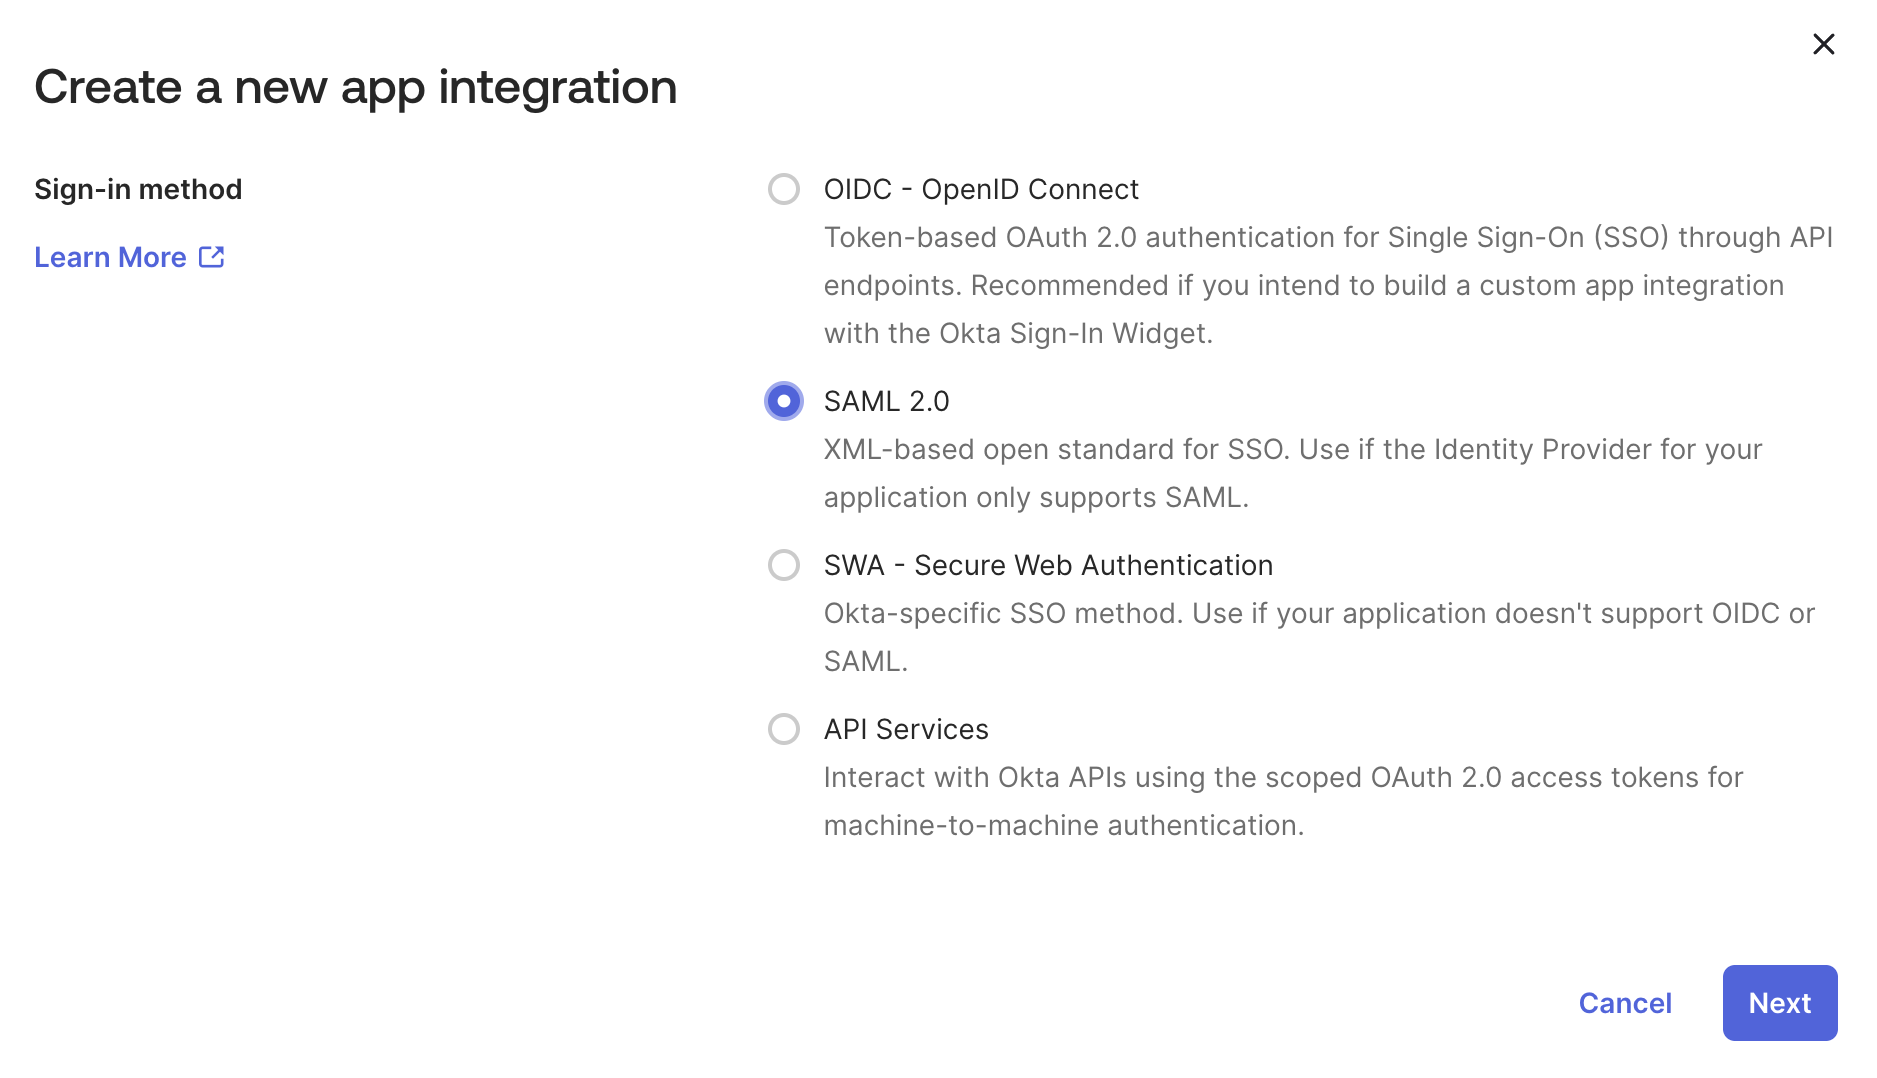
Select SAML 2.0, and then click Next.
-
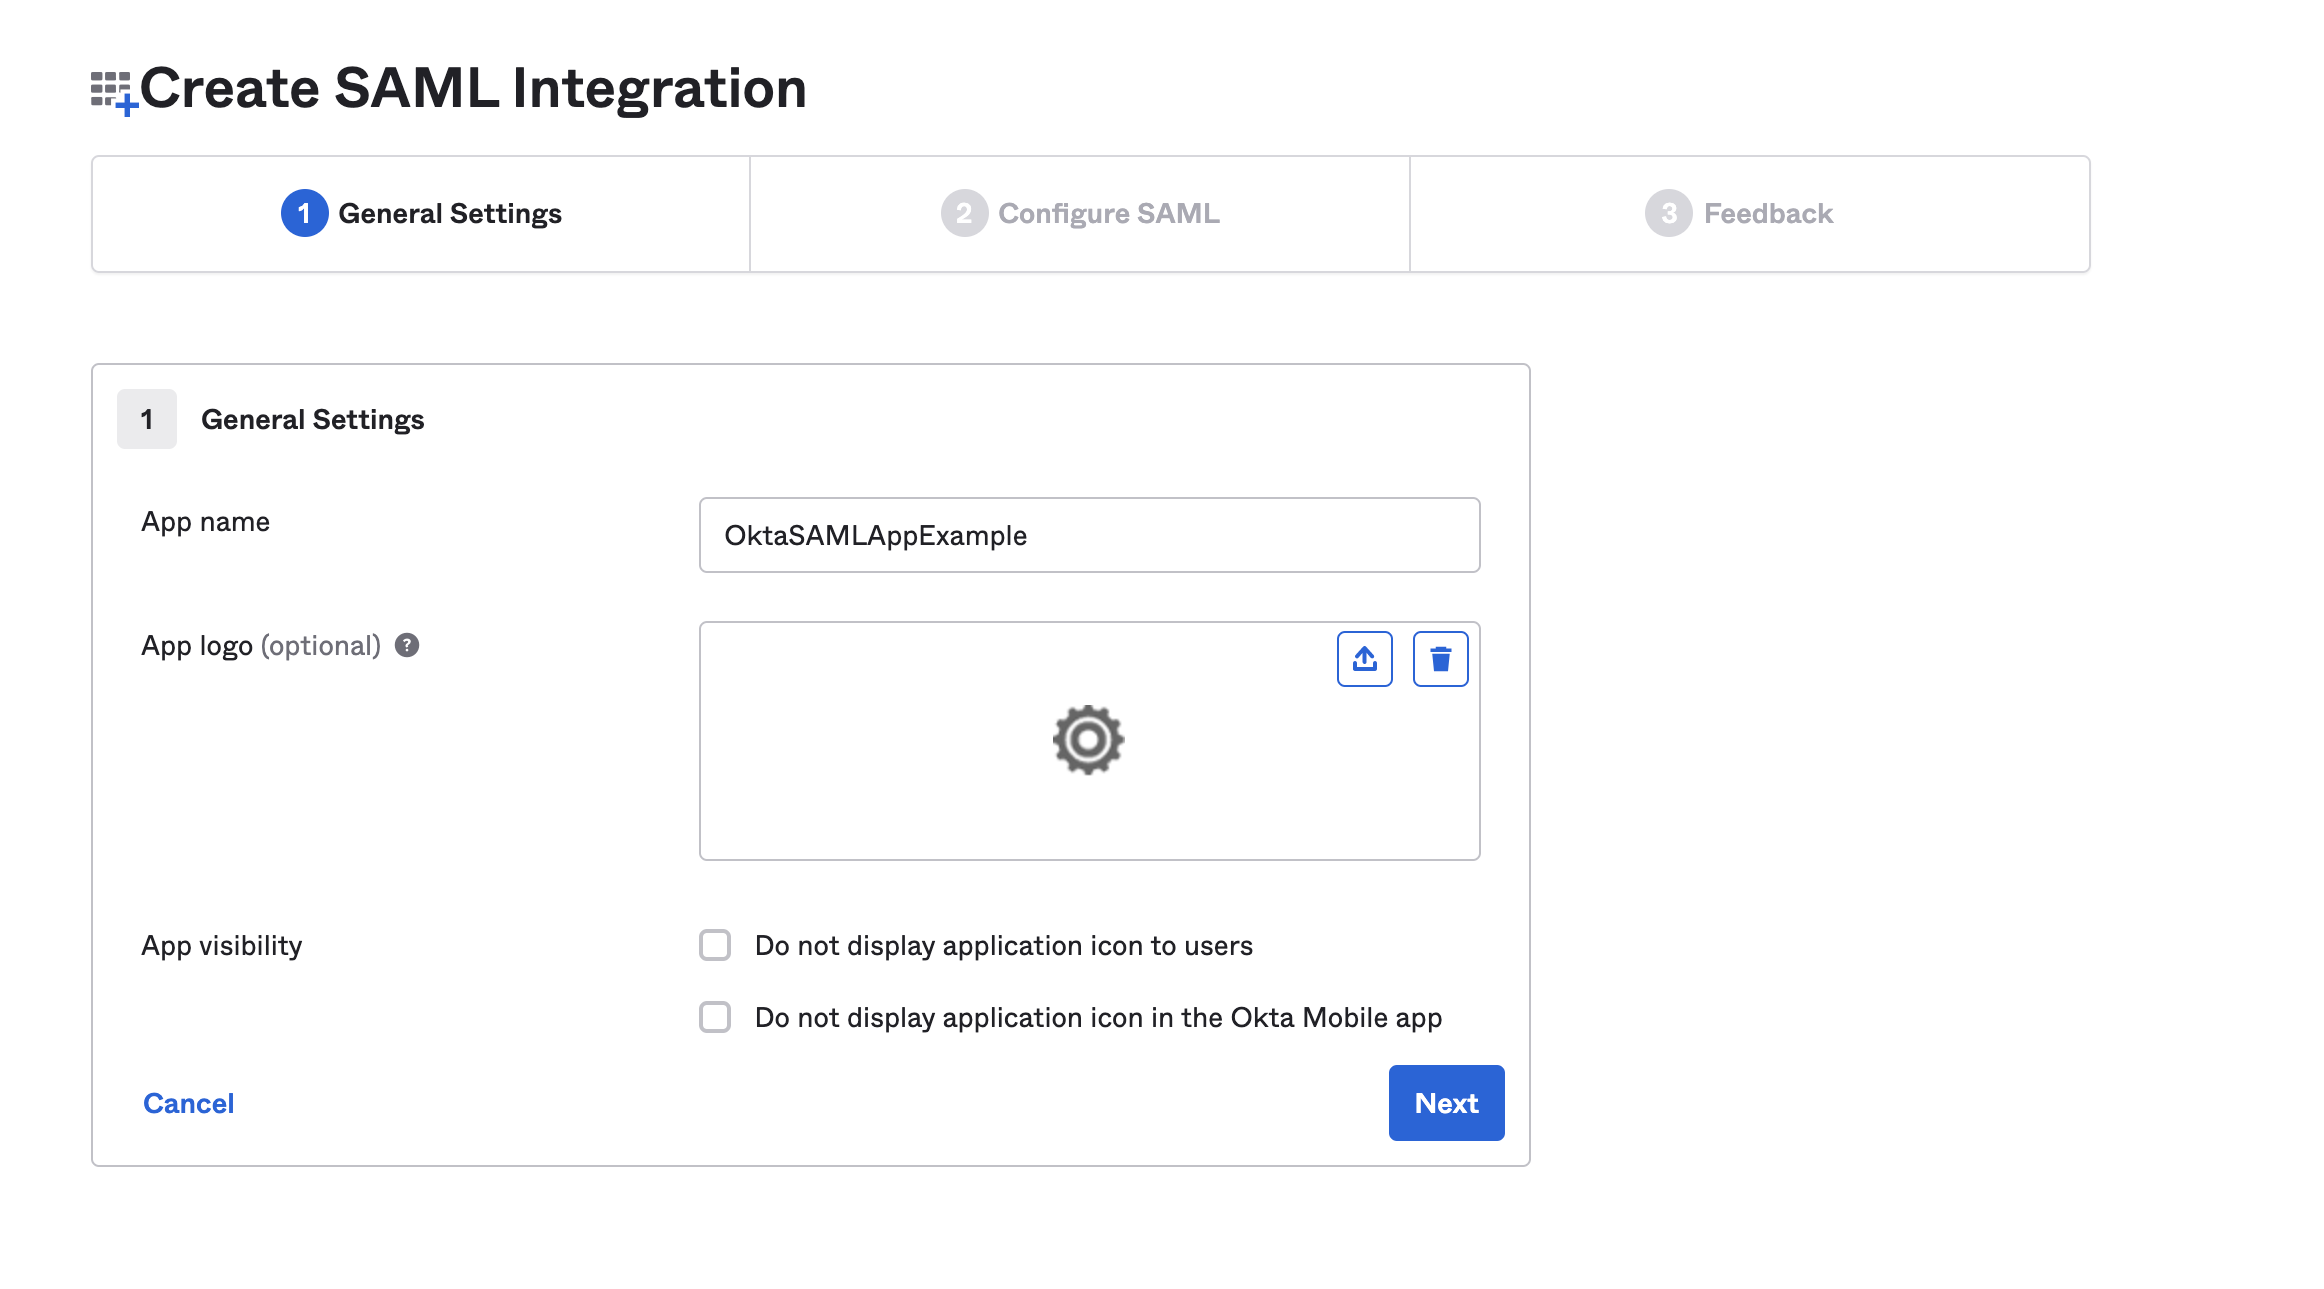
In General Settings, enter a name in the Application label field, and then click Next.
-
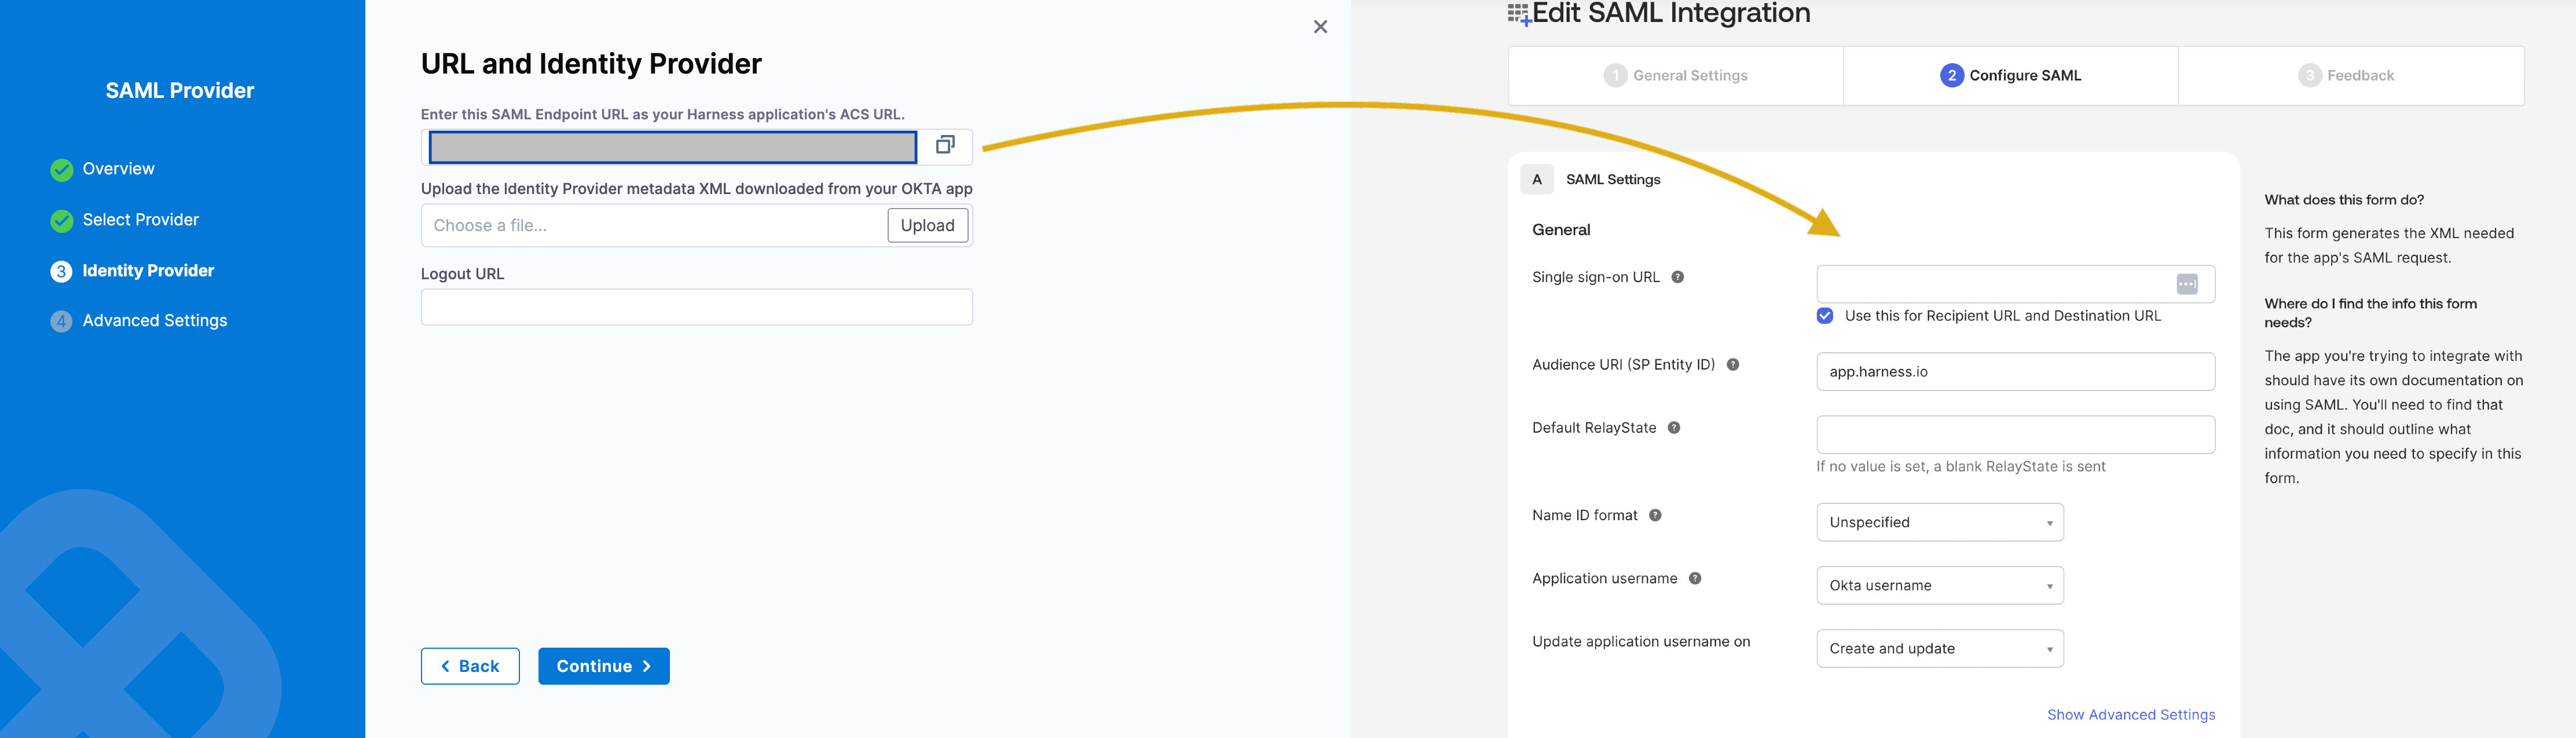
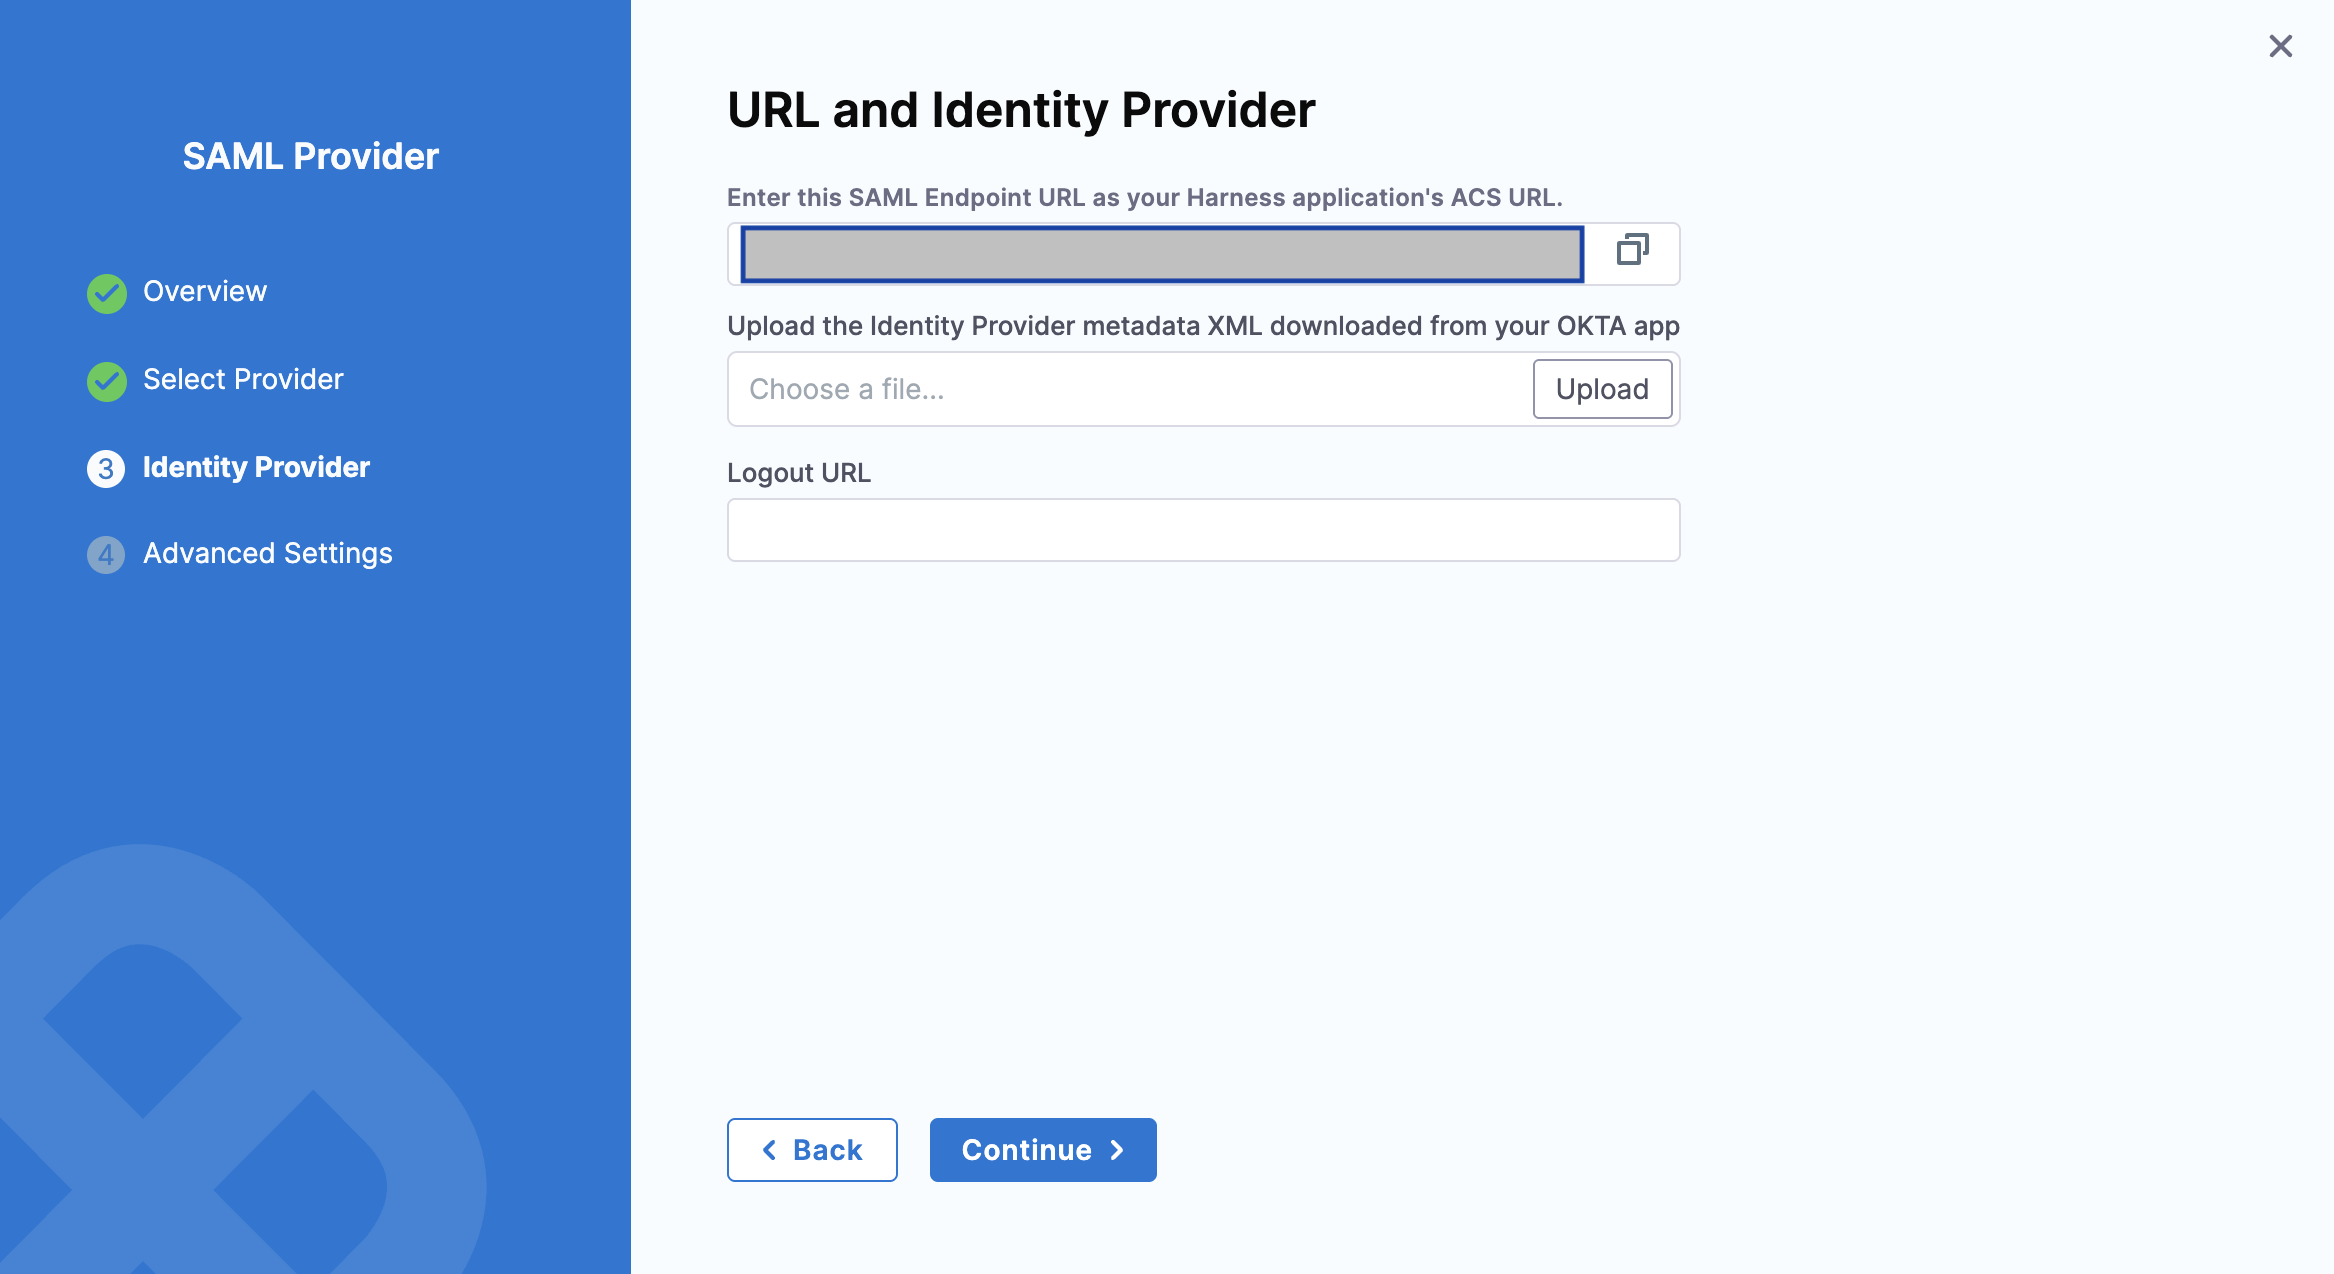
On the Configure SAML tab, enter the Harness SAML endpoint URL in the Single sign on URL field. To get the SAML endpoint URL from Harness:
-
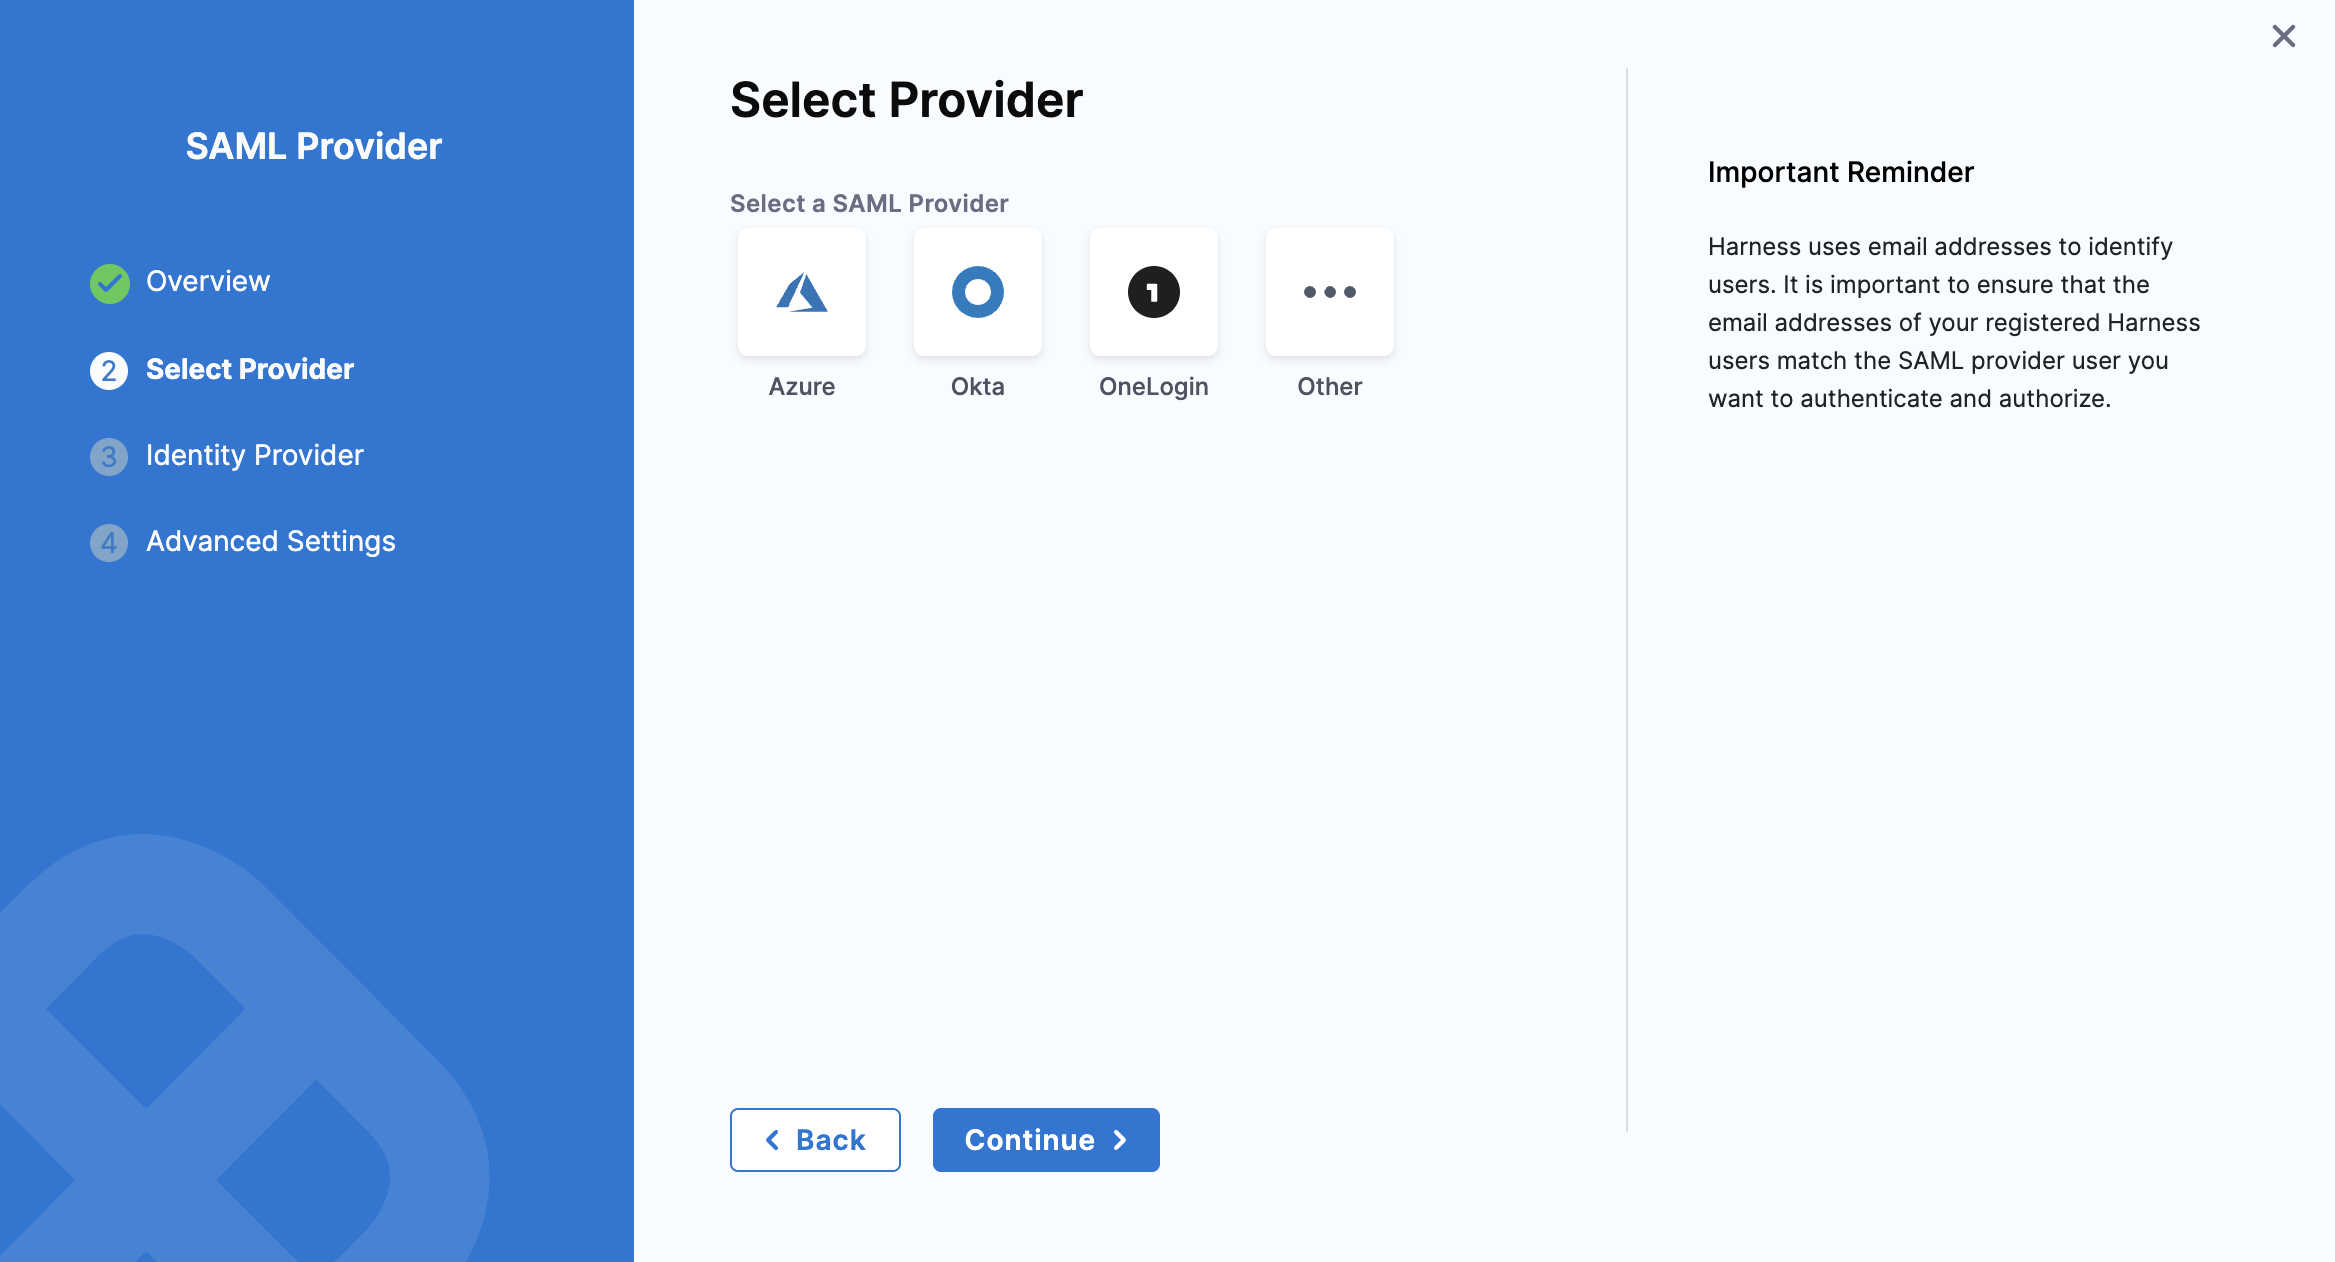
If you are not already on the Add SAML Provider page in Harness, open a new browser tab and navigate there. Sign in to Harness, navigate to Account Settings, select Authentication, select SAML Provider, enter a Name for the SAML configuration, and then select Okta.
-
Copy the endpoint URL from Enter this SAML Endpoint URL as your Harness application's ACS URL. This is the URL you paste in the Single sign on URL field in Okta.
-
Keep this page open. You use it later in this process.
-
-
In Audience URI (SP Entity ID), enter
app.harness.io. The SAML application identifier is alwaysapp.harness.io. -
In Default RelayState, leave the field blank. Harness uses this to exchange additional information between the IdP SAML provider (Okta) and the Service Provider (Harness), by sending Custom RelayState information.
-
In Name ID format, enter the username format you are sending in the SAML Response. The default format is Unspecified.
-
In Application username, enter the default username.
-
Click Next, and then click Finish.
-
Navigate to the Sign on tab and go to the Attribute statements section.

- Expand Show legacy configuration and click Edit. In Profile attribute statements, enter a name in the Name field, select Name Format as Basic, and select the Value as user.email.
When you create a new SAML integration or modify an existing one, you can define custom attribute statements. These statements are inserted into the SAML assertions shared with your app. Go to the Okta documentation on defining attribute statements for more information on custom attribute statements.
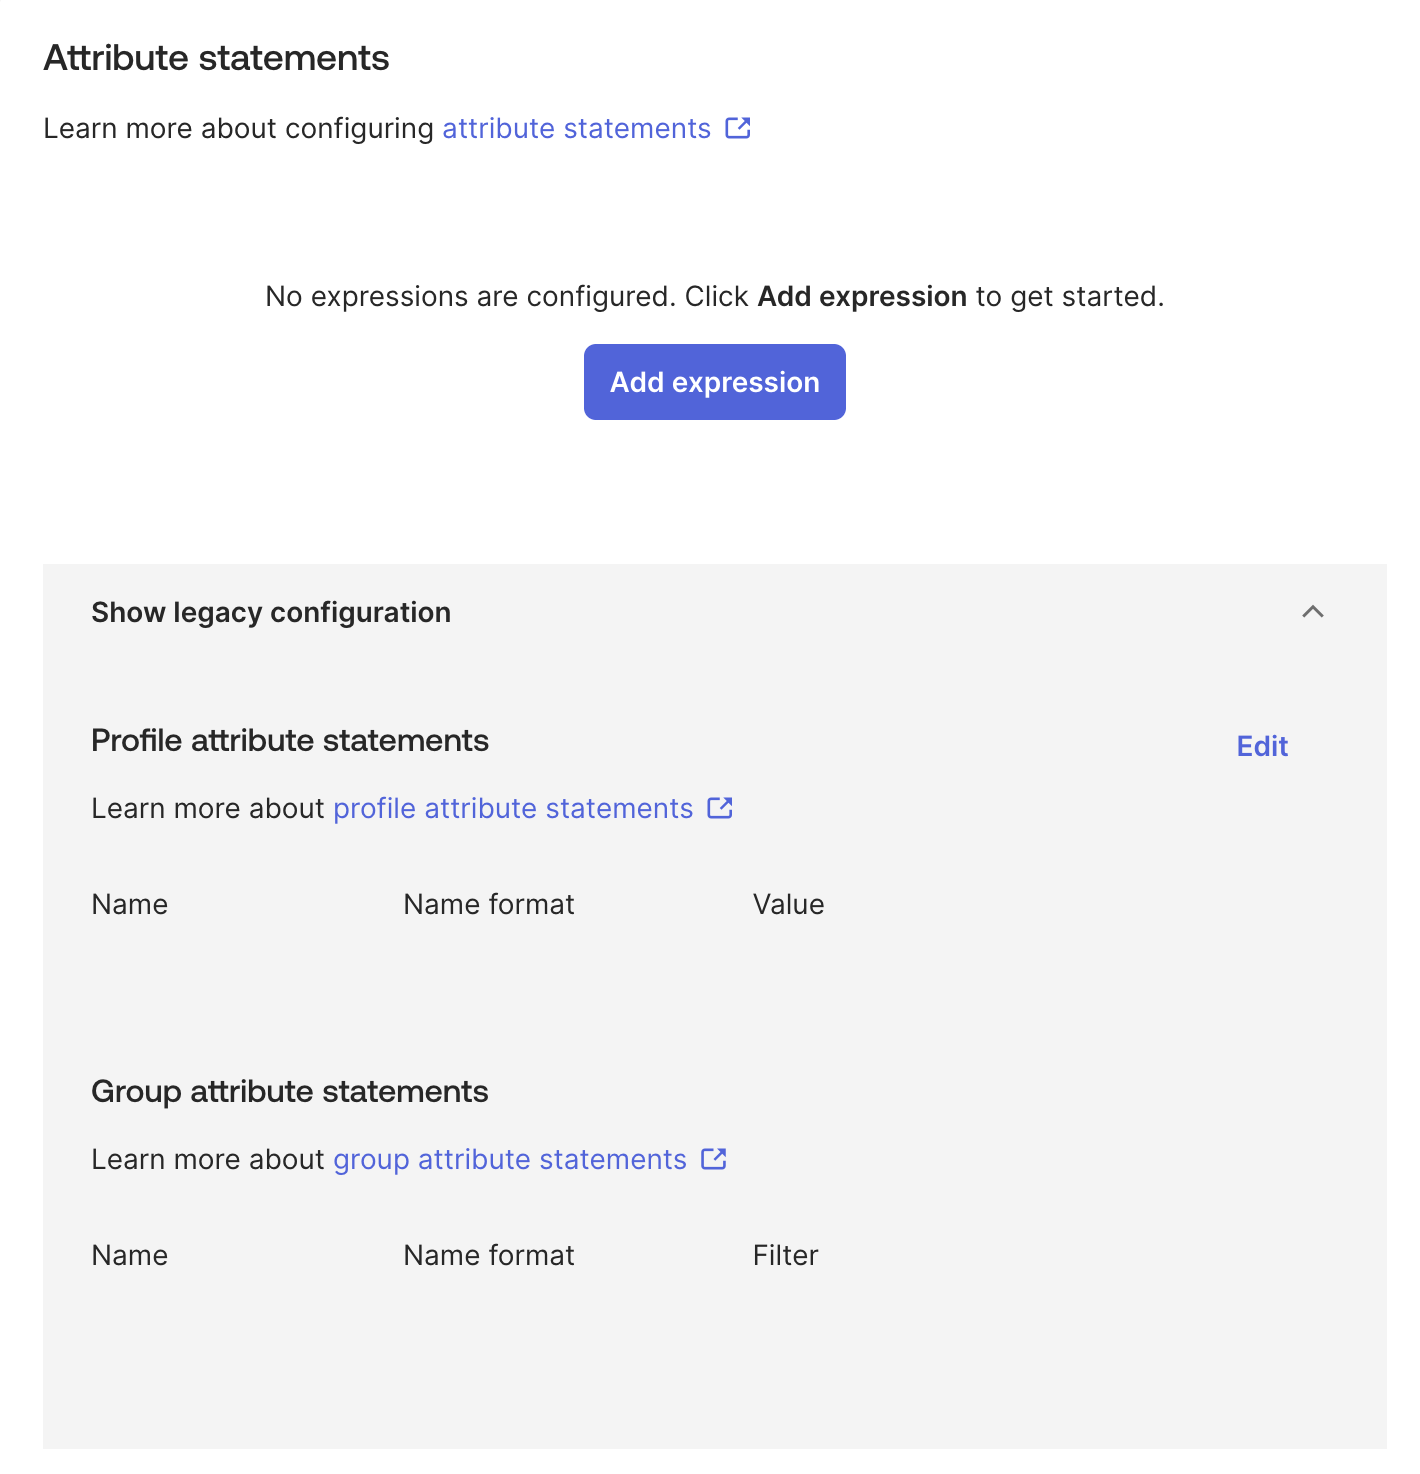
- In Group attribute statements, enter a name in the Name field, select Name format as Basic, select an appropriate Filter, and enter its value.
If your Okta org uses groups to categorize users, you can add group attribute statements to the SAML assertion shared with your app. Go to the Okta documentation on defining group attribute statements for more information on group attribute statements.
- Click Save.
Step 3: Okta SAML metadata file
Download the Identity Provider metadata XML from your Okta app and upload it into Harness to complete the trust exchange.
-
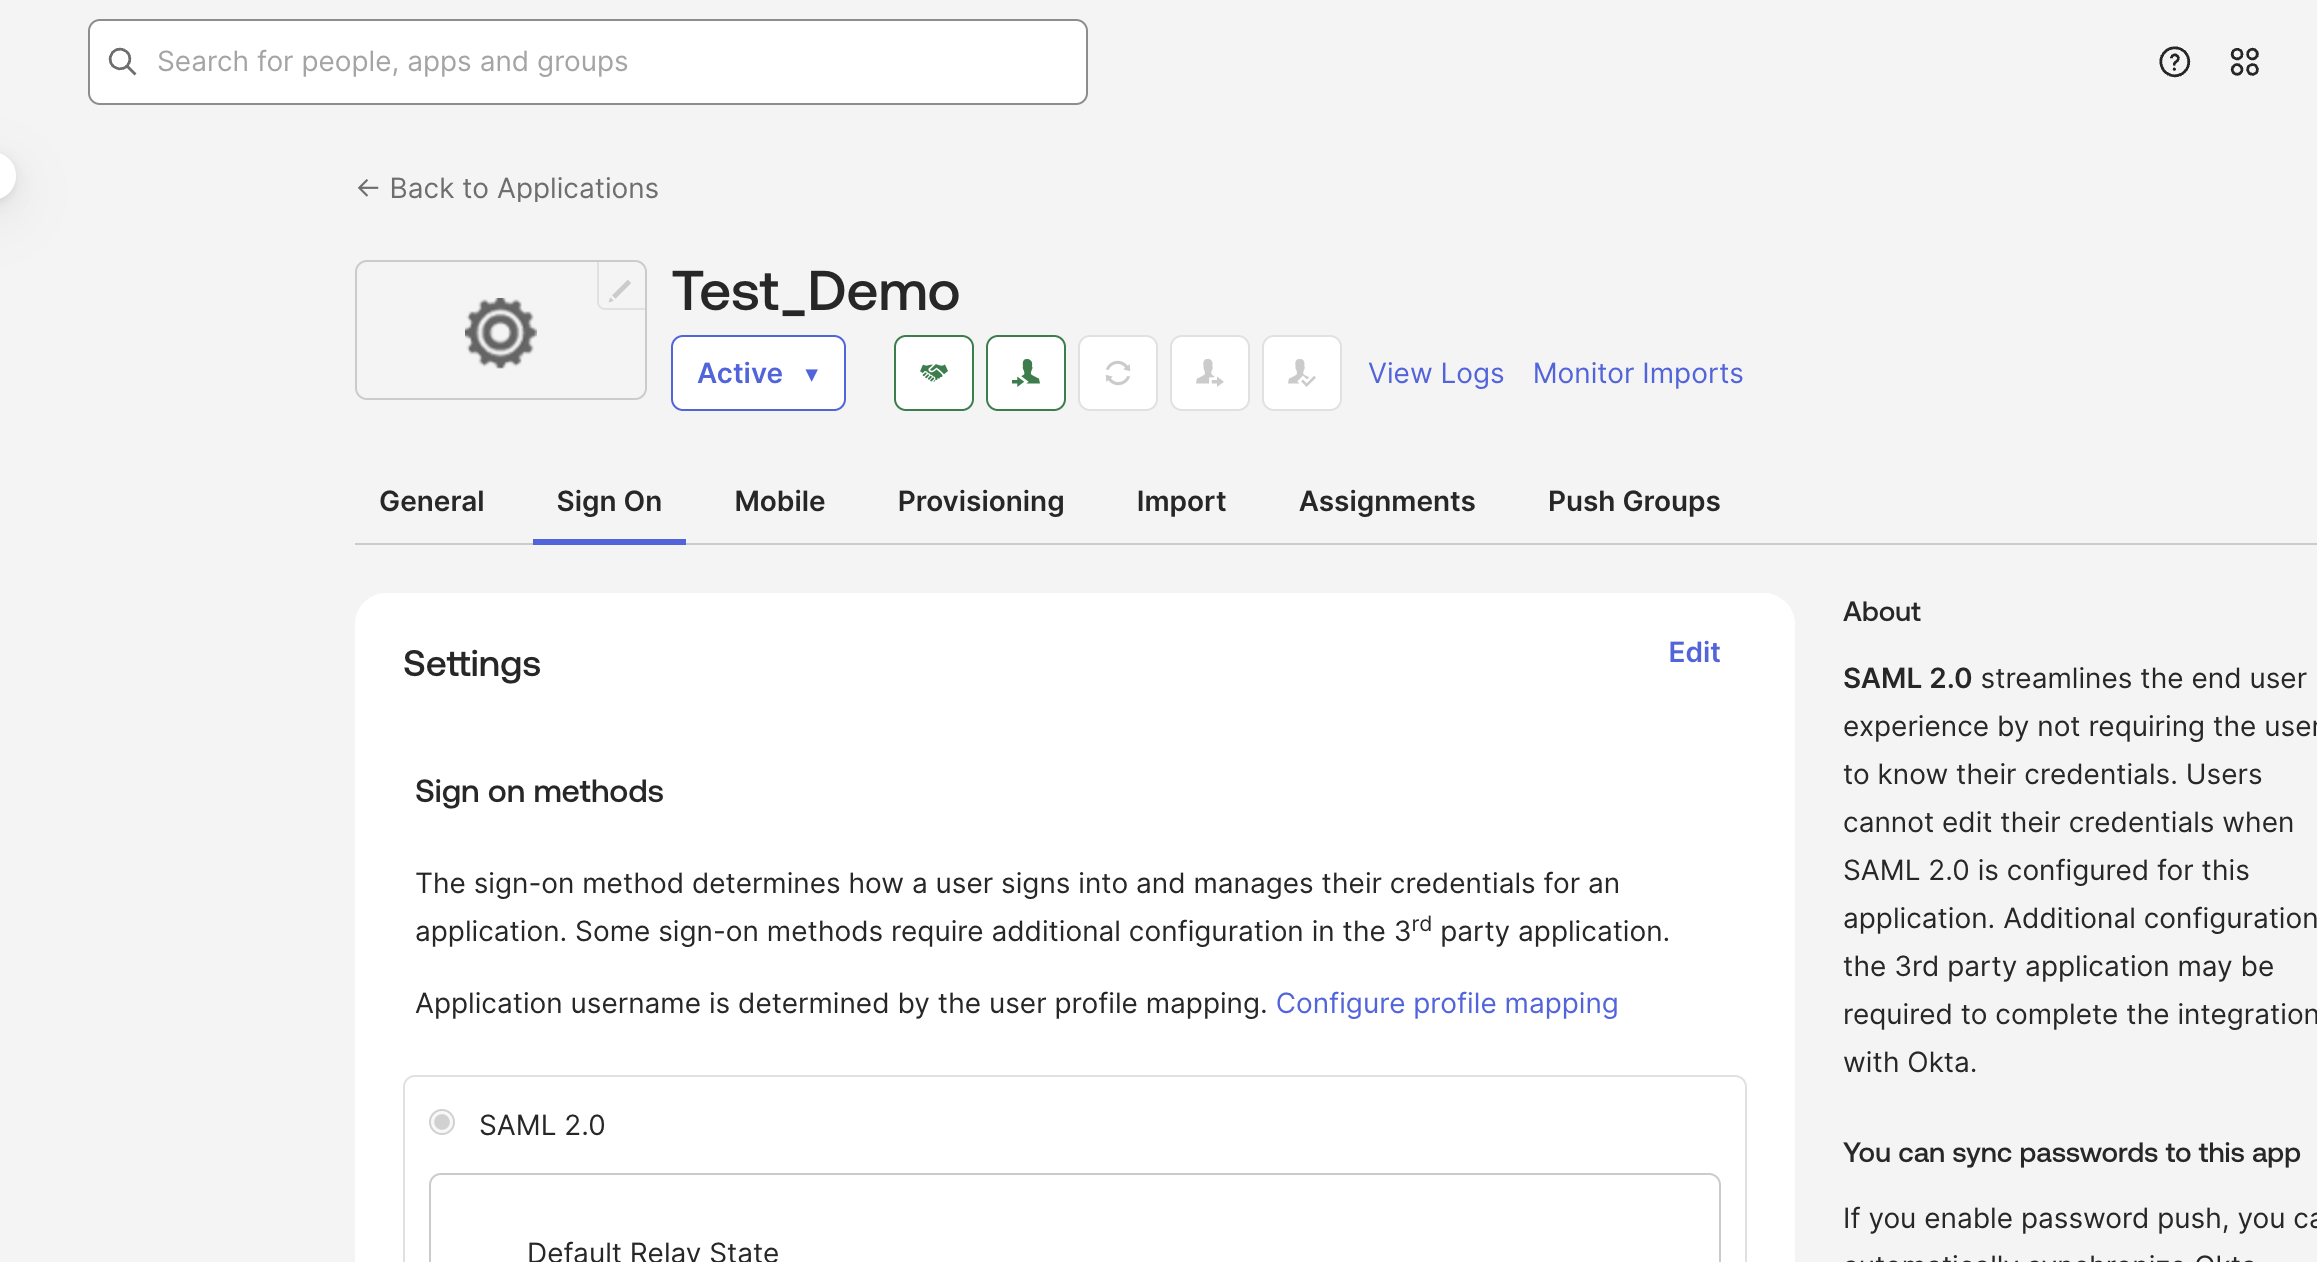
In your Harness Okta app, navigate to the Sign On tab, and then click Edit.
-
Click Copy to copy that data into a file, and save it with an
.xmlextension.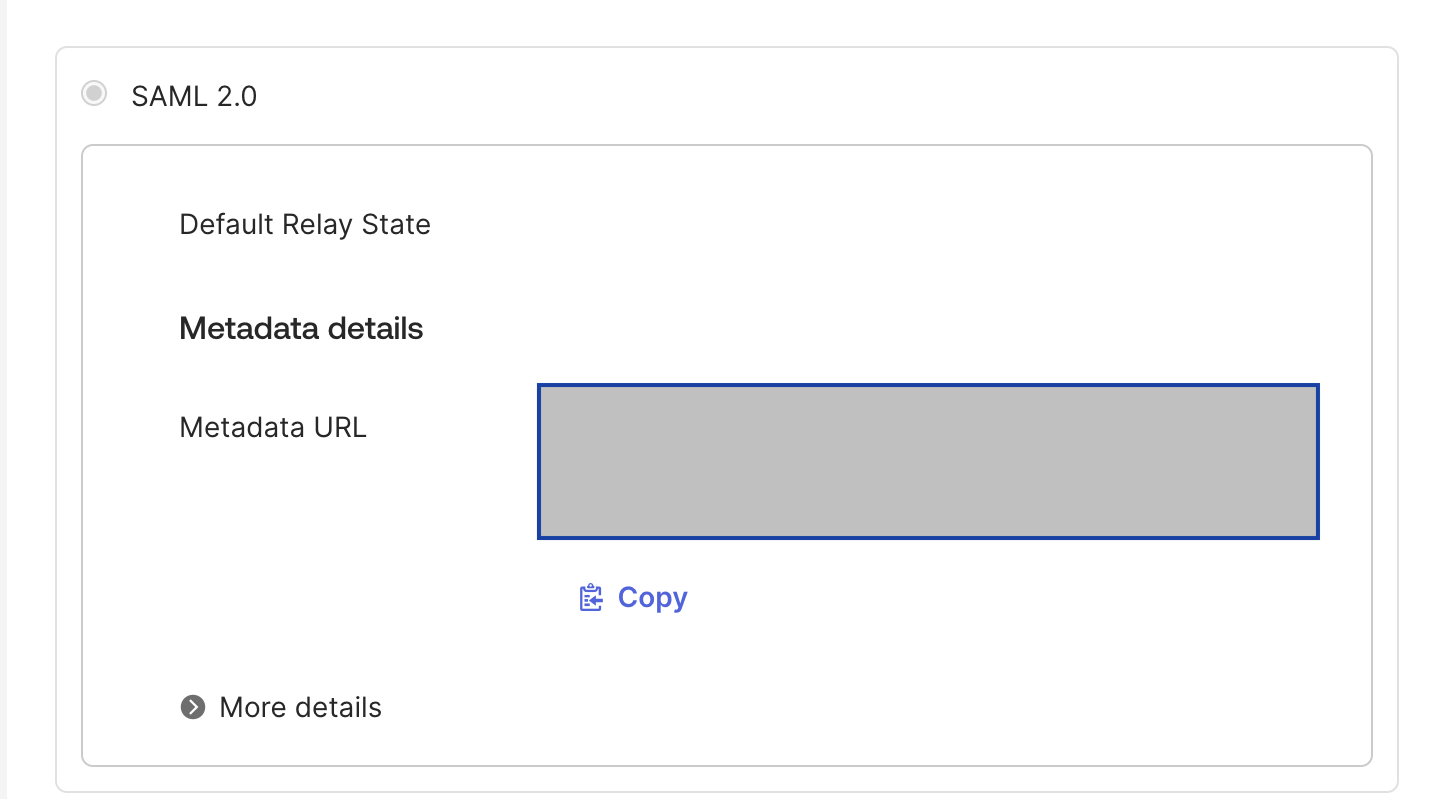
-
In Harness, on the Add SAML Provider page, in Upload the Identity Provider metadata XML downloaded from your Okta app, click Choose a file or Upload, and select the SAML metadata file you downloaded from your Okta app.
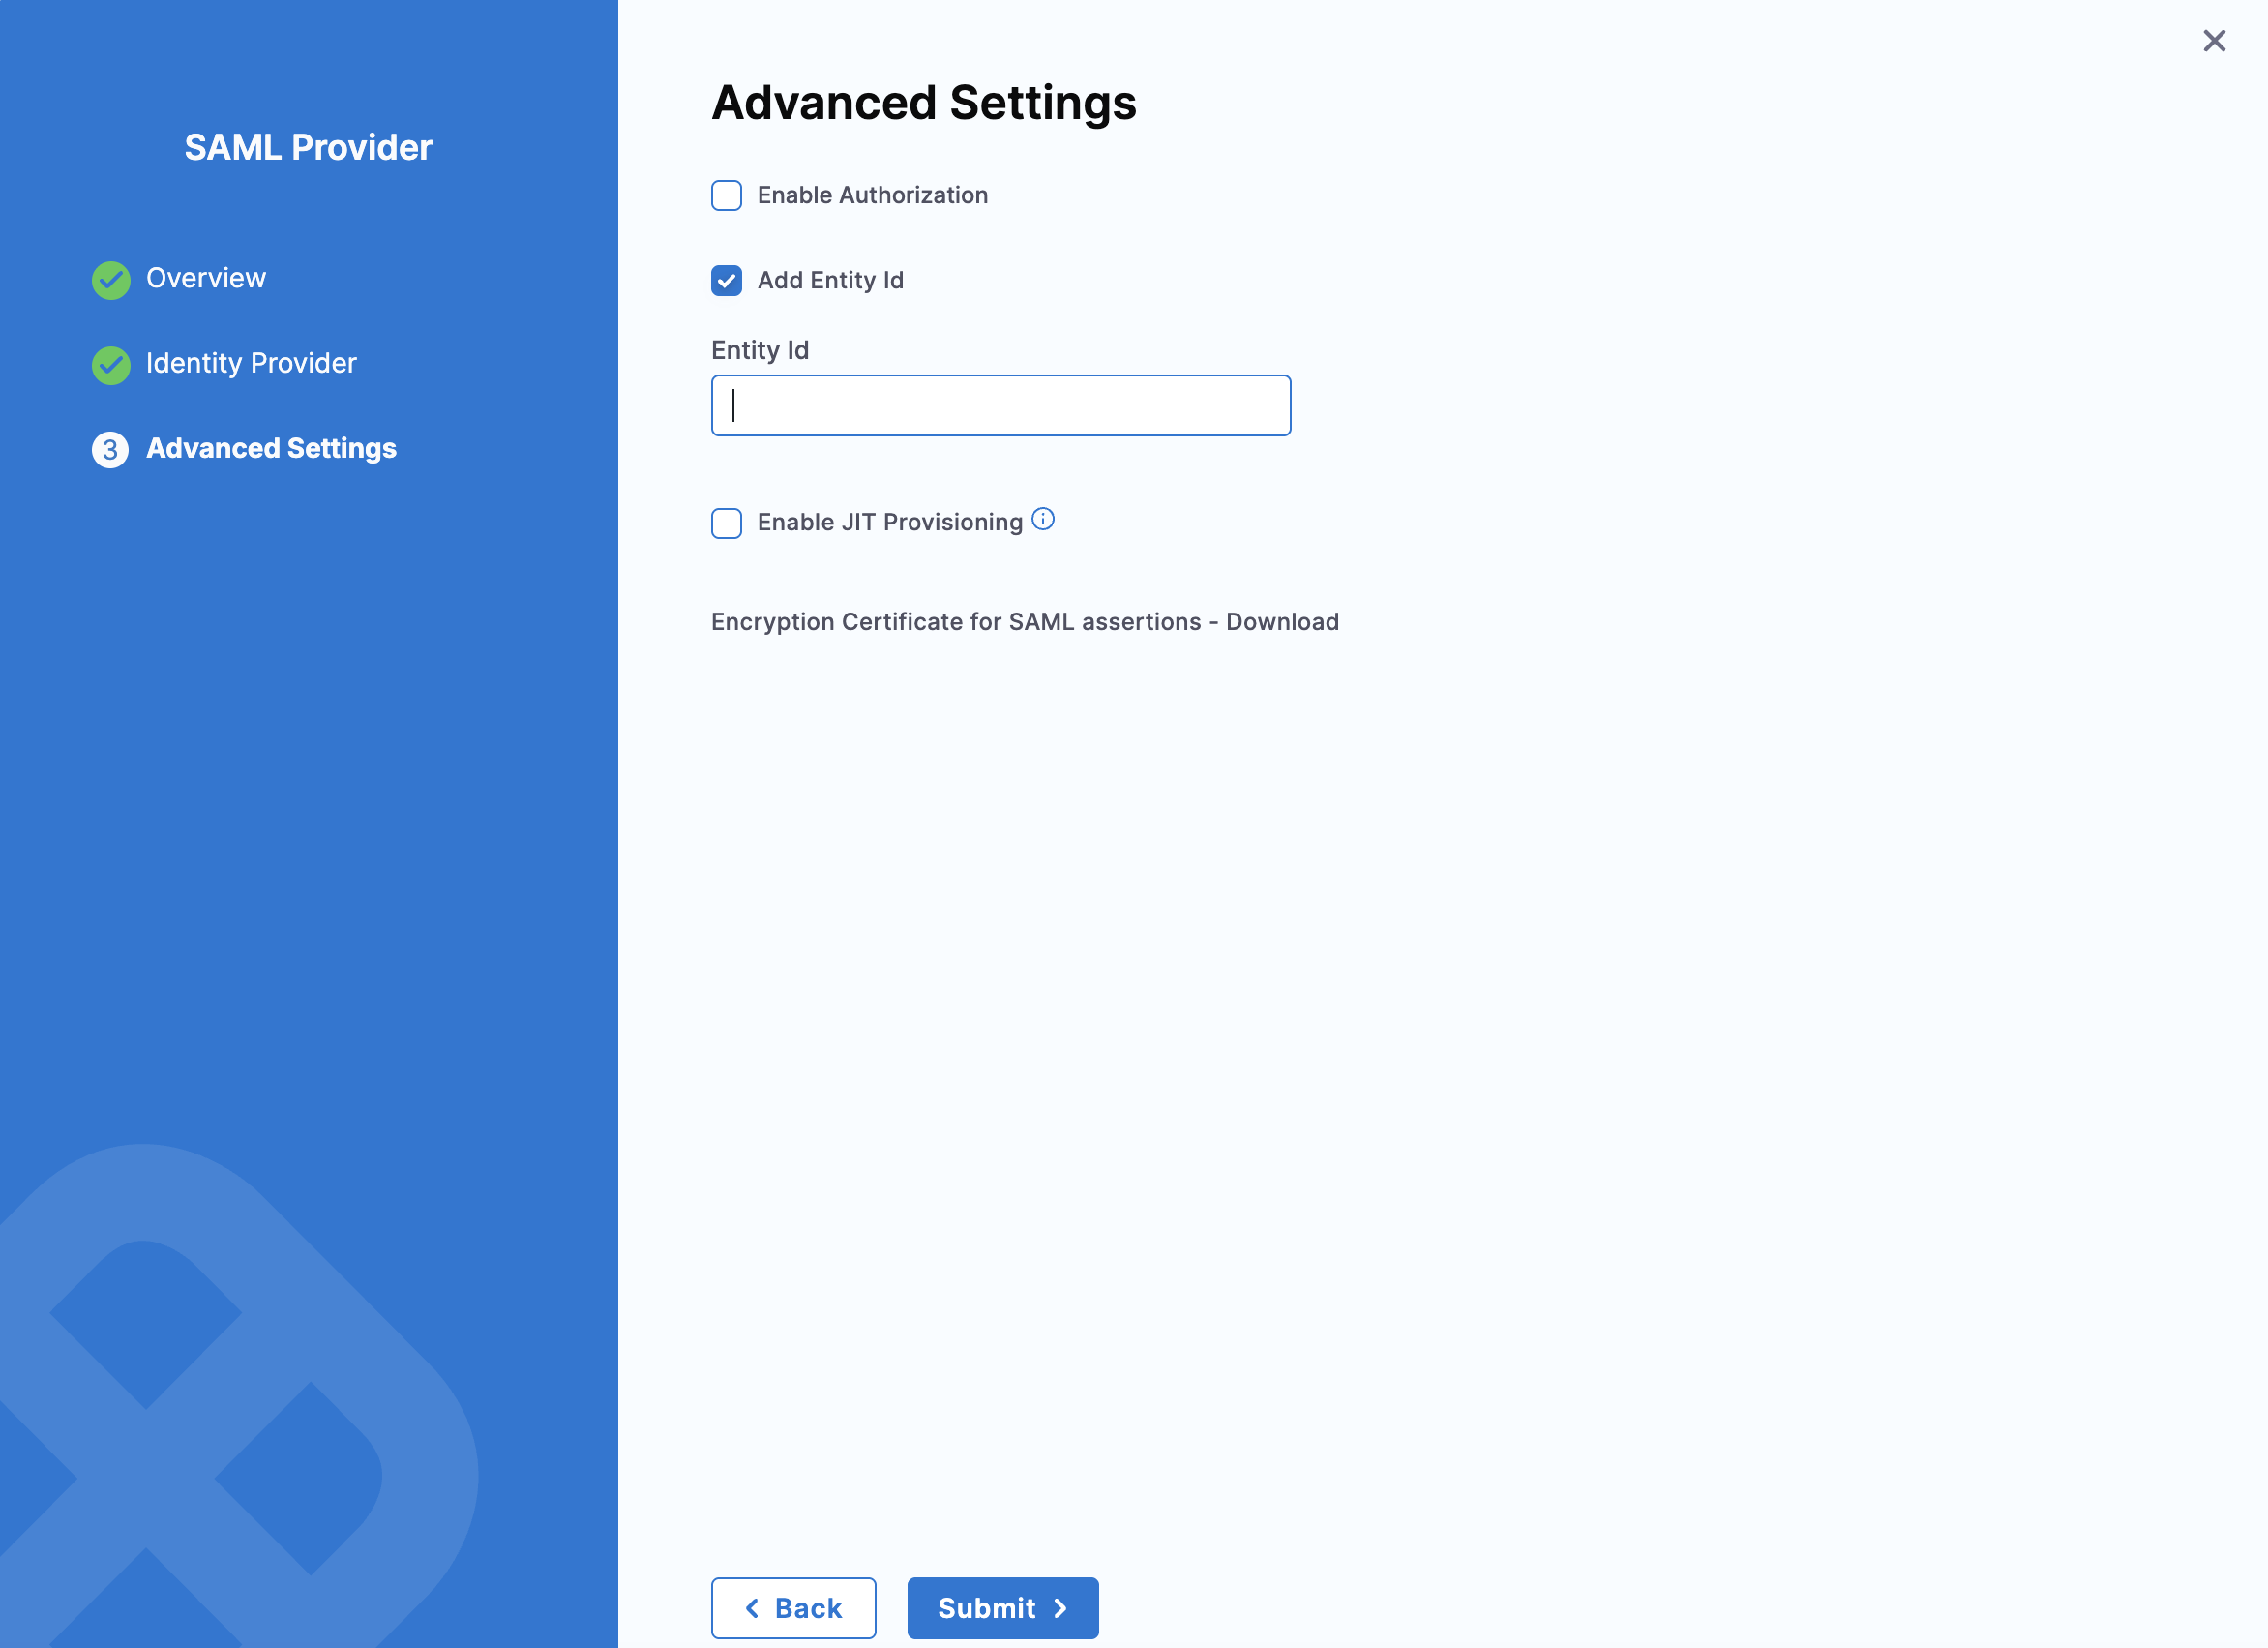
- Deselect Enable Authorization. The default Entity ID is
app.harness.io. To override the default entity ID, click Add Entity ID and enter your custom entity ID. Click Submit.
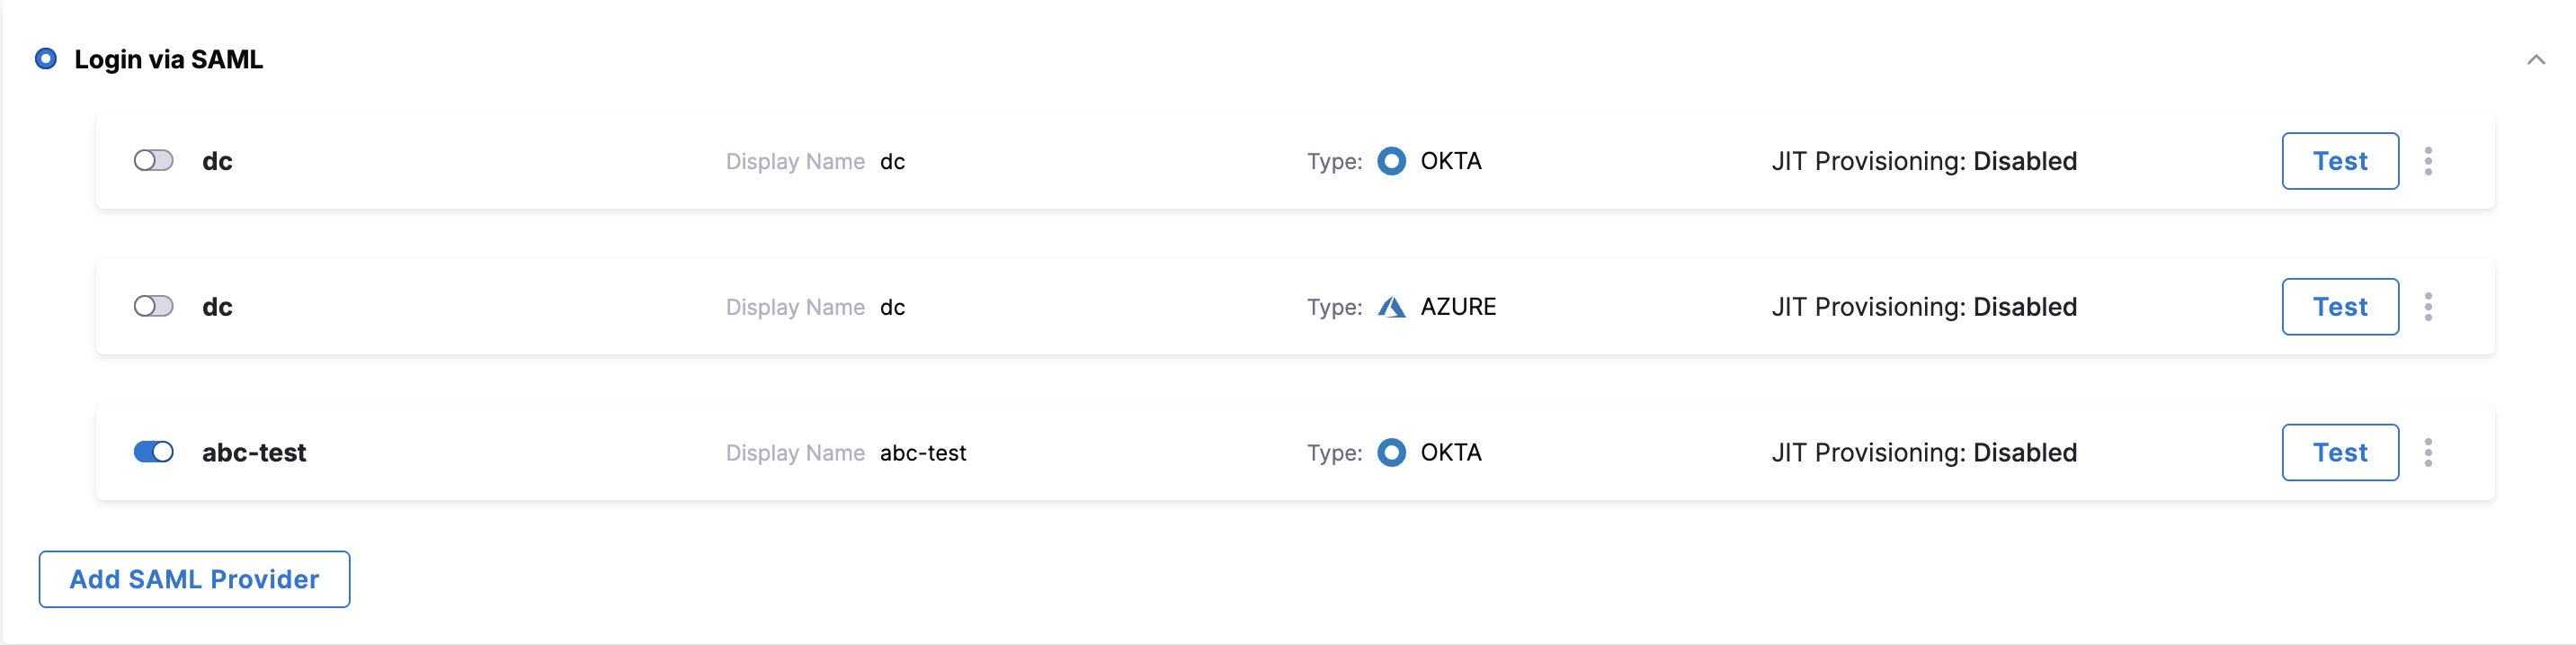
Your Okta configuration appears under Login via SAML.
Step 4: Enable SSO with Okta
Now that Okta is set up in Harness as a SAML SSO provider, enable and test it.
- In Harness, navigate to Account Settings, and then select Authentication.
- Select Login via SAML.
- On the Enable SAML Provider confirmation window, click Test to verify the connection.
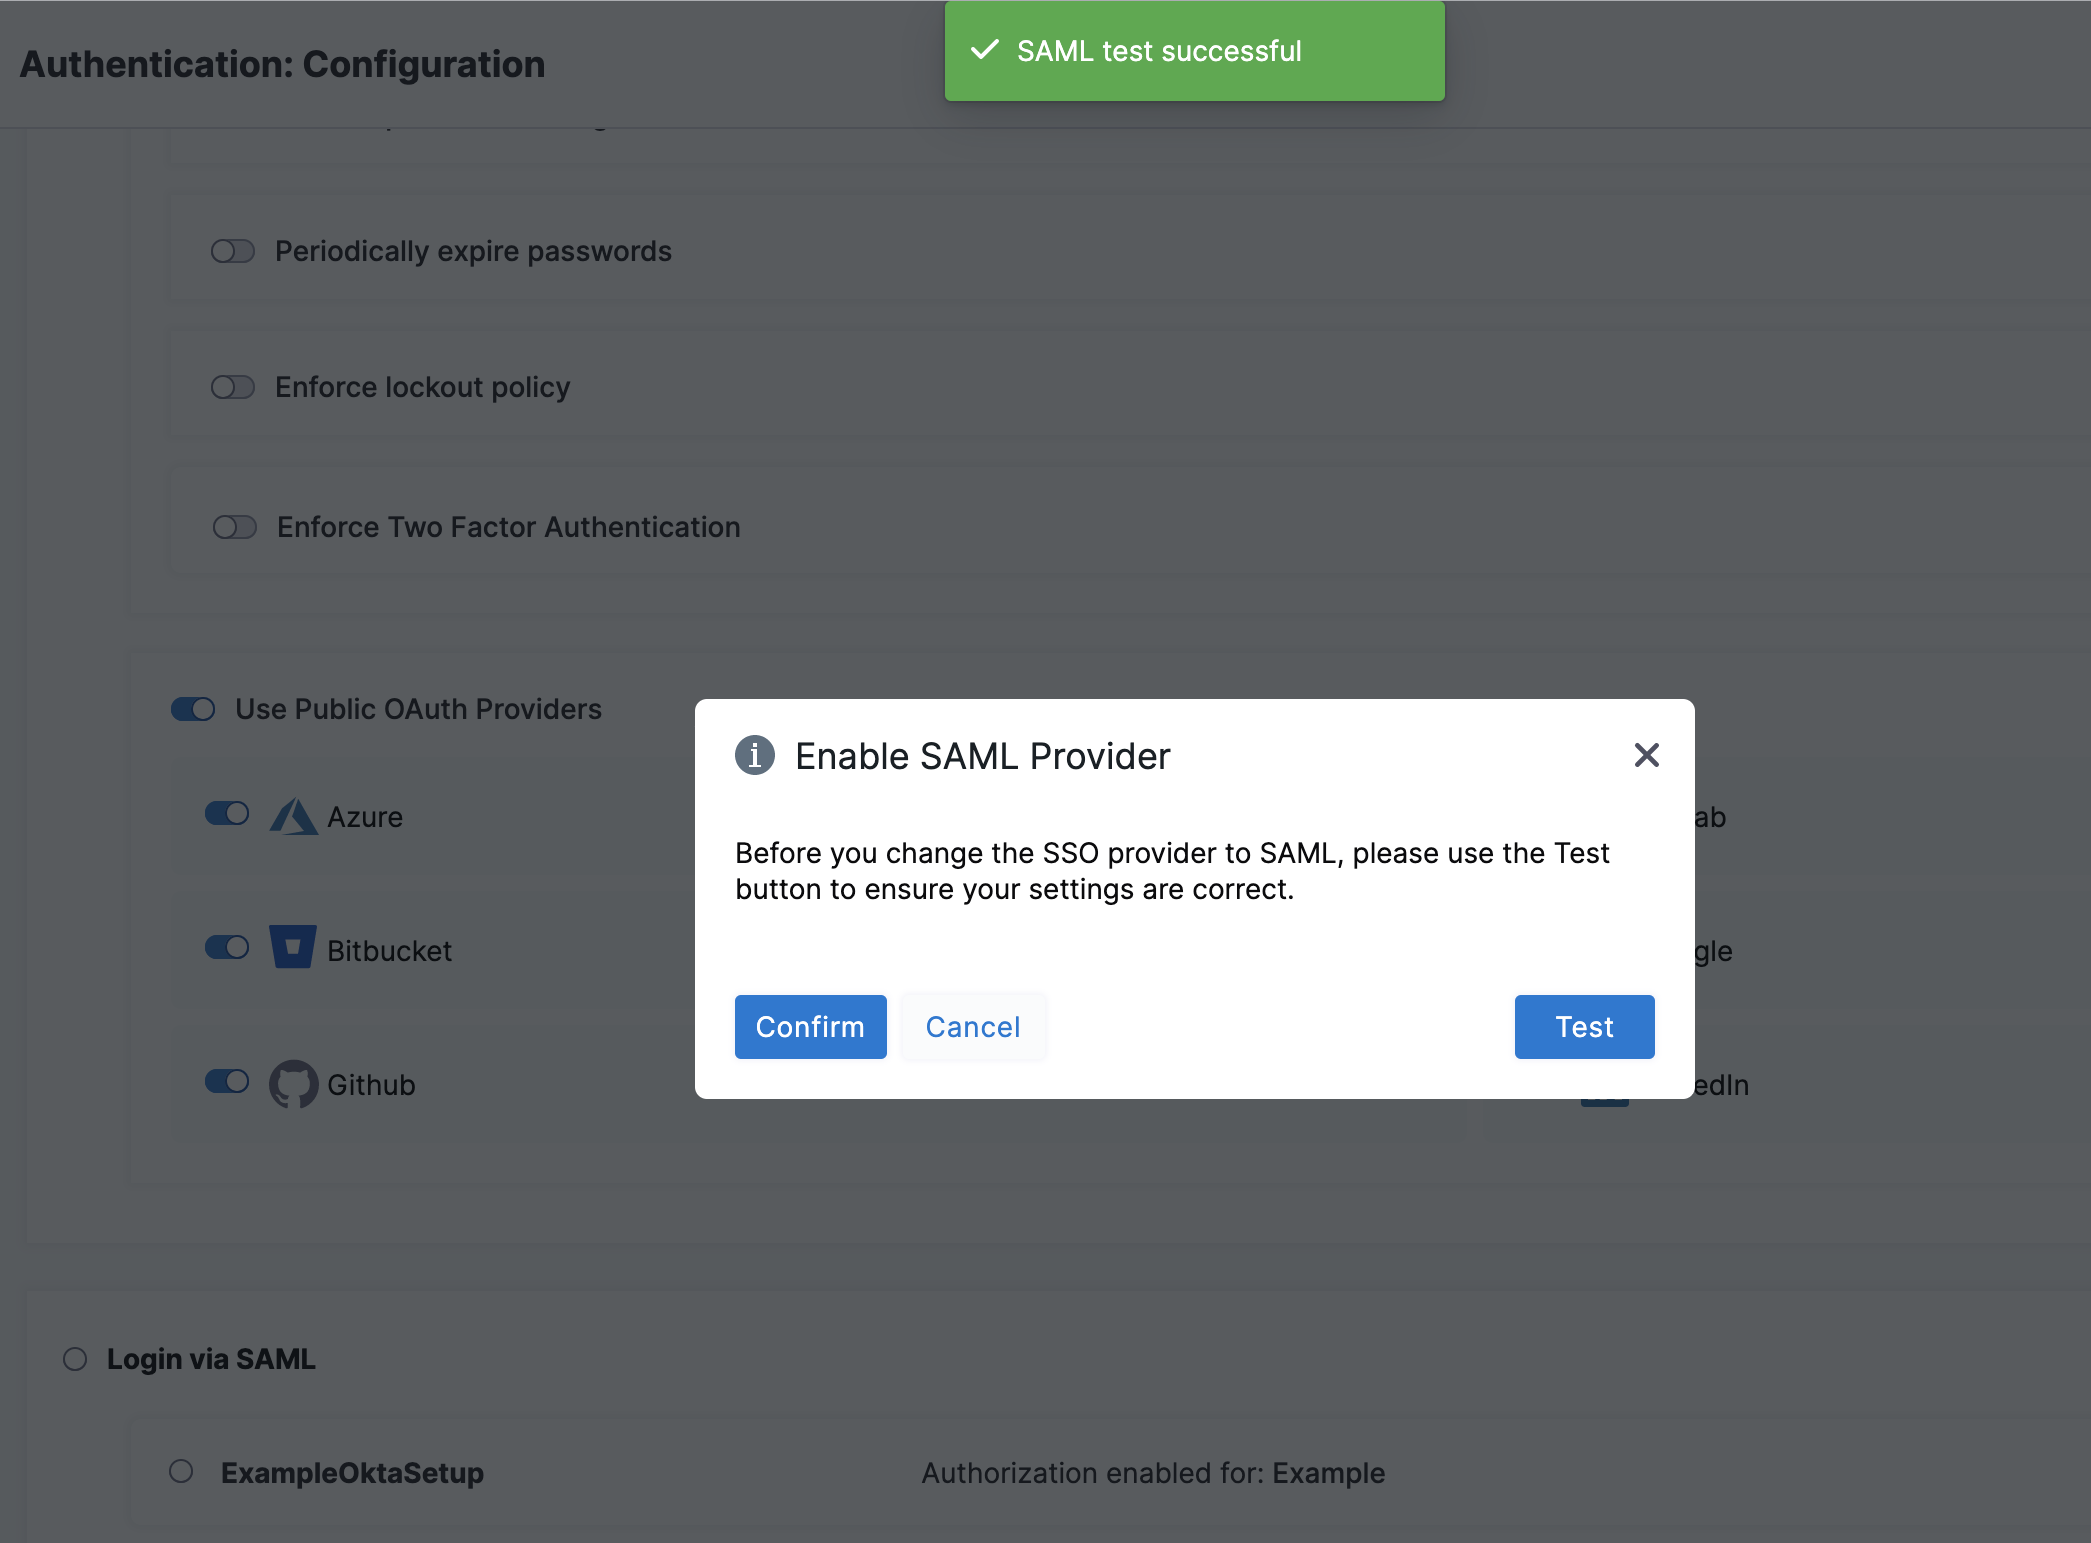
A new browser tab opens where you log in to Okta.
If the connection test succeeds, Harness displays a SAML test successful banner.
- Click Confirm to enable Okta SAML SSO in Harness.
Test SSO configuration
To test the SSO configuration, log into Harness through a different user account. Do this in a separate private browsing (Incognito) window so you can disable SSO in your Harness Administrator account if there are any errors.
If you get locked out of Harness due to an SSO issue, you can log into Harness through local login.
-
In a private browsing window, navigate to Harness.
-
Log in using a Harness user account that has a corresponding email address registered in Okta. If successful, Harness redirects you to the Okta log in page.
-
On the Okta log in page, enter the email address associated with the Harness user account. The Harness account and Okta account can have different passwords. If successful, you are returned to Harness.
If you belong to multiple accounts, confirm the default account is set before attempting to use Harness Local Login.
Step 5: SAML authorization with Okta
Once you have enabled Harness SSO with your Okta app, set up and enable Okta SAML authorization in Harness.
To set up SAML authorization in Harness, link a Harness user group to an Okta user group. When an Okta user in that Okta user group logs in to Harness, Harness adds them automatically to the associated Harness user group, and the user inherits all permissions and access assigned to that group. Go to RBAC in Harness for more information on permissions.
-
Set up SAML SSO in Harness as described in Set up user accounts in Okta and Harness.
When you enable SAML authorization, Harness authorizes the same Harness users that are authenticated using your SAML provider.
noteHarness uses email addresses to match Harness user accounts with Okta user accounts. Make sure the email addresses of your registered Harness users match the Okta users you want to authenticate and authorize.
-
In Okta, create a user group and add users to the group, if you do not already have one.
a. Sign in to Okta using an admin account. b. Under Directory, select Groups, and then click Add Group.
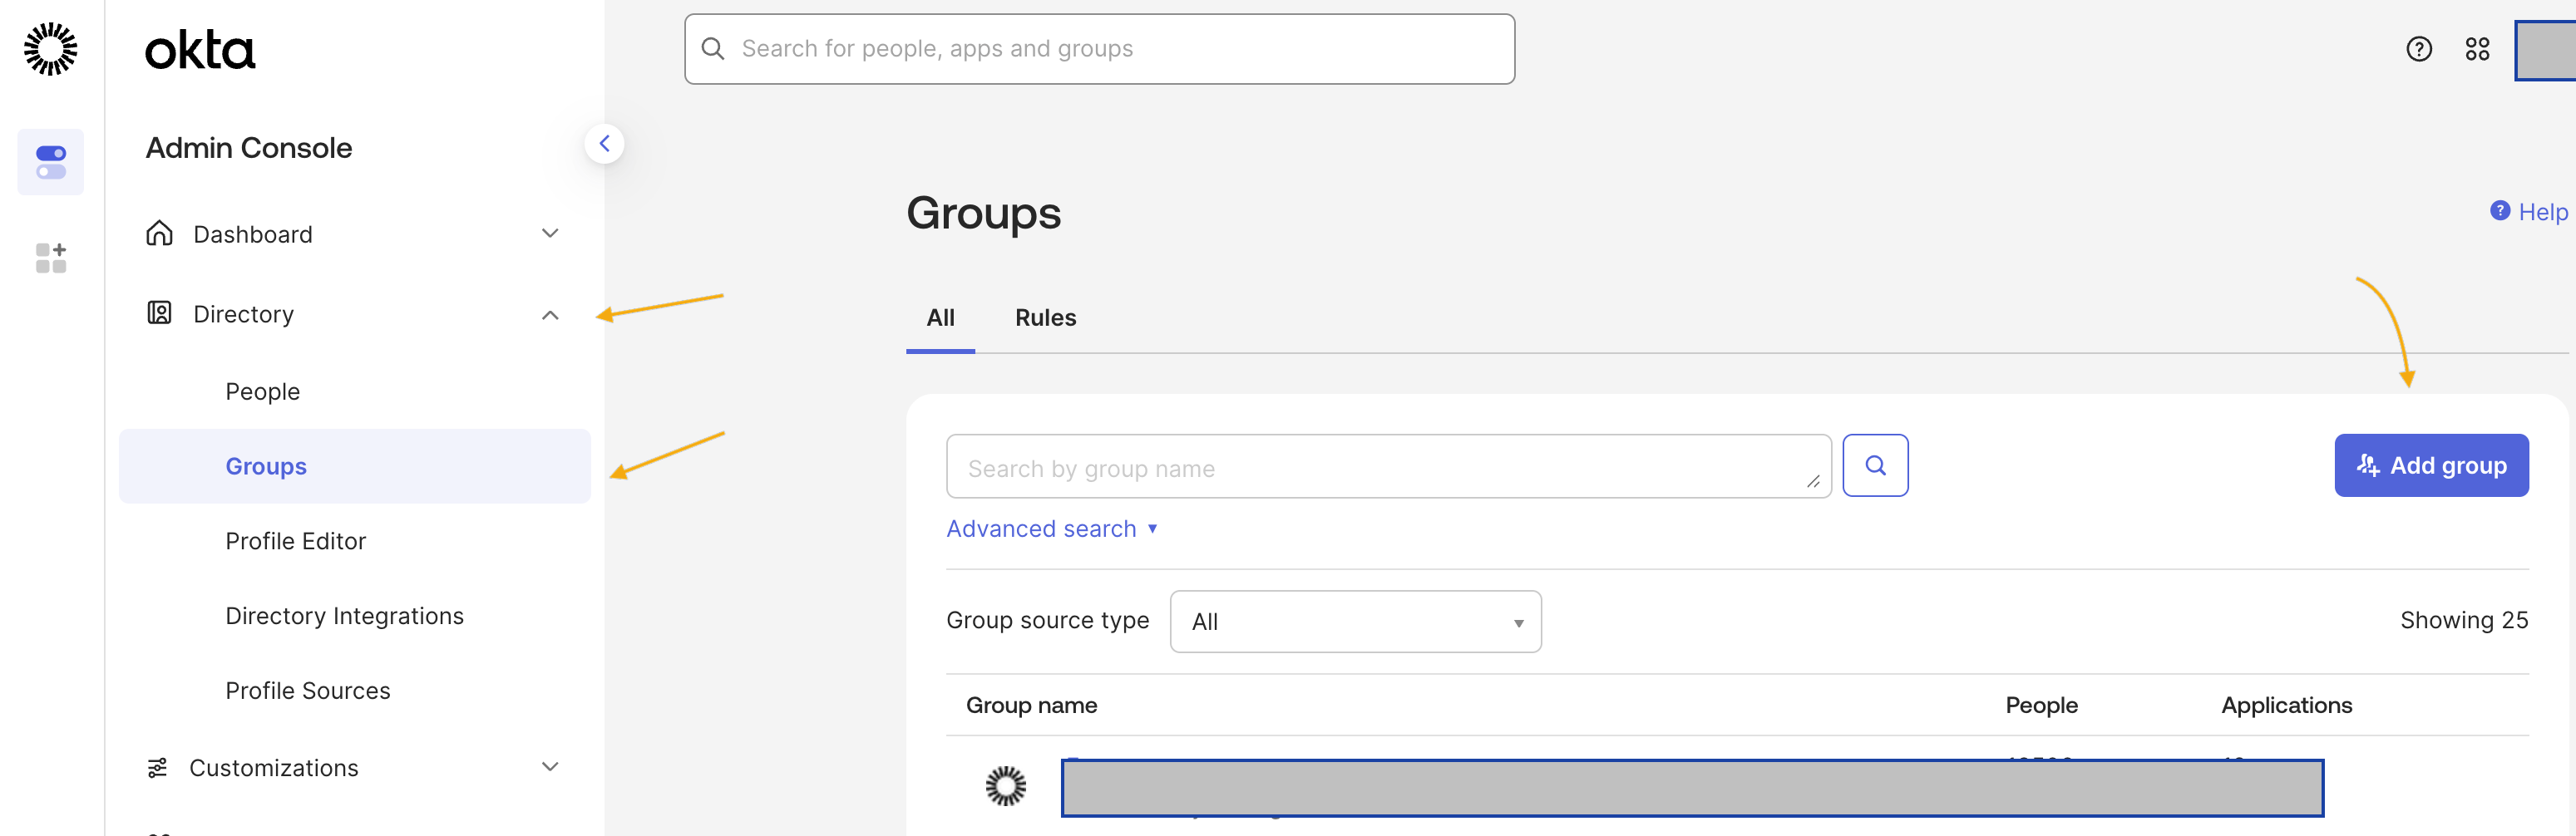
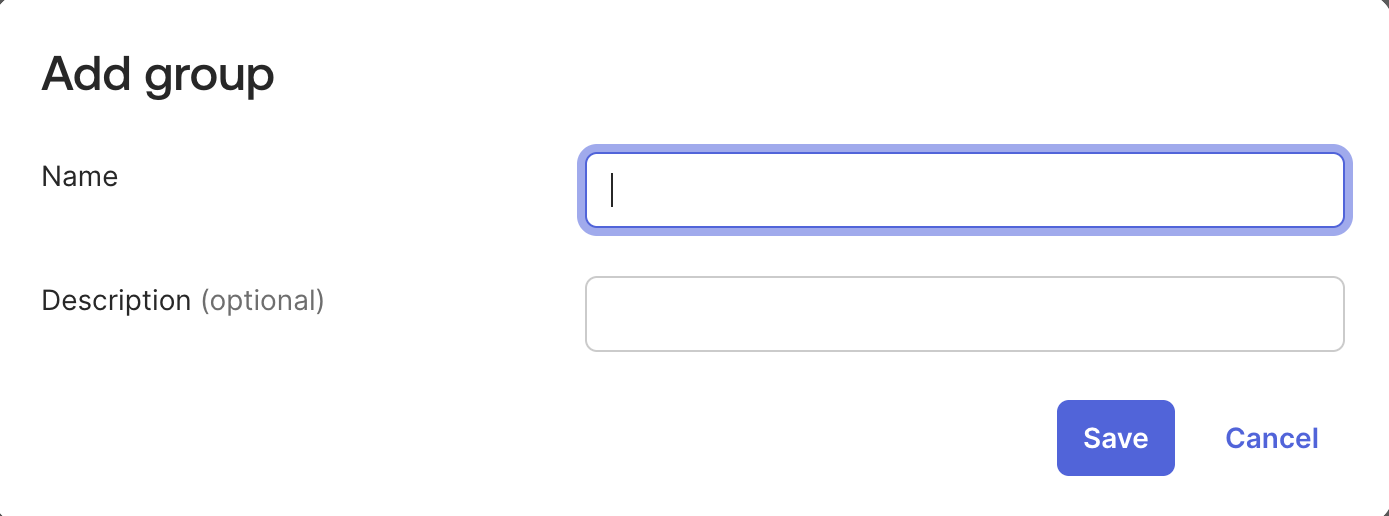
The Add Group dialog opens.
c. Enter a Name and Group Description for your group. Click Save.
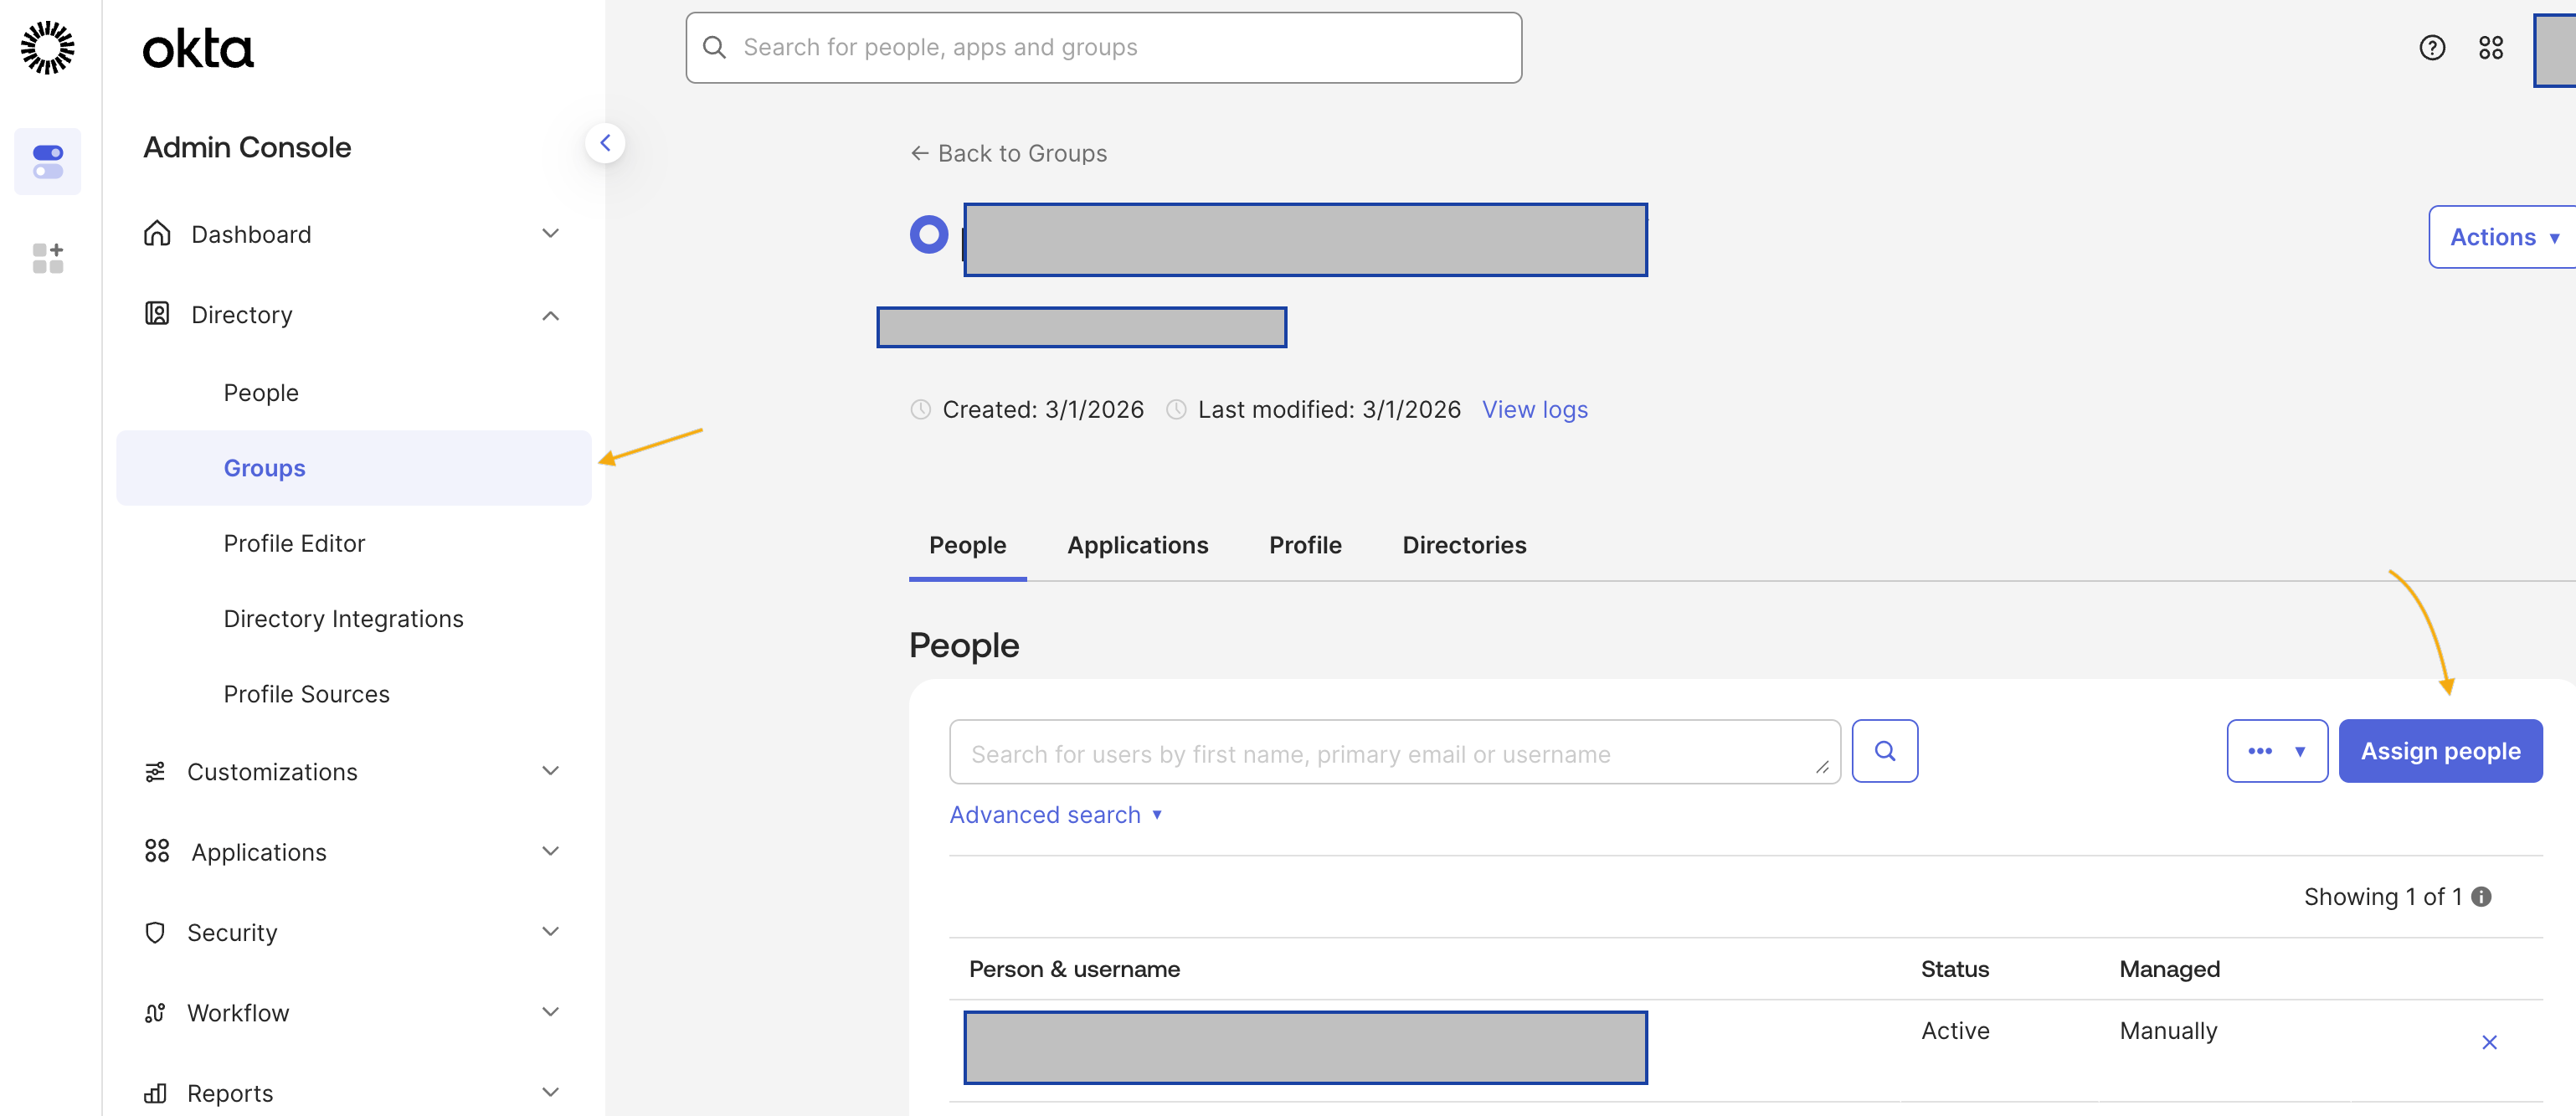
d. Okta redirects you to the Groups page. Search for the group you created, and then select it. e. Click Assign People. Find and add members to your group. Click Done.
-
Make note of the Okta group name. You need it later to link the Okta group to a Harness user group.
-
Make sure the Okta user group is assigned to the same Okta SAML provider app you use for Harness SAML SSO.
-
In Okta, under Directory, select Groups.
-
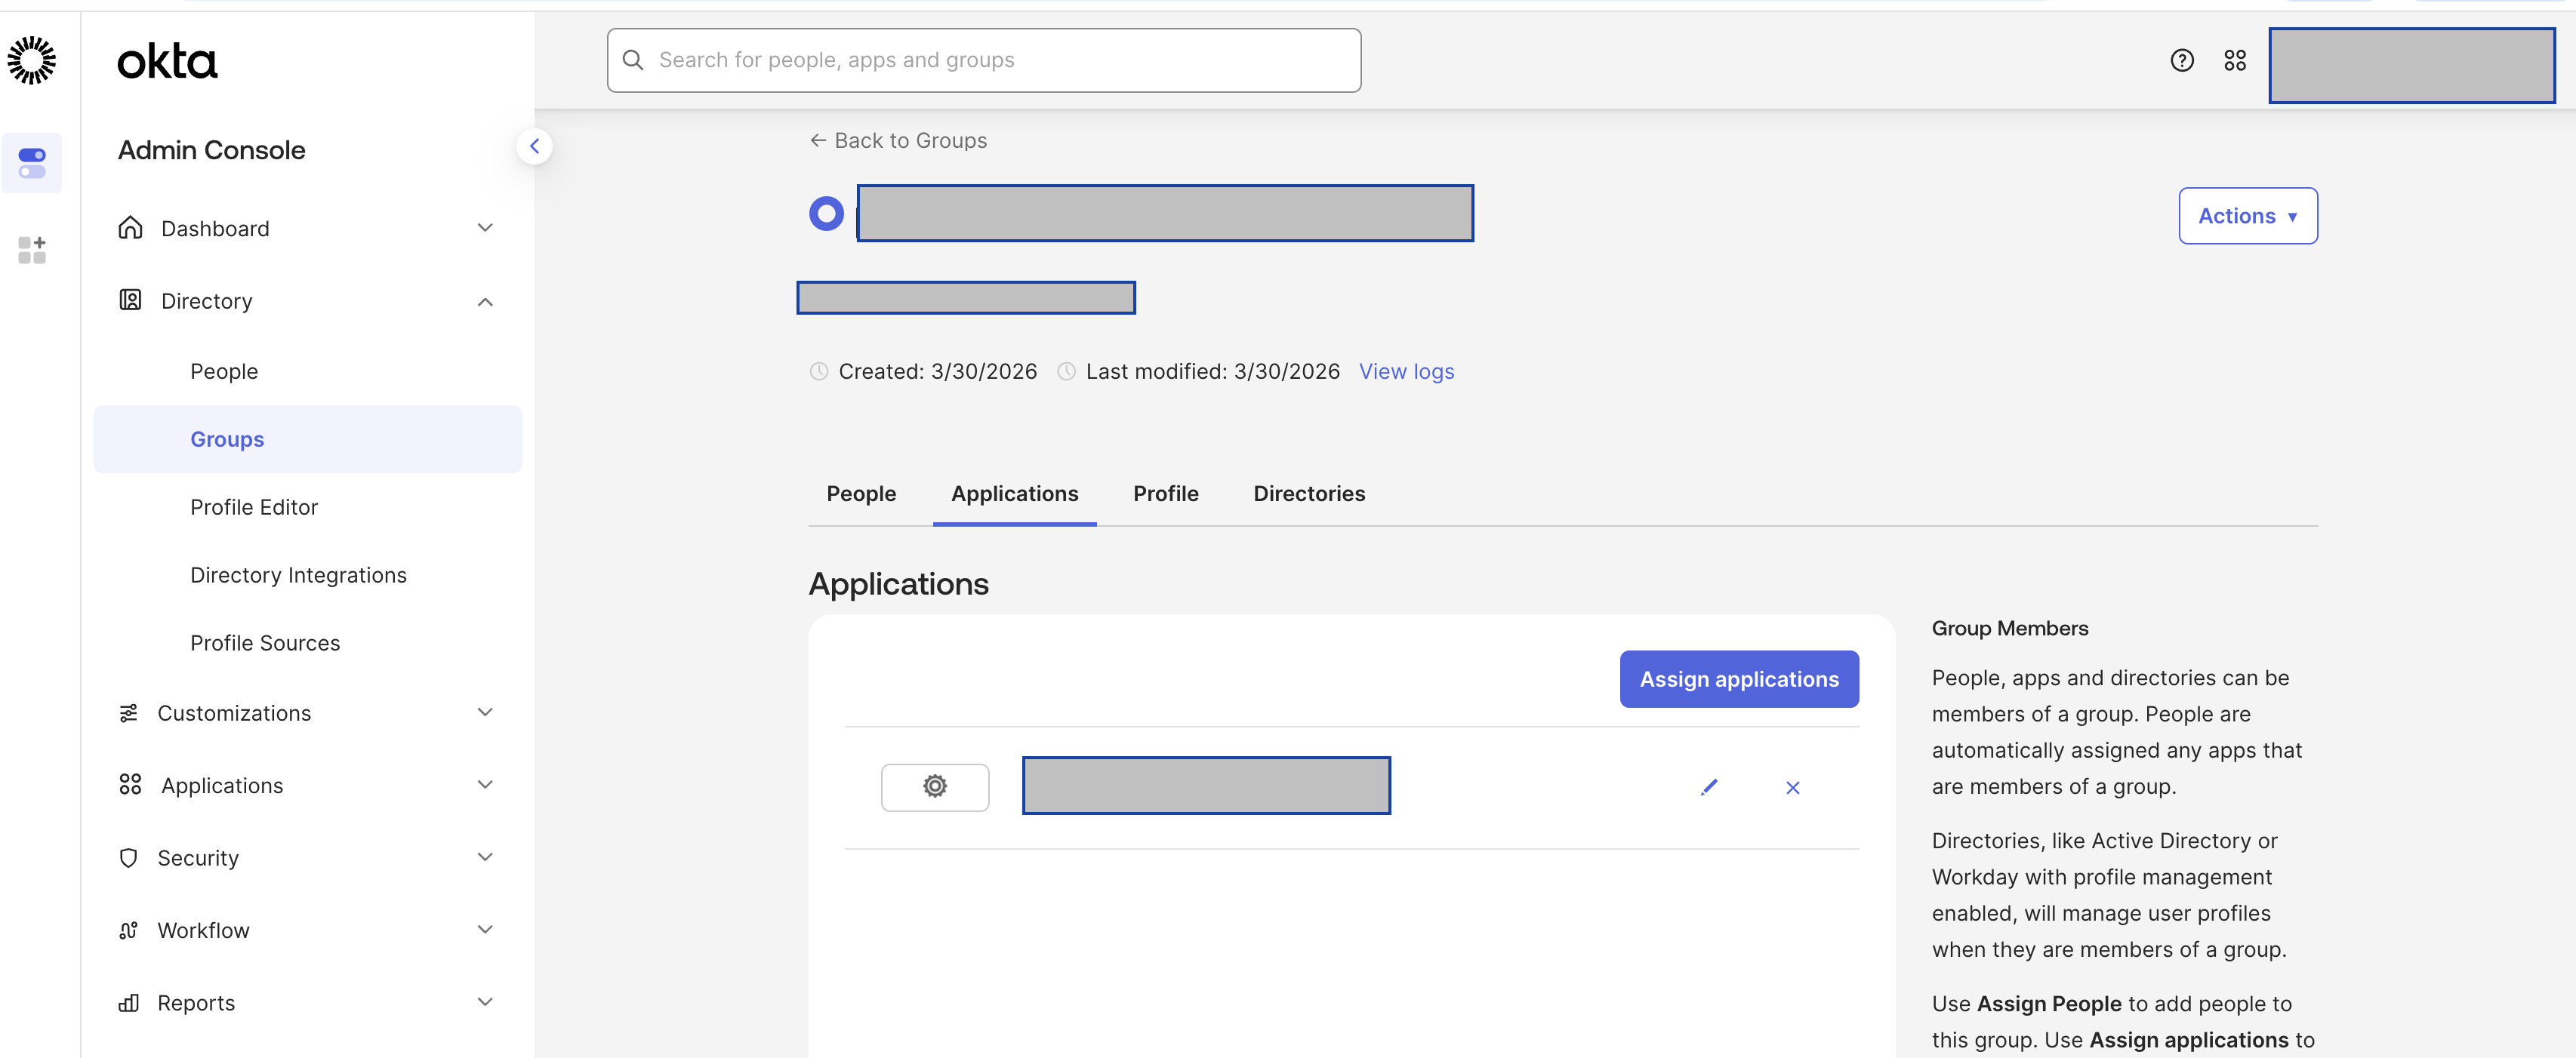
Find and select your Okta user group.
-
Click Assign applications. Find your Harness Okta app and click Assign.
-
Click Done.
-
Under Applications, select Applications.
-
Find and select your Harness Okta app.
-
Under Assignments, select Groups, and make sure your Okta user group is listed there.
-
-
Configure the Group attribute statements in your Okta app. Later, you use the name configured under Group attribute statements to enable SAML authorization in Harness.
a. In Okta, select Applications, and then select your Harness Okta SAML SSO app.
b. Follow steps 11 to 14 specified in create app integration.
c. Under Group attribute statements, ensure that the Filter is set to Matches regex and is set to the .* value.
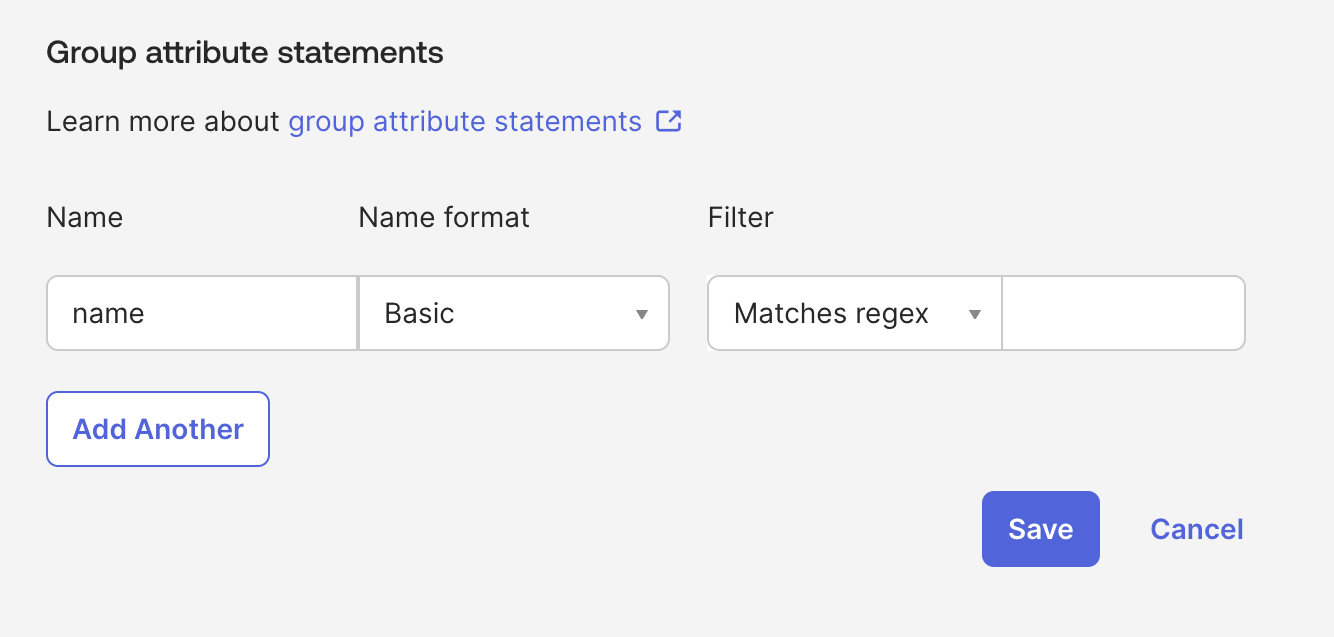
The
Group Attribute Nameis different from anOkta Group Name. Your company might have many groups set up in Okta, and the Group Attribute Name filters the groups that you want to authenticate to Harness. -
In Harness, navigate to Account Settings, and select Authentication.
-
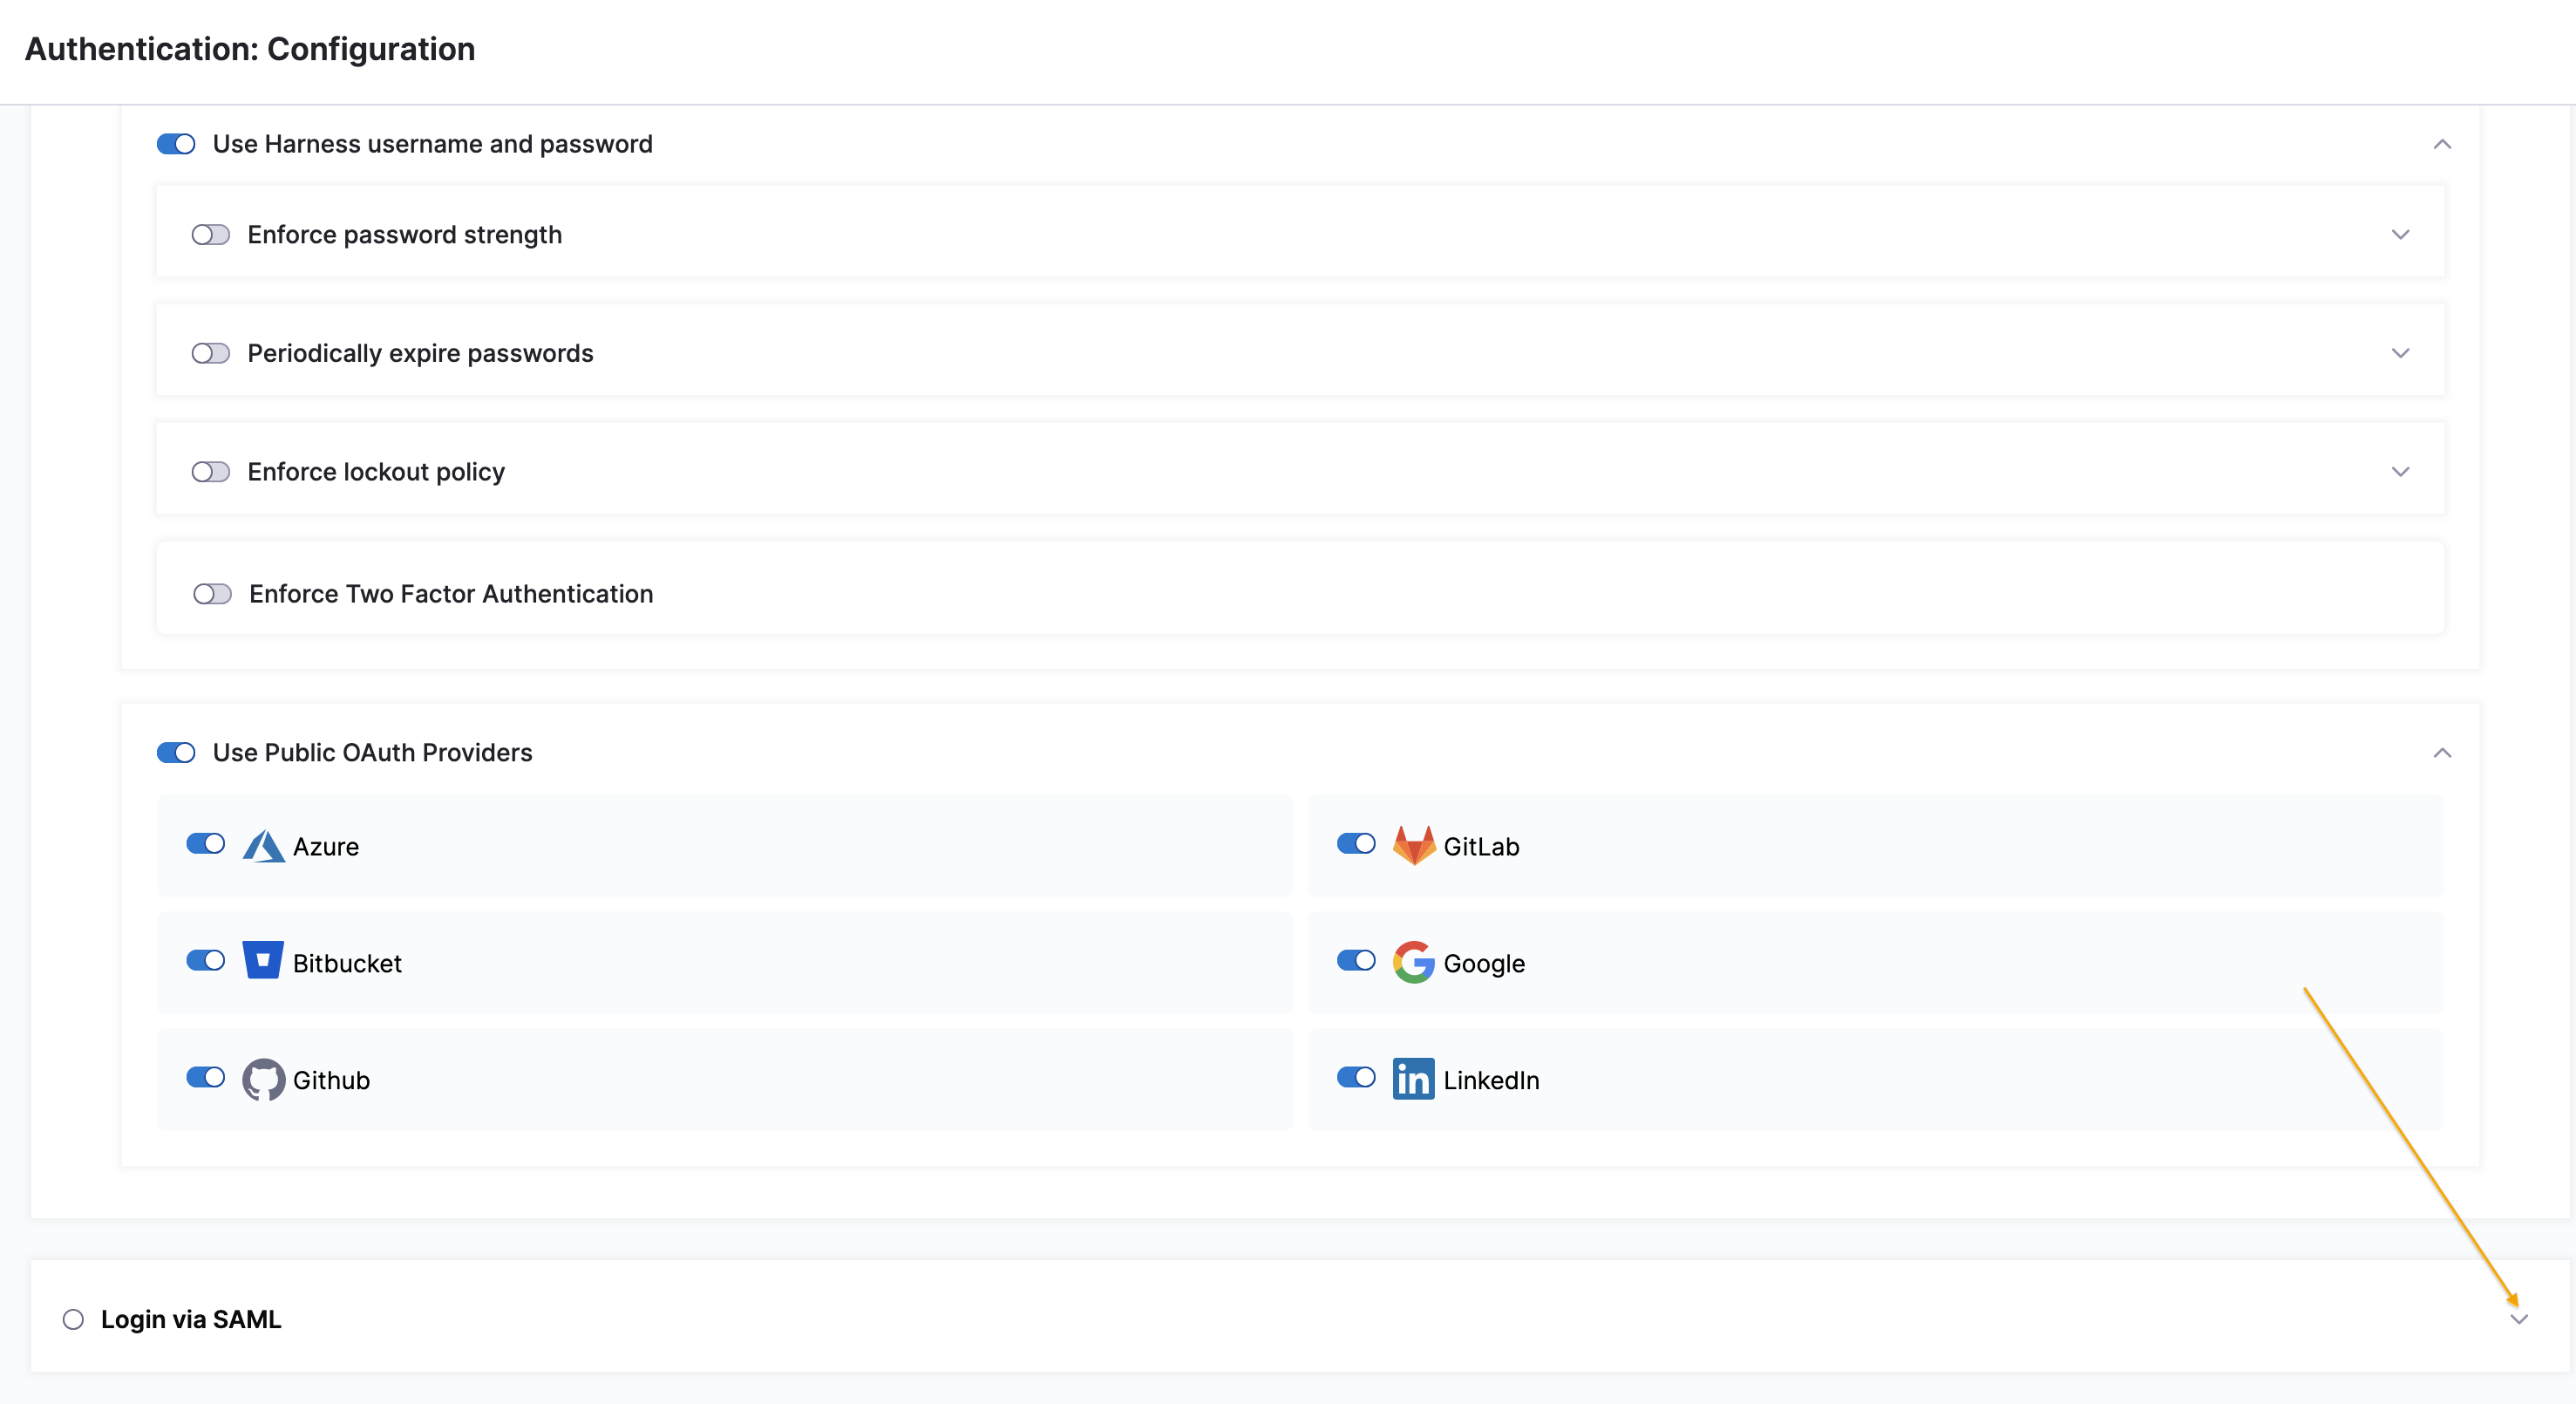
Select the arrow to expand the Login via SAML section.
-
Select More options (⋮) next to your Okta provider configuration, and then select Edit.

-
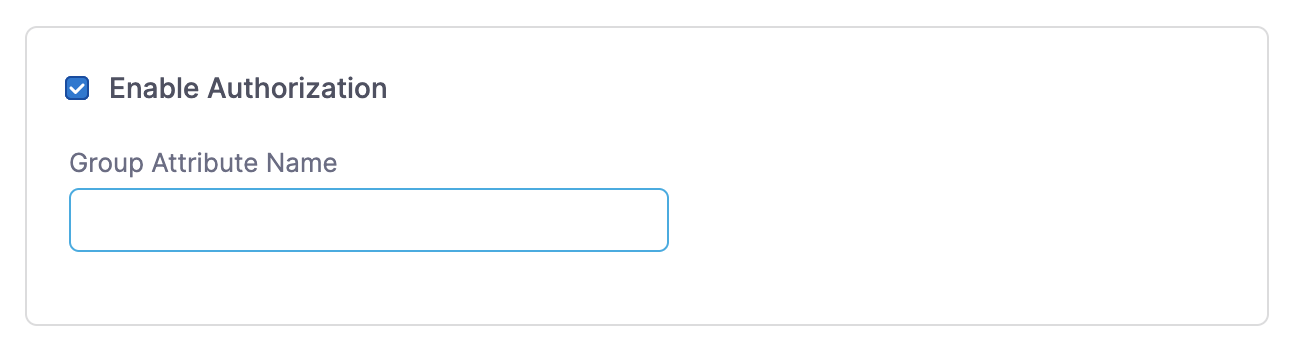
On the Edit SAML Provider page, select Enable Authorization.
-
Enter the Group Attribute Name.
-
Click Add. Your Okta configuration now uses the Group Attribute Name for authorization.
-
Link your Okta user group to a corresponding Harness user group. You can create a user group or use an existing group if your Harness user account is a member and your user account is registered under the same email address as in Okta.
-
In Harness, navigate to Account Settings, and select Access Control.
-
Select User Groups in the header, and locate the user group that you want to connect to your Okta user group.
-
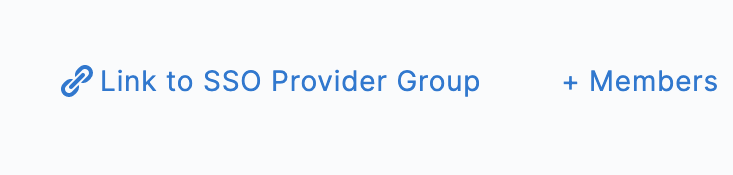
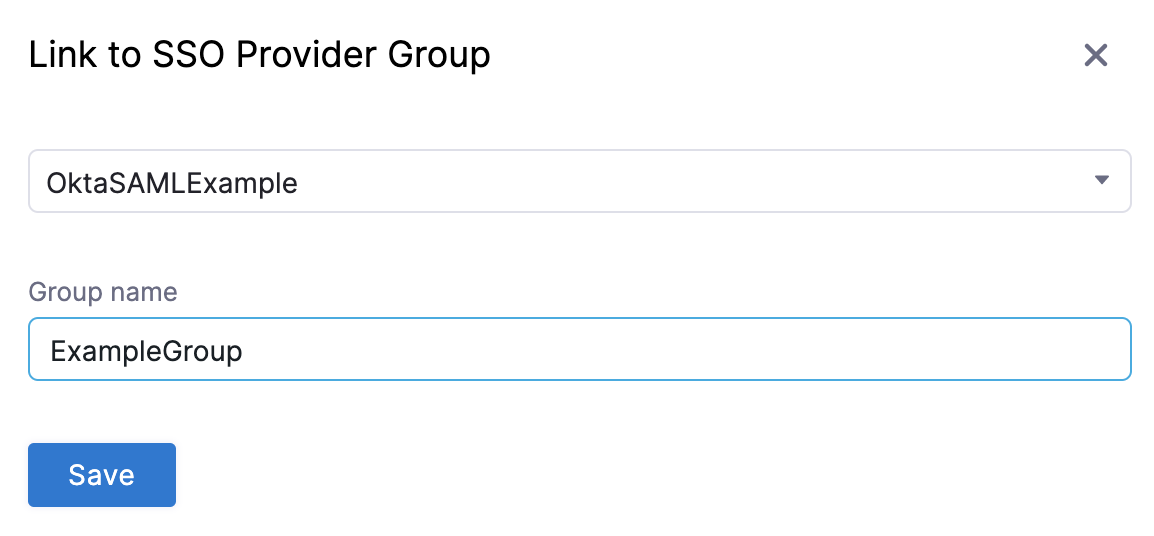
Select Link to SSO Provider Group.
-
In Search SSO Settings, select your Okta SAML SSO configuration.
-
Enter the Okta Group Name, and click Save.
-
Repeat these steps if you need to connect more user groups.
-
Test SAML authorization
To test the SAML authorization configuration, log into Harness through a different user account.
-
Follow the steps mentioned in test configuration.
-
In your other browser window (where you are logged in to your admin account), make sure the user appears in the Harness user group. Navigate to Account Settings, select Access Control, select User Groups in the header, select the user group you linked to Okta, and make sure the user you just logged in with is listed as a member.
By being a member of this user group, the user receives the permissions and access granted to that group. Go to RBAC in Harness for more information on group permissions.
Just-in-time (JIT) provisioning
Harness supports SAML configuration with or without JIT user provisioning. Go to Just-in-Time (JIT) user provisioning for more information on how Harness creates users on first SAML login when JIT is enabled.
Delink groups
If you no longer want a Harness user group to be connected with an Okta user group, delink the groups without losing group members.
Delinking groups is required to remove a SAML SSO provider configuration from Harness. You cannot delete the SAML SSO provider from Harness until you have delinked all associated Harness user groups.
-
In Harness, navigate to Account Settings, and select Access Control.
-
Select User Groups in the header, and locate the user group that you want to delink.
-
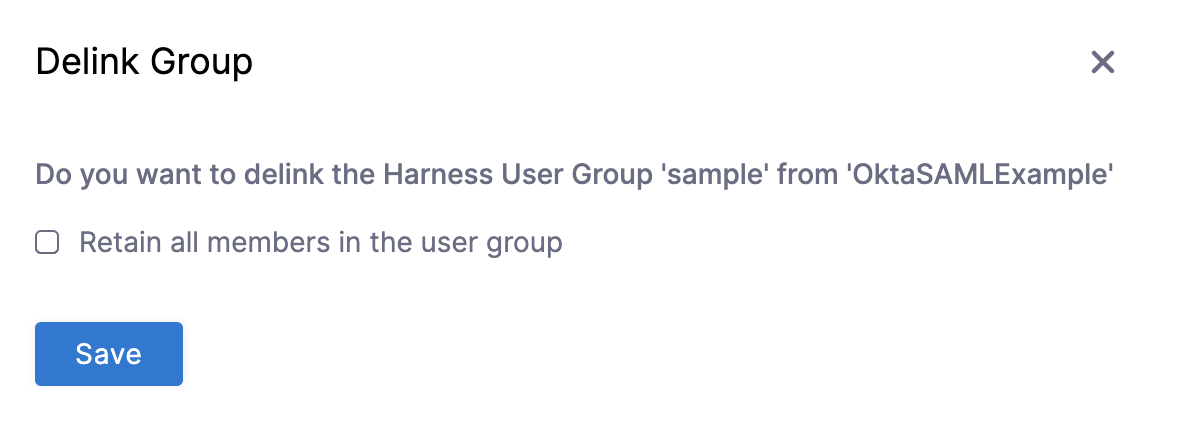
Select Delink Group.

-
On the Delink Group window, select Retain all members in the user group to keep the users (as local Harness user accounts) in the Harness user group. If unselected, the groups are delinked and the group members who were authenticated through Okta are removed from the Harness user group.
-
Click Save.
Troubleshooting
SAML assertion validation failed when signing in to Harness with Okta
Ensure the SAML Endpoint URL from Harness is entered in the Single sign-on URL field in Okta. Verify the Audience URI (SP Entity ID) is set to app.harness.io. Confirm users or groups are assigned to the Harness application under the Assignments tab.
Related articles
- SAML SSO with Microsoft Entra ID: Configure Microsoft Entra ID as a SAML SSO provider in Harness.
- SAML SSO with OneLogin: Configure OneLogin as a SAML SSO provider in Harness.
- SAML SSO with Keycloak: Configure Harness to use Keycloak SAML client as an SSO provider.
- Advanced SAML configuration: Configure advanced SAML options in Harness.