Container Action
Last updated on
What is a Container Action?
A Container Action allows you to execute commands inside a container during chaos experiment execution. This provides powerful capabilities to:
- Execute custom commands in containerized environments
- Perform application-specific operations during experiments
- Run validation or diagnostic commands
- Interact with containerized applications and services
- Implement custom setup or cleanup operations
- Execute scripts or binaries available in container images
When to Use Container Actions
Container Actions are particularly valuable in the following scenarios:
Application Validation
- Health Checks: Execute application-specific health check commands
- State Verification: Validate application state during chaos events
- Data Validation: Check data consistency within containers
- Process Monitoring: Verify that critical processes are running
System Operations
- Configuration Changes: Apply configuration changes during experiments
- Service Restarts: Restart services or processes within containers
- Cache Operations: Clear caches or perform cache-related operations
- Log Collection: Gather application logs for analysis
Environment Setup/Cleanup
- Pre-experiment Setup: Prepare the containerized environment before chaos
- Post-experiment Cleanup: Clean up resources after experiment completion
- Test Data Management: Set up or tear down test data
- State Preparation: Configure specific application states
Diagnostic Operations
- Network Diagnostics: Run network connectivity tests from within containers
- Resource Checks: Monitor resource usage from inside containers
- Dependency Validation: Verify connectivity to dependent services
- Performance Metrics: Collect application-specific performance data
How to configure a Container Action
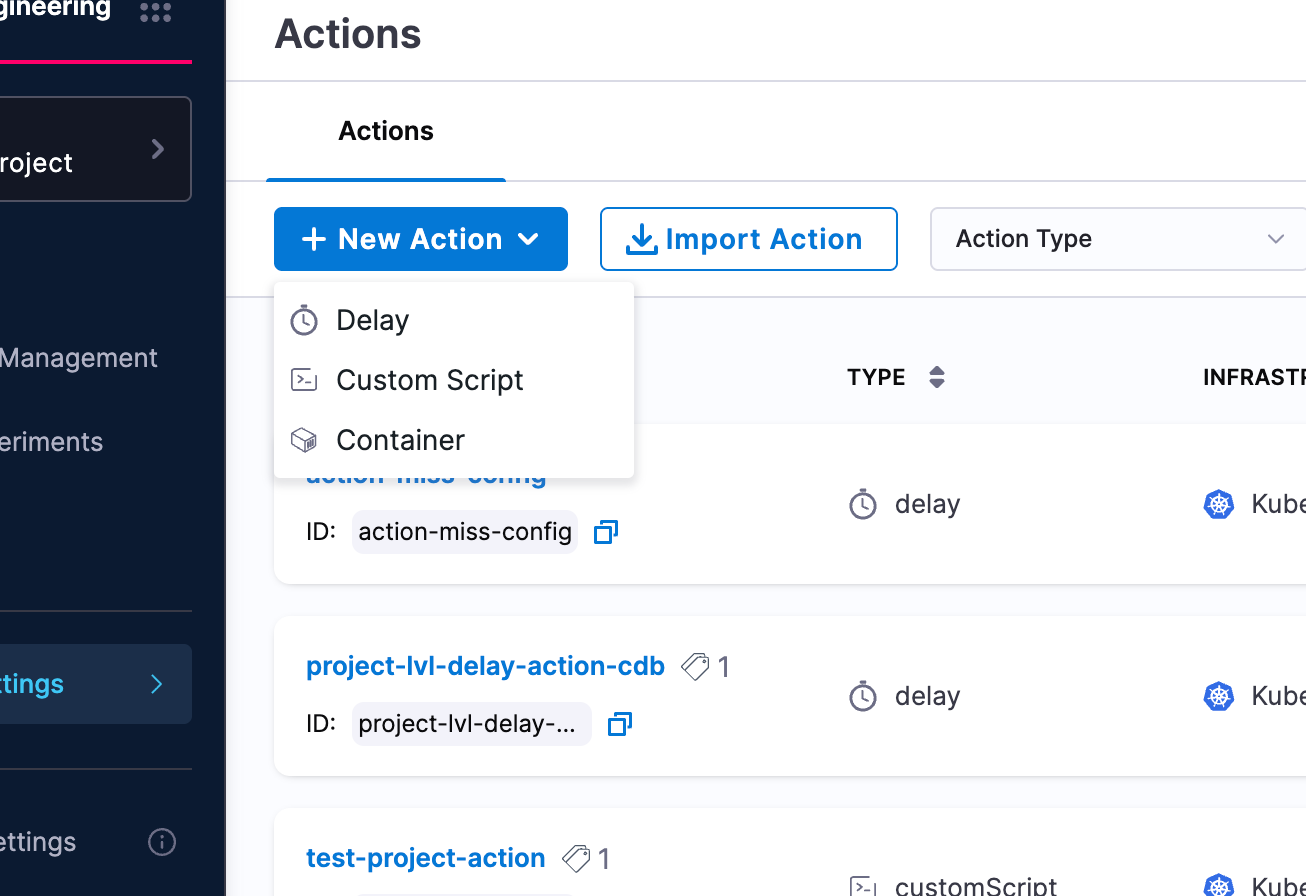
Step 1: Create a New Action
- Navigate to your Probes & Actions and go to the Actions tab
- Click New Action and select Container from the dropdown
Step 2: Configure Metadata
Configure the following parameters for your container action:
- Name: Provide a descriptive name for the container action
- Description (optional): Add a description to explain the action's purpose
- Tags (optional): Add tags for better organization and filtering
- Infrastructure Type: Select the target infrastructure (Kubernetes)

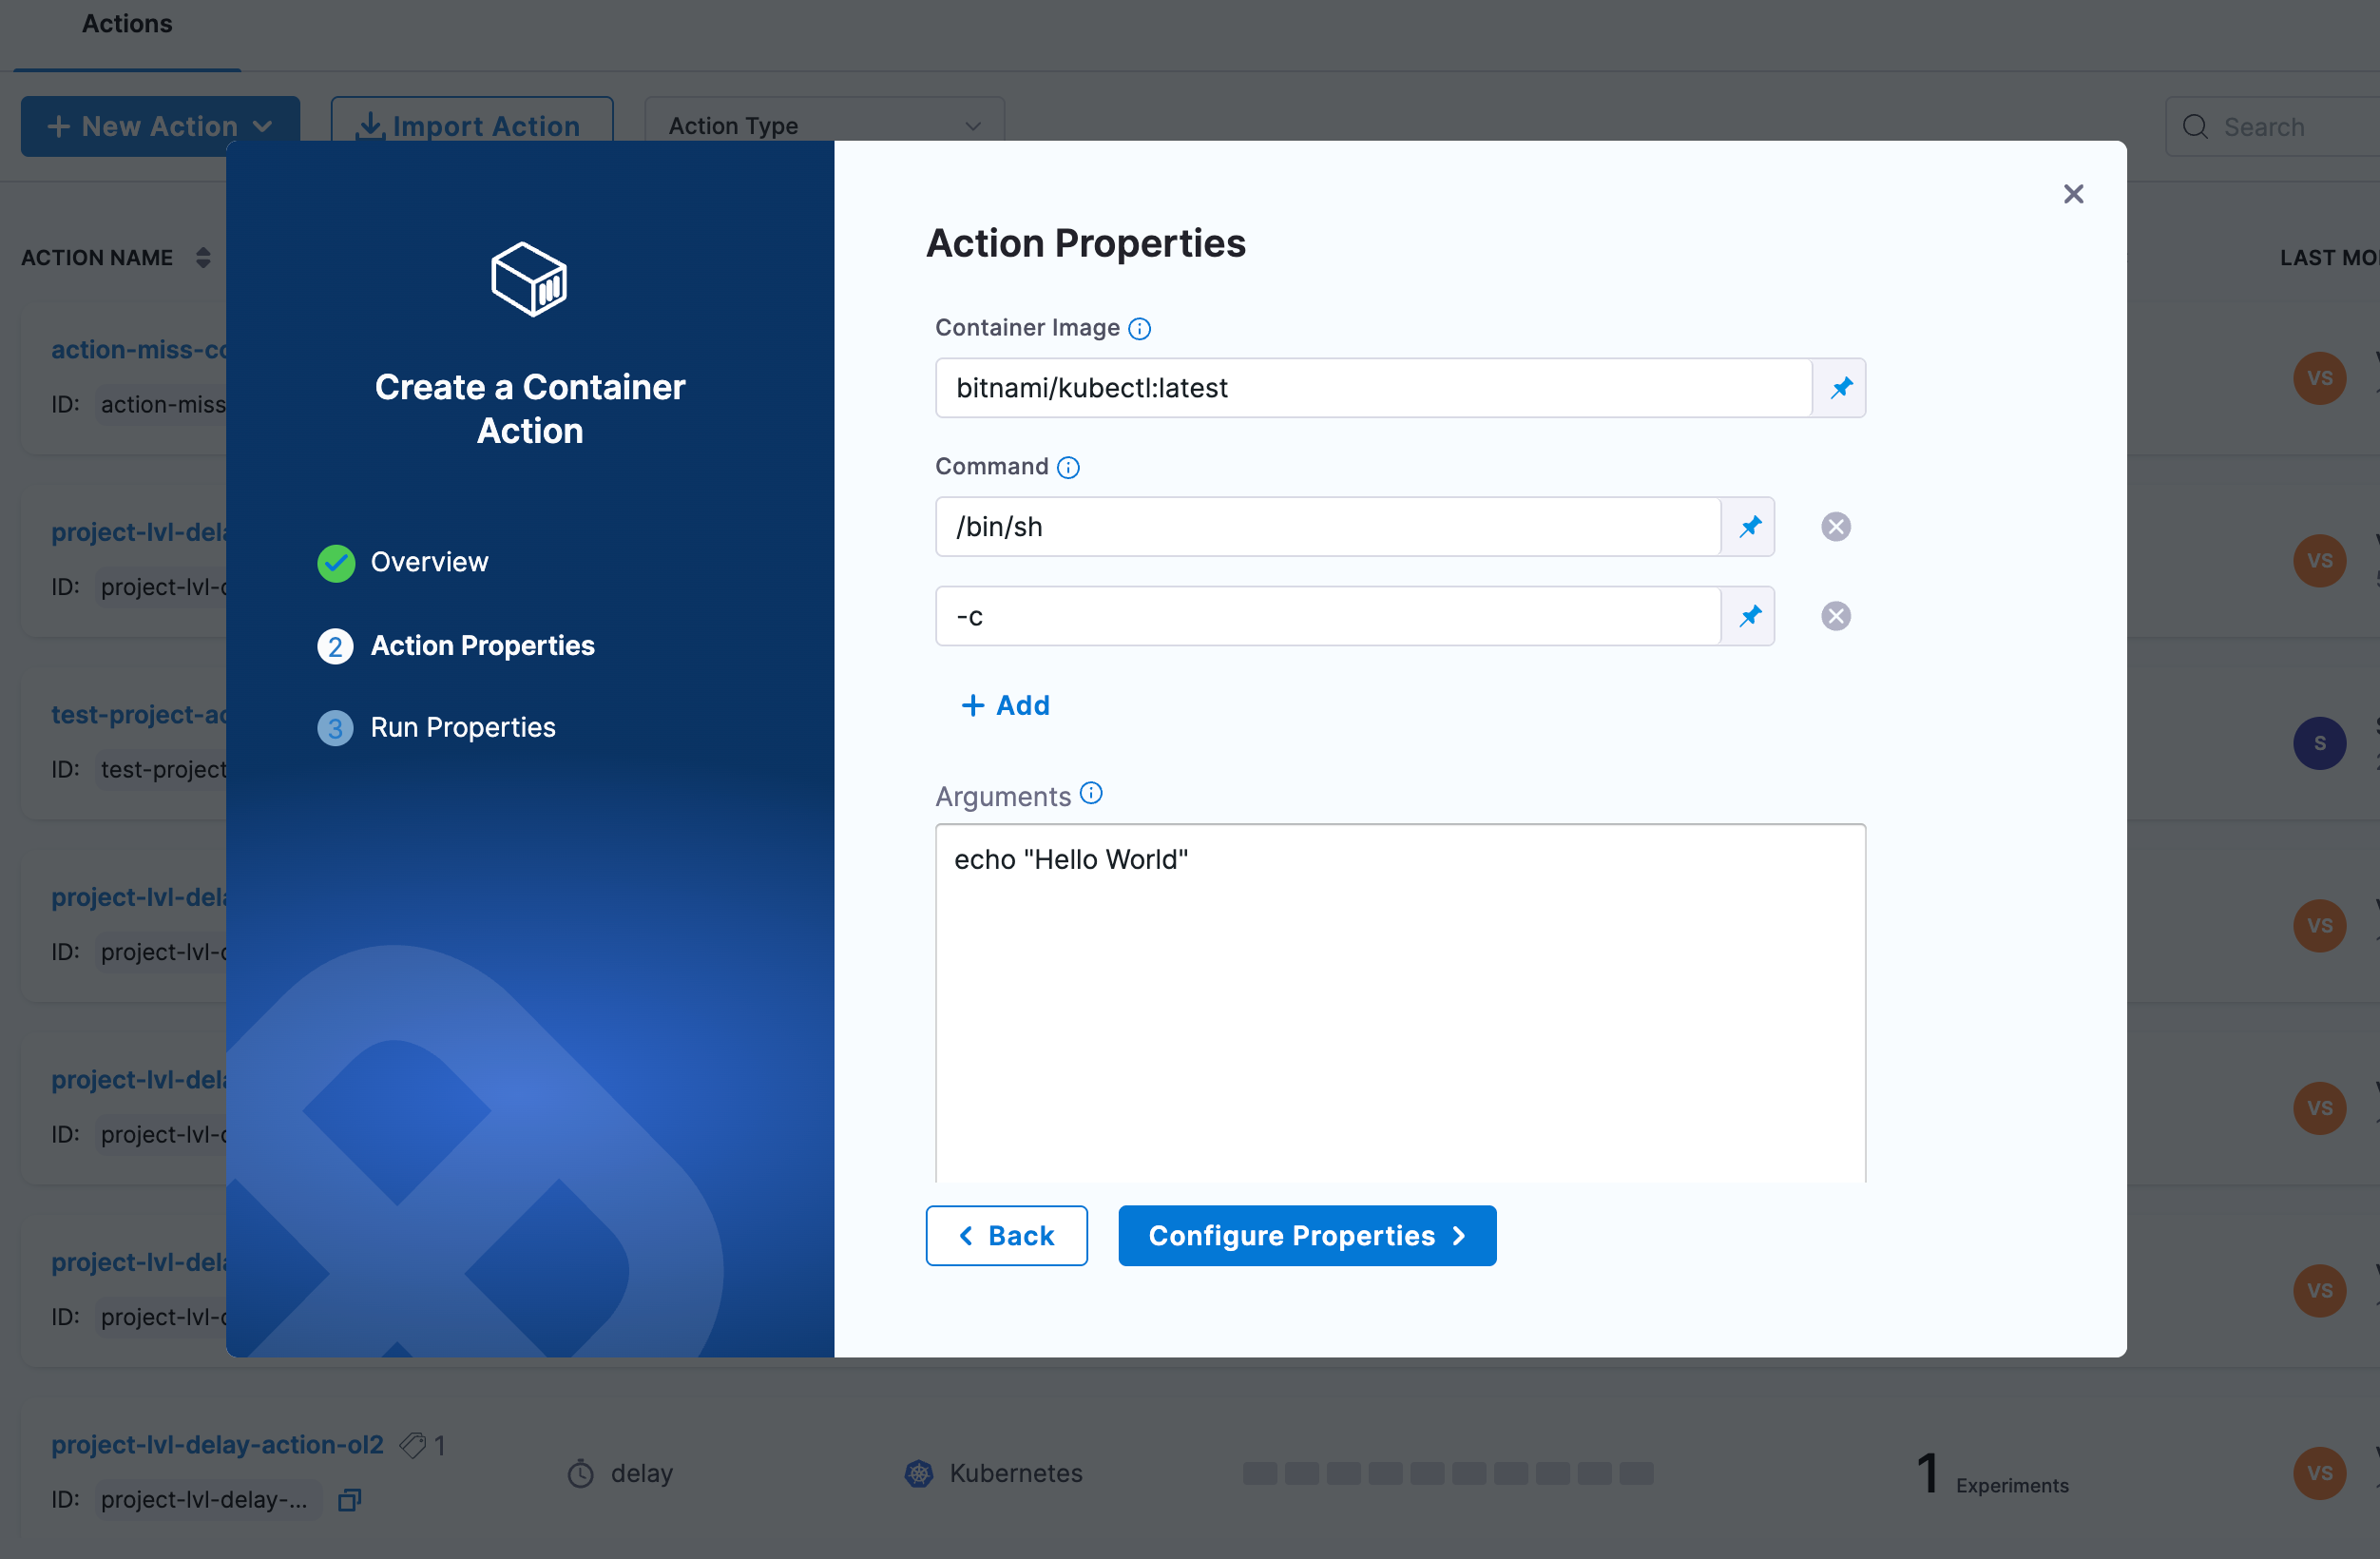
Step 3: Configure Action Properties
In the Action Properties section, configure the container and command details:
- Container Image: Specify the container image to use (e.g.,
bitnami/kubectl:latest,busybox:latest,alpine:latest) - Command: Specify the command to execute inside the container as an array (e.g.,
/bin/sh,-c)- You can add multiple command arguments by clicking the + Add button
- Arguments: Provide the actual command or script to execute (e.g.,
echo "Hello World") - Environment Variables (optional): Add environment variables as key-value pairs
- Click + Add to add new environment variables
- Namespace: Specify the Kubernetes namespace (default:
default) - Image Pull Policy: Define when to pull the image (
IfNotPresent,Always,Never)
Step 4: Configure Advanced Settings (Optional)
Configure advanced settings as needed:
Advanced Configuration
- Service Account Name: Kubernetes service account to use
- Image Pull Secrets: Secrets for private registries
- Labels and Annotations: Custom metadata for the action container
- Node Selector: Node selection constraints
- Tolerations: Allow scheduling on nodes with matching taints
- Node Affinity: Required or preferred node affinity rules
- Resource Limits: Set memory and CPU limits (e.g.,
512Mi,500m) - Resource Requests: Set memory and CPU requests (e.g.,
256Mi,100m)
Volumes
- Add volumes to mount into the action container with volume name, mount path, and volume source
Volume Mounts
- Specify additional volume mounts with name, mount path, and optional sub path
Security Configuration
- Host Network, HostPID, Host IPC: Use host namespaces
- Allow Privilege Escalation: Allow gaining more privileges
- Read Only Root Filesystem: Mount root filesystem as read-only
- Privileged: Run in privileged mode
- Run As Non Root: Ensure non-root execution
- Run as user and Run as group: Specify user and group IDs
- FS Group: Filesystem group ID for volume ownership
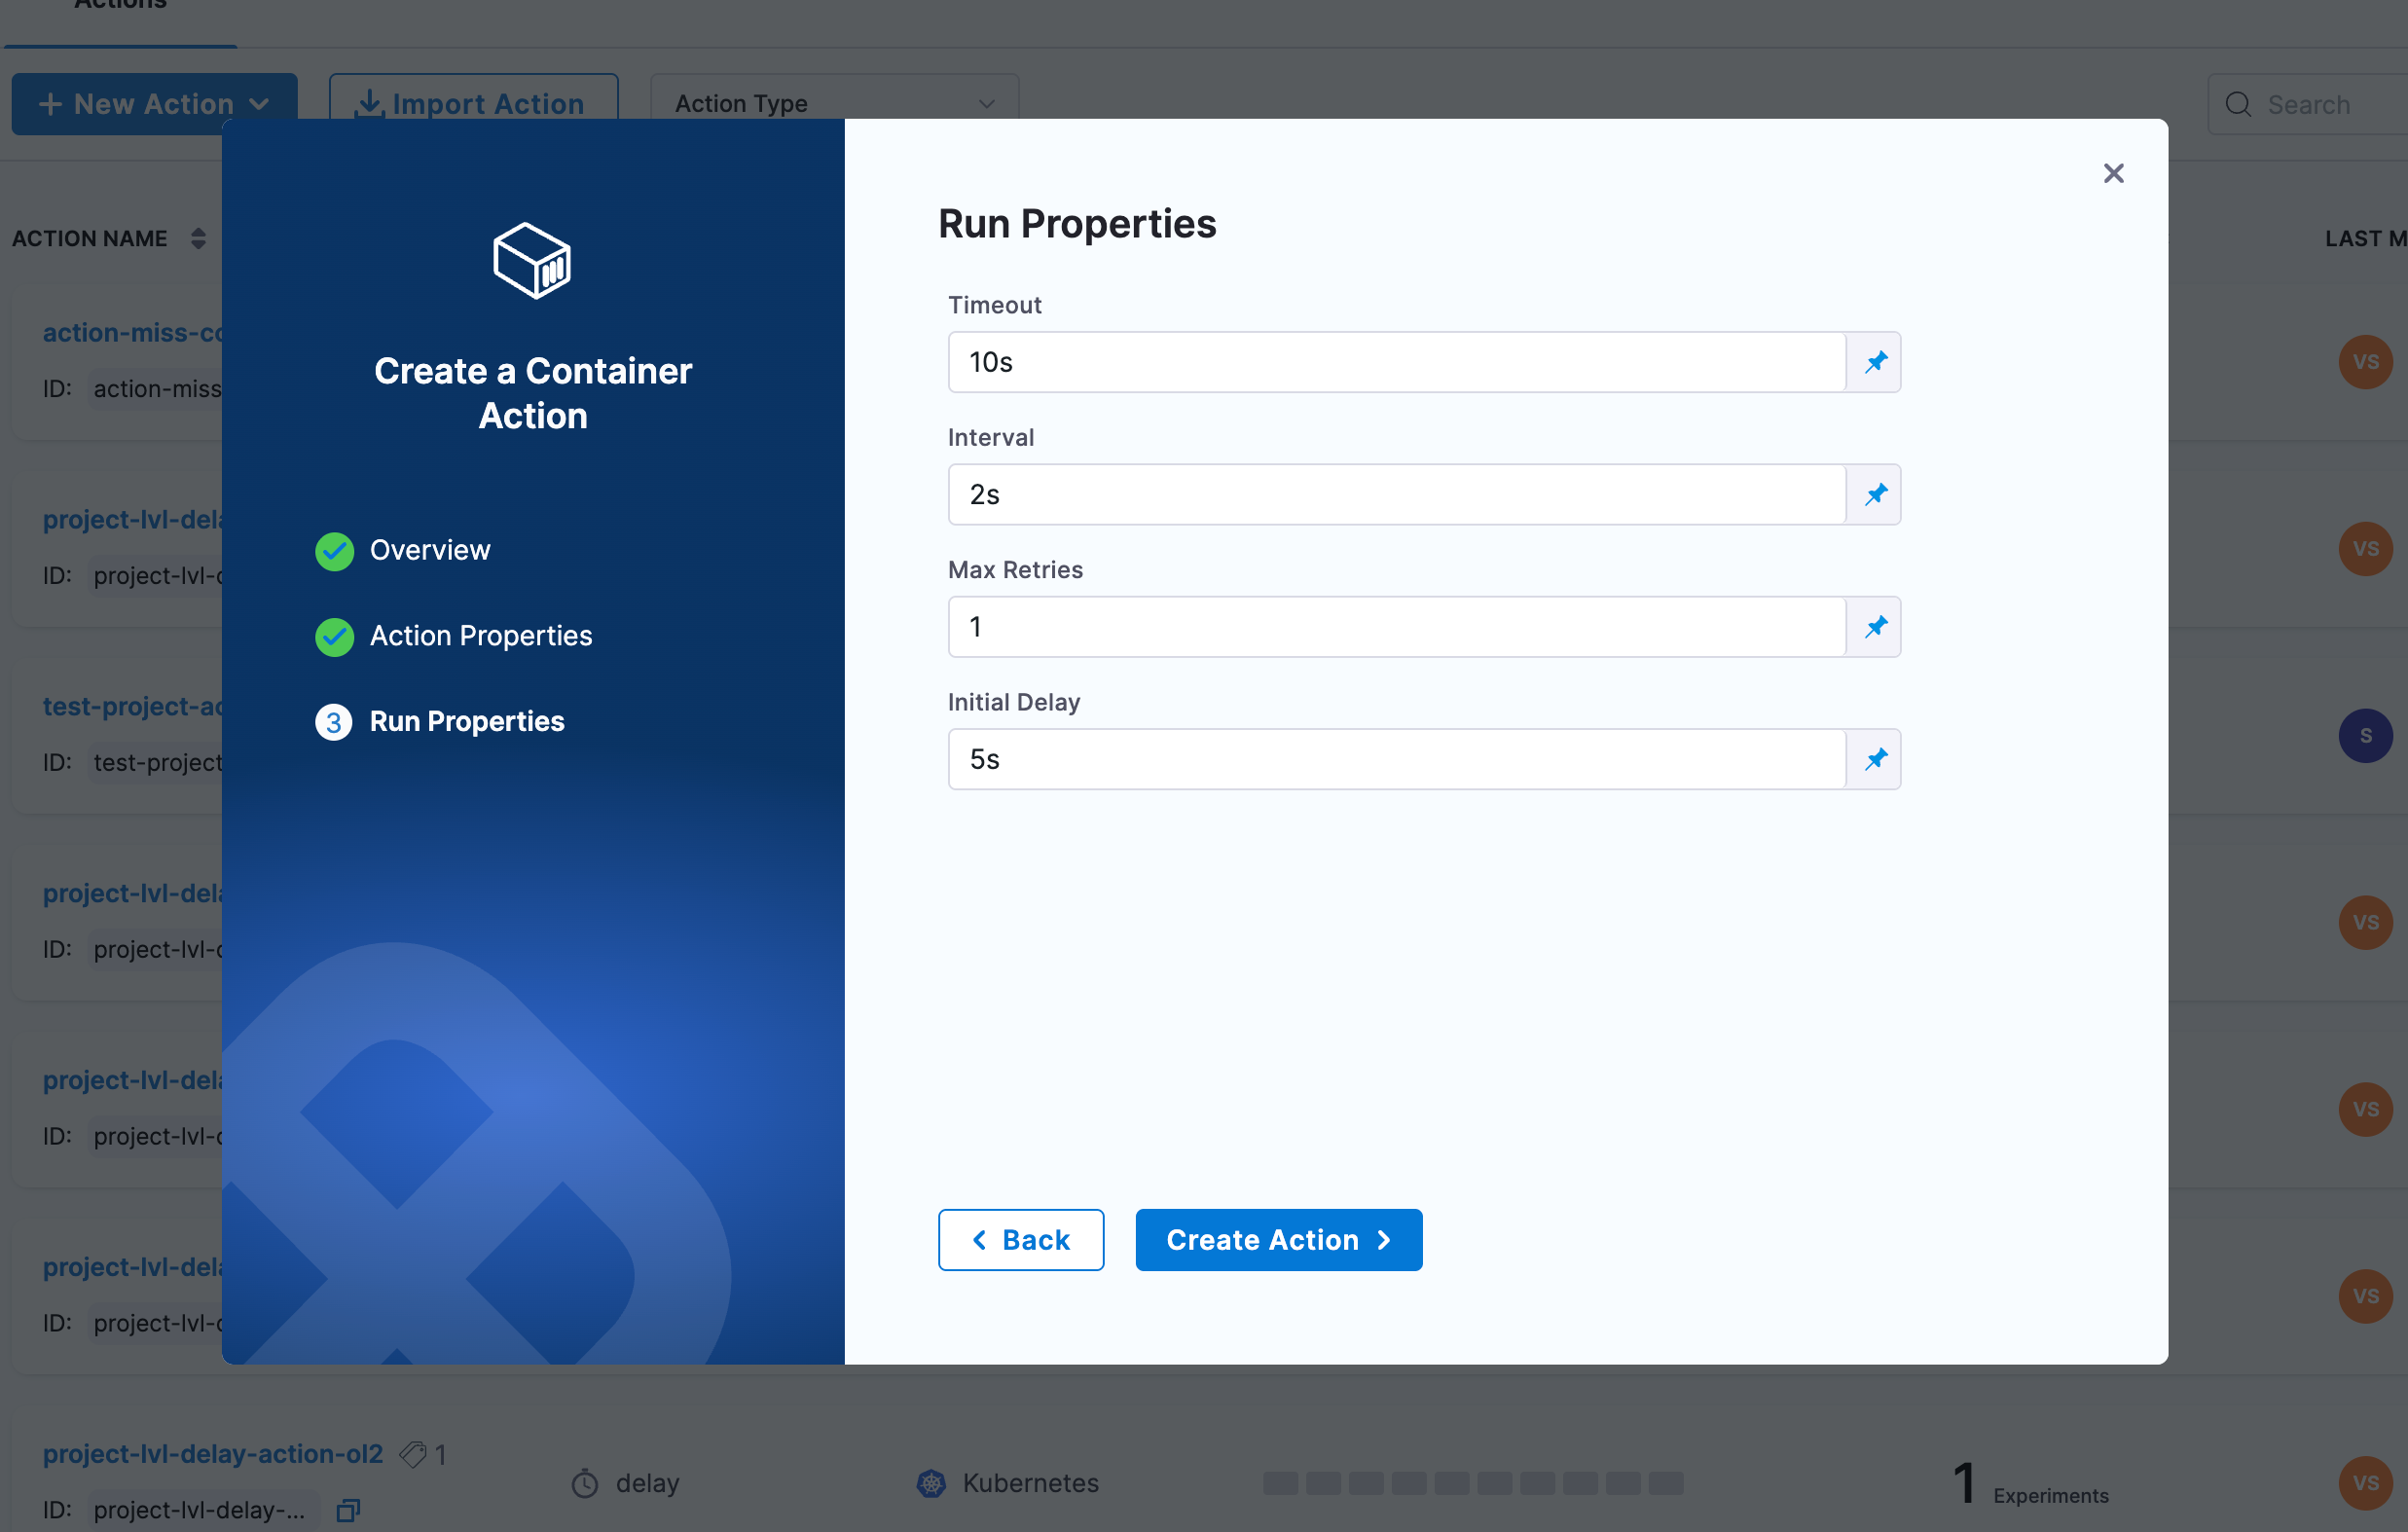
Step 5: Configure Run Properties
Configure the execution behavior:
- Timeout: Maximum time for action execution (e.g.,
10s) - Interval: Time between successive executions (e.g.,
2s) - Max Retries: Number of retry attempts (e.g.,
1) - Initial Delay: Delay before first execution (e.g.,
5s)
Step 6: Position the Action
Place the container action at the appropriate point in your experiment workflow:
- Pre-experiment: Setup or validation before chaos injection
- Mid-experiment: Operations or validation during chaos
- Post-experiment: Cleanup or final validation after chaos
- Between Phases: Transition logic between different experiment phases
Next Steps
- Learn about Delay Actions
- Learn about Custom Script Actions
- Explore experiment timeline view (see Experiments documentation)
- Create experiments with actions